There’s something magical about the sound of chicken sizzling in hot oil, the aroma filling my kitchen, and that first satisfying crunch when I bite into a perfectly fried piece. After years of experimenting, burning a few batches, and learning from countless mistakes, I’ve finally mastered what I consider the ultimate crispy fried chicken recipe.
Growing up, I watched my grandmother work her magic in the kitchen, but she never measured anything. Everything was “a pinch of this” and “a splash of that.” It took me years to decode her methods and create a recipe that delivers that same incredible taste and texture every single time. Today, I’m sharing everything I’ve learned about creating fried chicken that’s crispy on the outside, juicy on the inside, and absolutely irresistible.
Understanding the Science Behind Perfect Fried Chicken
Before diving into the recipe, I want to share what I’ve learned about why certain techniques work. The key to exceptional fried chicken lies in understanding moisture, temperature, and timing. When chicken hits hot oil, the surface moisture instantly turns to steam, creating that beautiful bubbling effect. This steam actually helps create the crispy coating we all crave.
Brining: The foundation of juicy fried chicken : Soaking chicken in a salt water solution breaks down tough proteins and allows the meat to retain moisture during cooking
Double coating: The secret to extra crispiness : Using both flour and a wet mixture creates multiple layers that fry up incredibly crispy
Temperature control: The difference between soggy and crispy : Maintaining oil temperature between 325-350°F ensures proper cooking without burning
Resting time: Why patience pays off : Allowing coated chicken to rest before frying helps the coating adhere better
My Essential Ingredients and Equipment
Over the years, I’ve discovered that quality ingredients make all the difference. Here’s what I always keep on hand for my fried chicken sessions:
Primary Ingredients
| Ingredient | Quantity | Purpose | Quality Tips |
|---|---|---|---|
| Whole chicken (cut up) | 3-4 lbs | Main protein | Choose fresh, never frozen for best texture |
| All-purpose flour | 3 cups | Base coating | Unbleached flour gives better color |
| Buttermilk | 2 cups | Tenderizing marinade | Full-fat for richness |
| Eggs | 2 large | Binding agent | Room temperature works best |
| Salt | 2 tablespoons | Flavor enhancement | Kosher salt preferred |
| Black pepper | 1 tablespoon | Heat and flavor | Freshly ground |
| Paprika | 2 teaspoons | Color and mild heat | Hungarian sweet paprika |
| Garlic powder | 1 teaspoon | Aromatic depth | Not garlic salt |
| Onion powder | 1 teaspoon | Savory complexity | Fresh ground if possible |
| Cayenne pepper | 1/2 teaspoon | Heat level | Adjust to taste |
Additional Seasonings
| Spice | Amount | Flavor Profile | Optional Substitutes |
|---|---|---|---|
| Dried thyme | 1 teaspoon | Earthy, herbal | Fresh thyme (2 tsp) |
| Dried oregano | 1/2 teaspoon | Mediterranean warmth | Italian seasoning |
| Smoked paprika | 1/2 teaspoon | Smoky depth | Regular paprika |
| White pepper | 1/4 teaspoon | Clean heat | More black pepper |
Equipment I Can’t Live Without
Heavy-bottomed pot or deep fryer: For consistent heat distribution Instant-read thermometer: Essential for monitoring oil temperature Wire cooling racks: Prevents soggy bottoms Paper towels: For initial draining Large mixing bowls: For brining and coating Tongs: Heat-resistant for safe handling
My Step-by-Step Method
Phase 1: Preparation and Brining
I start by cutting my whole chicken into 8 pieces: 2 breasts, 2 thighs, 2 drumsticks, and 2 wings. I’ve found that uniform sizing ensures even cooking, so I sometimes butterfly the larger breast pieces.
The brine is where the magic begins. I dissolve 1/4 cup of salt in 4 cups of cold water, then submerge the chicken pieces completely. This stays in my refrigerator for at least 4 hours, though I prefer overnight when I have the time. The salt solution not only seasons the meat throughout but also helps it retain moisture during the high-heat cooking process.
Phase 2: Creating the Perfect Coating
My coating system uses what I call the “three-stage method.” First, I combine my dry ingredients in a large bowl:
- 3 cups all-purpose flour
- 2 tablespoons salt
- 1 tablespoon black pepper
- 2 teaspoons paprika
- 1 teaspoon garlic powder
- 1 teaspoon onion powder
- 1 teaspoon dried thyme
- 1/2 teaspoon cayenne pepper
- 1/2 teaspoon oregano
- 1/2 teaspoon smoked paprika
- 1/4 teaspoon white pepper
In a separate bowl, I whisk together 2 cups of buttermilk with 2 beaten eggs. This mixture is crucial because the acid in buttermilk continues to tenderize the chicken while the eggs help the coating stick.
Phase 3: The Coating Process
I remove the chicken from the brine and pat each piece completely dry with paper towels. Excess moisture is the enemy of crispy coating, so I’m thorough with this step.
My coating process follows this sequence:
- Dredge each piece in the seasoned flour mixture
- Dip into the buttermilk-egg mixture
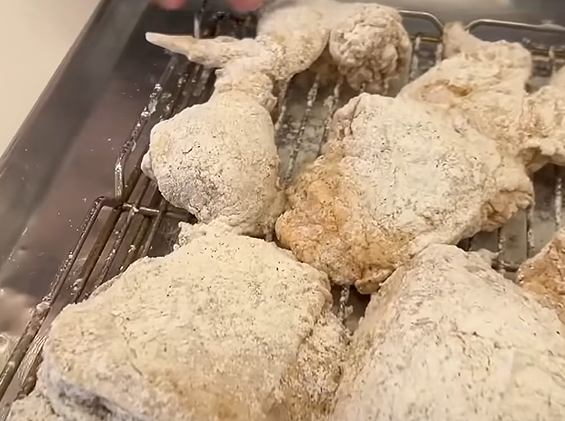
- Return to the flour mixture for a second coating
- Place on a wire rack and let rest for 15-20 minutes
This resting period is crucial. It allows the coating to set up properly and creates an even better crust when fried.
Phase 4: The Frying Process
I heat my oil to exactly 325°F. I’ve experimented with different temperatures, and this gives me the perfect balance of cooking the chicken through without burning the coating. I use a mixture of vegetable oil and lard when available, as the lard adds incredible flavor, but vegetable oil alone works perfectly fine.
My frying schedule prioritizes even cooking:
| Chicken Piece | Cooking Time | Internal Temperature |
|---|---|---|
| Drumsticks | 12-14 minutes | 165°F |
| Thighs | 14-16 minutes | 165°F |
| Wings | 8-10 minutes | 165°F |
| Breast pieces | 10-12 minutes | 165°F |
I start with the pieces that take longest (thighs and drumsticks) and add the quicker-cooking pieces as I go. This ensures everything finishes around the same time.
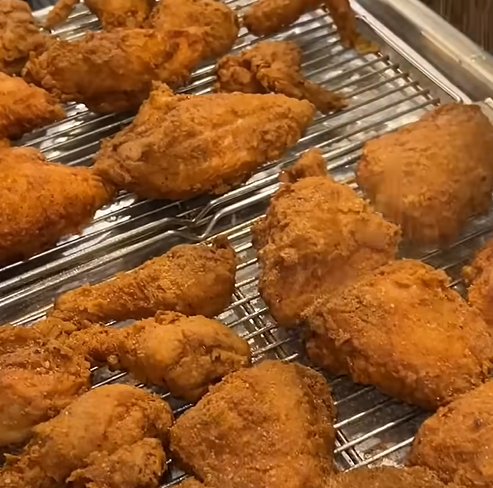
During frying, I maintain oil temperature between 325-350°F. When I add cold chicken, the temperature drops, so I adjust my heat accordingly. The chicken is done when it reaches an internal temperature of 165°F and the coating is deep golden brown.
Troubleshooting Common Issues
Through my years of making fried chicken, I’ve encountered every possible problem. Here are the solutions I’ve developed:
Soggy coating: Usually caused by oil temperature that’s too low or overcrowding the pot Burnt exterior, raw interior: Oil temperature too high; reduce heat and cook longer Coating falls off: Insufficient resting time after coating or wet chicken pieces Greasy chicken: Oil temperature too low or not draining properly after cooking Dry meat: Overcooking or skipping the brining step
Serving Suggestions and Pairings
My fried chicken shines with the right accompaniments. I love serving it with:
Classic Southern sides: Creamy coleslaw, mac and cheese, biscuits with honey Fresh vegetables: Garden salad, roasted corn on the cob, green beans Comfort foods: Mashed potatoes with gravy, cornbread, pickled vegetables International twists: Asian slaw, Mexican street corn, Mediterranean potato salad
For sauces, I keep it simple with hot sauce, honey, or a mixture of both. Sometimes I make a garlic aioli or serve it with homemade ranch dressing.
Storage and Reheating Tips
Leftover fried chicken (if there is any!) stores well in the refrigerator for up to 3 days. I wrap pieces individually in paper towels, then place them in an airtight container.
For reheating, I never use the microwave as it makes the coating soggy. Instead, I preheat my oven to 375°F and place the chicken on a wire rack over a baking sheet. This takes about 10-15 minutes and restores much of the original crispiness.
Nutritional Information
| Nutrient | Per Serving (1 piece) | % Daily Value |
|---|---|---|
| Calories | 285 | 14% |
| Protein | 24g | 48% |
| Total Fat | 18g | 23% |
| Saturated Fat | 5g | 25% |
| Cholesterol | 85mg | 28% |
| Sodium | 380mg | 17% |
| Carbohydrates | 8g | 3% |
| Fiber | 0.5g | 2% |
Values are approximate and based on a 4-oz piece of chicken with coating
Recipe Variations I Love
Over time, I’ve developed several variations that keep things interesting:
Spicy Nashville Style: I add 2 tablespoons of cayenne to my flour mixture and brush finished chicken with a hot oil and spice blend.
Herb-Crusted Version: I incorporate fresh herbs like rosemary, sage, and parsley into my coating mixture.
Buttermilk Ranch: I add a packet of ranch seasoning to my buttermilk mixture for extra flavor.
Korean-Inspired: I add gochugaru (Korean chili flakes) to my coating and serve with a gochujang glaze.
Questions and Answers
Q: Can I use chicken pieces other than a whole cut-up chicken? I absolutely recommend using whatever pieces you prefer! Drumsticks and thighs tend to stay juicier, while breasts cook faster. Just adjust your cooking times accordingly and always check internal temperature.
Q: What’s the best oil for frying chicken? I’ve had great success with peanut oil, vegetable oil, and canola oil. Peanut oil has a high smoke point and adds subtle flavor, but vegetable oil is more economical for large batches. Avoid olive oil as it has too low a smoke point.
Q: How do I know when the oil is ready without a thermometer? Drop a small piece of bread into the oil. If it browns in about 60 seconds, your oil is ready. You can also drop a small amount of batter – it should sizzle immediately and float to the surface.
Q: Can I prepare the chicken ahead of time? Yes! I often coat my chicken in the morning and let it rest in the refrigerator until dinner time. The longer rest actually improves the coating adhesion. Just bring it to room temperature for 20 minutes before frying.
Q: Why does my chicken sometimes stick to the bottom of the pot? This usually happens when the oil isn’t hot enough or when you move the chicken too soon after adding it. Let each piece cook undisturbed for the first 3-4 minutes to develop a proper crust.
Q: Can I make this recipe gluten-free? Absolutely! I substitute the all-purpose flour with a mixture of rice flour and cornstarch (2:1 ratio). The texture is slightly different but still deliciously crispy.
Q: How much oil do I need? I use enough oil so that the chicken pieces are about 2/3 submerged. For most home setups, this is about 6-8 cups of oil in a large, heavy pot.
Q: What’s the secret to getting restaurant-quality crispiness at home? The key is maintaining consistent oil temperature and not overcrowding. I fry in small batches and use a thermometer religiously. The double coating and resting time also make a huge difference.
Q: Can I freeze fried chicken? While it’s possible, I don’t recommend it as the coating loses its crispiness. If you must freeze it, wrap pieces individually and reheat in a 375°F oven for best results.
Q: How do I prevent oil splattering? Make sure your chicken is completely dry before coating, and gently lower pieces into the oil using tongs. Having a splatter screen helps too. Never drop chicken into oil from a height.
This recipe has become my signature dish, and I hope it brings as much joy to your kitchen as it has to mine. The key is practice and patience – don’t be discouraged if your first batch isn’t perfect. Each time you make it, you’ll learn something new and get closer to that ideal crispy, juicy fried chicken that makes everyone gather around the table.