Growing up in a household where the aroma of spiced curries filled every corner, I’ve always been drawn to the complex yet comforting flavors of Sri Lankan cuisine. Among the many dishes that hold a special place in my heart, green bean curry stands out as a perfect example of how simple vegetables can be transformed into something extraordinary through the magic of traditional spices and cooking techniques.
This authentic Sri Lankan green bean curry, known locally as “Bonchi Curry,” represents the essence of home-style Ceylon cooking. What makes this dish particularly special is its ability to balance the earthiness of fresh green beans with the warming embrace of roasted spices, creating a symphony of flavors that dance on your palate. I’ve spent years perfecting this recipe, drawing from family traditions and culinary experiences across different regions of Sri Lanka.
The beauty of this curry lies not just in its taste but in its versatility. Whether you’re serving it as part of a traditional rice and curry spread or enjoying it as a standalone dish with flatbread, this green bean curry delivers satisfaction in every spoonful. The combination of coconut milk, curry leaves, and aromatic spices creates a rich, creamy base that perfectly complements the tender crunch of properly cooked green beans.
Understanding Sri Lankan Green Bean Curry
Bonchi Curry: The Sinhala term for green bean curry, where “bonchi” refers to green beans and “curry” indicates the spiced preparation method traditional to Sri Lankan cuisine.
Tempered Spices (Tadka): A fundamental technique in Sri Lankan cooking where whole spices are heated in oil to release their essential oils and create aromatic flavor bases.
Curry Leaves: Fresh leaves from the curry tree (Murraya koenigii), essential for authentic Sri Lankan flavor and not to be confused with curry powder.
Coconut Milk Grades: Different concentrations of coconut milk used in various stages of cooking, from thick first-press milk to lighter second-press milk.
Roasted Curry Powder: Freshly ground spice blend that forms the backbone of Sri Lankan curries, typically including coriander, cumin, fennel, and fenugreek.
Essential Ingredients and Their Roles
Primary Ingredients
| Ingredient | Quantity | Purpose | Quality Notes |
|---|---|---|---|
| Fresh Green Beans | 1.5 lbs (680g) | Main vegetable base | Choose firm, bright green beans without brown spots |
| Thick Coconut Milk | 1 cup (240ml) | Creates rich, creamy texture | Use full-fat canned or fresh coconut milk |
| Thin Coconut Milk | 1.5 cups (360ml) | Cooking liquid base | Can dilute thick coconut milk with water |
| Large Onions | 2 medium | Aromatic foundation | Yellow onions work best for sweetness |
| Garlic Cloves | 6-8 cloves | Flavor enhancement | Fresh garlic only, minced finely |
| Fresh Ginger | 2-inch piece | Warmth and depth | Young ginger preferred for tender texture |
Spice Blend Components
| Spice | Quantity | Flavor Profile | Preparation Method |
|---|---|---|---|
| Sri Lankan Curry Powder | 3 tablespoons | Complex, warm, slightly sweet | Toast lightly before use |
| Turmeric Powder | 1 teaspoon | Earthy, slightly bitter | Mix with liquid to prevent clumping |
| Red Chili Powder | 1-2 teaspoons | Heat and color | Adjust according to preference |
| Roasted Curry Powder | 2 tablespoons | Deep, nutty flavor | Essential for authentic taste |
| Fenugreek Powder | 1/2 teaspoon | Slight bitterness, complexity | Use sparingly to avoid overpowering |
Tempering Ingredients
| Component | Quantity | Function | Timing |
|---|---|---|---|
| Coconut Oil | 3 tablespoons | Cooking medium, flavor | Heat until shimmering |
| Mustard Seeds | 1 teaspoon | Nutty pop, texture | First in hot oil |
| Curry Leaves | 15-20 leaves | Authentic aroma | Add after mustard seeds |
| Dried Red Chilies | 3-4 whole | Subtle heat, color | Remove seeds for less heat |
| Onion Slices | 1 large onion | Sweet base flavor | Cook until golden |
Step-by-Step Preparation Method
Phase 1: Ingredient Preparation
I always start by organizing all my ingredients, a practice that ensures smooth cooking flow. Begin by washing the green beans thoroughly under cold running water. Trim both ends and cut them into 2-inch diagonal pieces. This diagonal cut isn’t just aesthetic; it increases the surface area, allowing the beans to absorb more of the curry’s flavors while maintaining their structural integrity during cooking.
Prepare your aromatics by finely chopping the onions, mincing the garlic, and grating the ginger. I prefer using a microplane grater for the ginger as it creates a paste-like consistency that integrates beautifully into the curry base. Keep these aromatics separate as they’ll be added at different stages of the cooking process.
Phase 2: Creating the Spice Base
Heat your coconut oil in a heavy-bottomed pot over medium heat. The choice of cookware matters here; a thick-bottomed pot distributes heat evenly and prevents the delicate spices from burning. Once the oil reaches the right temperature—you’ll know it’s ready when a single mustard seed dropped in immediately sizzles and pops—begin the tempering process.
Add the mustard seeds first and listen for that characteristic popping sound. This usually takes about 30 seconds. The moment you hear the popping slow down, quickly add the curry leaves. Be prepared for some splattering; the leaves contain moisture that creates a dramatic sizzle when it hits the hot oil. This reaction is exactly what we want as it releases the curry leaves’ essential oils.
Follow immediately with the dried red chilies, being careful not to let them burn as they can turn bitter very quickly. The entire tempering process should take no more than 2 minutes, and the oil should be fragrant with the combined aromas of all the spices.
Phase 3: Building the Curry Base
Add the chopped onions to the tempered oil and cook them slowly until they achieve a beautiful golden-brown color. This process requires patience—rushing it by increasing the heat will result in unevenly cooked onions that can taste harsh. Properly caramelized onions should take about 8-10 minutes and will develop a sweet, complex flavor that forms the foundation of your curry.
Once the onions reach the perfect golden hue, create a well in the center of the pot and add the minced garlic and grated ginger. Cook these aromatics for about 1 minute until fragrant, then mix them with the onions. This technique prevents the garlic from burning while ensuring it cooks evenly.
Phase 4: Spice Integration
Now comes the critical step of adding the dry spices. Reduce the heat to low and add the curry powder, turmeric, chili powder, and roasted curry powder. Stir continuously for 30-45 seconds, just long enough to toast the spices and release their oils without burning them. The mixture should become very fragrant and slightly darker in color.
Immediately add a splash of the thin coconut milk to prevent the spices from burning and to create a paste-like consistency. This technique, known as “blooming” the spices, is essential for developing deep, complex flavors in the final dish.
Phase 5: Adding the Green Beans
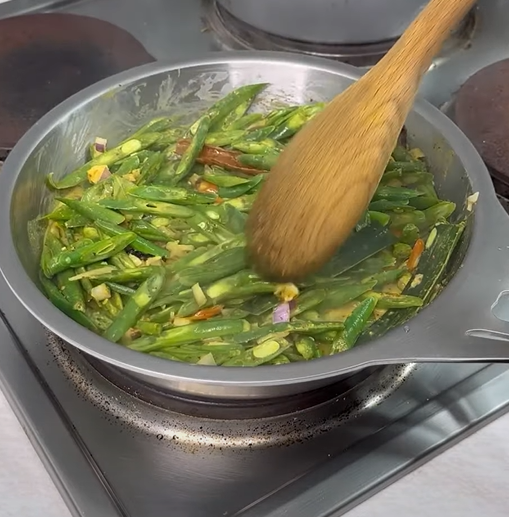
Add the prepared green beans to the pot and stir them thoroughly to coat with the spice mixture. Cook for 3-4 minutes, stirring occasionally, until the beans are well-coated and have started to soften slightly. This initial cooking helps the beans absorb the spice flavors before we add the liquid components.
Pour in the remaining thin coconut milk and bring the mixture to a gentle boil. Once boiling, reduce the heat to maintain a steady simmer. Cover the pot and cook for 15-20 minutes, stirring occasionally to prevent sticking and ensure even cooking.
Cooking Techniques and Temperature Control
Optimal Heat Management
| Cooking Phase | Heat Level | Duration | Visual Cues |
|---|---|---|---|
| Tempering | Medium | 2 minutes | Sizzling, aromatic oil |
| Onion Cooking | Medium-Low | 8-10 minutes | Golden brown color |
| Spice Toasting | Low | 30-45 seconds | Fragrant, slightly darkened |
| Bean Cooking | Medium | 15-20 minutes | Tender but not mushy |
| Final Simmering | Low | 5-10 minutes | Thick, creamy consistency |
Texture Development Stages
The perfect green bean curry should have beans that are tender yet retain a slight bite. Overcooking results in mushy beans that lose their appealing texture and nutritional value. I test for doneness by piercing a bean with a fork; it should offer minimal resistance while maintaining its shape.
During the final 5 minutes of cooking, add the thick coconut milk and stir gently. This late addition of thick coconut milk prevents it from curdling and ensures a rich, creamy finish. Season with salt to taste, keeping in mind that the coconut milk will slightly dilute the saltiness.
Nutritional Profile and Health Benefits
Nutritional Breakdown (Per Serving)
| Nutrient | Amount | % Daily Value | Health Benefits |
|---|---|---|---|
| Calories | 185 | 9% | Moderate energy content |
| Protein | 4.2g | 8% | Plant-based protein source |
| Dietary Fiber | 6.8g | 27% | Digestive health support |
| Vitamin C | 28mg | 31% | Immune system boost |
| Vitamin K | 45μg | 38% | Bone health support |
| Folate | 58μg | 15% | Cell division support |
| Manganese | 0.8mg | 35% | Antioxidant enzyme function |
| Potassium | 312mg | 9% | Heart health support |
Health Benefits Analysis
Green beans are nutritional powerhouses that bring numerous health benefits to this curry. They’re excellent sources of vitamins C and K, providing significant portions of daily requirements in each serving. The fiber content supports digestive health and helps maintain stable blood sugar levels, making this curry suitable for those managing diabetes.
The spices used in this curry aren’t just flavor enhancers; they’re functional foods with documented health benefits. Turmeric contains curcumin, a powerful anti-inflammatory compound that may help reduce chronic inflammation. Curry leaves are rich in antioxidants and have been traditionally used to support digestive health and blood sugar regulation.
Coconut milk, while higher in saturated fats, provides medium-chain triglycerides (MCTs) that are easily metabolized by the body for quick energy. When consumed as part of a balanced diet, the fats in coconut milk can contribute to satiety and nutrient absorption.
Regional Variations and Adaptations
Northern Sri Lankan Style
In the northern regions of Sri Lanka, this curry often includes additional vegetables like carrots or potatoes, creating a more substantial dish. The spice level tends to be higher, reflecting the Tamil influence in the region’s cuisine. Some cooks add a touch of tamarind paste for extra tanginess.
Southern Coastal Variation
Along Sri Lanka’s southern coast, where coconut palms are abundant, cooks often use freshly grated coconut milk and add a higher proportion of curry leaves. The coastal version sometimes includes a small amount of Maldive fish (dried tuna flakes) for umami depth, though this can be omitted for vegetarian versions.
Hill Country Adaptation
In the cooler hill country, this curry is often made with locally grown snake beans (long beans) instead of regular green beans. The cooking time is adjusted accordingly, and additional warming spices like cinnamon and cardamom might be included to suit the cooler climate.
Serving Suggestions and Pairings
Traditional Sri Lankan Meal Context
This green bean curry shines brightest when served as part of a traditional Sri Lankan rice and curry meal. I recommend serving it alongside:
- Steamed jasmine rice or red rice
- Dhal curry (lentil curry) for protein balance
- Mallum (shredded vegetable salad with coconut)
- Papadum (crispy lentil wafers)
- Pol sambol (coconut relish with chilies)
Modern Serving Ideas
For contemporary presentations, this curry works beautifully with:
- Quinoa or brown rice for added nutrition
- Naan bread or roti for scooping
- As a side dish with grilled fish or chicken
- Over cauliflower rice for low-carb options
- With fresh herbs like cilantro for color contrast
Accompaniment Suggestions
| Starch Base | Flavor Profile | Preparation Notes |
|---|---|---|
| Basmati Rice | Neutral, aromatic | Cook with pandan leaf for extra fragrance |
| Red Rice | Nutty, chewy | Traditional Sri Lankan choice |
| Coconut Rice | Rich, complementary | Infuse rice with coconut milk |
| Roti/Chapati | Neutral, absorbent | Warm before serving |
| String Hoppers | Delicate, traditional | Steam fresh for best texture |
Storage and Reheating Guidelines
Proper Storage Methods
This curry actually improves in flavor after resting, as the spices have time to meld and develop deeper complexity. Store leftover curry in airtight containers in the refrigerator for up to 4 days. The coconut milk may separate slightly during storage, but this is normal and will reintegrate when reheated.
For longer storage, this curry freezes well for up to 3 months. I recommend freezing in portion-sized containers for convenient individual servings. When freezing, leave some headspace in containers as the liquid will expand.
Reheating Best Practices
When reheating refrigerated curry, do so gently over low heat, stirring occasionally to prevent sticking. Add a splash of coconut milk or water if the curry has thickened too much during storage. For frozen curry, thaw overnight in the refrigerator before reheating.
Microwave reheating is possible but should be done in short intervals with stirring to ensure even heating and prevent hot spots that could affect the texture of the green beans.
Troubleshooting Common Issues
Preventing Coconut Milk Curdling
One of the most common problems when making coconut milk curries is curdling, which creates an unappetizing appearance and texture. To prevent this, always add coconut milk when the curry base isn’t at a rolling boil, and stir gently rather than vigorously. If your curry does curdle, try whisking in a small amount of cold coconut milk off the heat.
Achieving Perfect Bean Texture
Overcooked green beans become mushy and lose their appealing texture. Test for doneness frequently during the last 5 minutes of cooking. The beans should be tender enough to pierce easily with a fork but still maintain some firmness. If your beans are cooking too quickly, reduce the heat and add a bit more liquid.
Balancing Flavors
If your curry turns out too spicy, add more coconut milk or a small amount of sugar to balance the heat. If it’s too mild, create a small tempering with additional chili powder and curry leaves, then stir it into the curry. For insufficient salt, remember that coconut milk can mask saltiness, so taste and adjust accordingly.
Questions and Answers
Q: Can I use frozen green beans instead of fresh ones?
Yes, frozen green beans can be used, but they’ll require less cooking time since they’re partially blanched before freezing. Add them directly to the curry without thawing and reduce the cooking time by about 5 minutes. Keep in mind that frozen beans may have a slightly different texture than fresh ones.
Q: What can I substitute for curry leaves if I can’t find them?
While curry leaves are irreplaceable for authentic flavor, you can try using bay leaves (use half the quantity) or a small amount of lime zest. However, I strongly recommend seeking out curry leaves from Indian or Sri Lankan grocery stores, as they’re essential for the authentic taste profile.
Q: How can I make this curry less spicy for children?
Reduce the chili powder by half and remove the seeds from the dried red chilies used in tempering. You can also increase the amount of coconut milk to dilute the heat. Adding a small amount of palm sugar or regular sugar can also help balance the spiciness.
Q: Can I prepare this curry ahead of time for meal prep?
Absolutely! This curry is perfect for meal prep as the flavors develop and improve over time. Prepare it 1-2 days ahead and store it in the refrigerator. The beans will continue to absorb the flavors, making it even more delicious when reheated.
Q: What’s the difference between Sri Lankan curry powder and regular curry powder?
Sri Lankan curry powder typically contains roasted coriander, cumin, fennel seeds, fenugreek, and sometimes cinnamon, creating a sweeter, more complex flavor than Indian curry powders. It’s usually darker due to the roasting process and has a more prominent fennel flavor.
Q: Can I make this curry vegan?
This recipe is naturally vegan as written, using coconut milk as the creamy base instead of dairy products. Just ensure that any curry powder you use doesn’t contain any animal-derived ingredients, though traditional Sri Lankan curry powders are typically plant-based.
Q: Why do my green beans turn brown during cooking?
Brown discoloration usually occurs from overcooking or cooking at too high a temperature. Maintain medium to medium-low heat throughout the cooking process and avoid overcooking the beans. Adding a pinch of baking soda can help maintain the green color, but use it sparingly.
Q: Can I add other vegetables to this curry?
Certainly! Carrots, potatoes, bell peppers, or eggplant work well in combination with green beans. Add harder vegetables like potatoes earlier in the cooking process, while softer vegetables like bell peppers should be added during the last 10 minutes of cooking.
This Sri Lankan green bean curry represents more than just a recipe; it’s a connection to centuries of culinary tradition and the warm hospitality that defines Sri Lankan culture. Each time I prepare this dish, I’m reminded of the power of simple ingredients transformed through traditional techniques and genuine care. The combination of fresh green beans, aromatic spices, and creamy coconut milk creates a harmony that speaks to both comfort and sophistication.
Whether you’re new to Sri Lankan cuisine or looking to expand your curry repertoire, this green bean curry offers an accessible entry point into a rich culinary tradition. The techniques you’ll learn here—proper tempering, spice blooming, and coconut milk handling—will serve you well in exploring other Sri Lankan dishes.
I encourage you to make this recipe your own by adjusting spice levels to your preference and experimenting with seasonal vegetables. Remember that cooking is as much about the journey as the destination, and each time you prepare this curry, you’ll discover new nuances in flavor and technique. The aromatic steam rising from your pot, the vibrant colors of the finished dish, and the satisfied smiles around your table will remind you why traditional recipes like this one have endured through generations.