Have you ever sipped on a delicious bubble tea and wondered if you could recreate those chewy, bouncy tapioca pearls at home? Well, I certainly did, and after many attempts (including some spectacular failures), I’ve perfected the art of making tapioca pearls from scratch. Making your own boba isn’t just economical—it’s incredibly satisfying and allows you to customize the flavor and texture exactly how you like it.
In this comprehensive guide, I’ll walk you through everything you need to know about creating restaurant-quality tapioca pearls in your kitchen. From selecting the right ingredients to troubleshooting common problems, you’ll be a boba master in no time!
What Are Tapioca Pearls?
Before diving into the recipe, let’s understand what we’re making. Tapioca pearls, commonly known as boba, are the chewy, ball-shaped treats that sit at the bottom of bubble tea. These pearls are made primarily from tapioca starch, which comes from the cassava root—a starchy tuber native to South America but now cultivated throughout tropical regions worldwide.
Traditional tapioca pearls have a mild, subtle sweetness and a uniquely chewy texture that’s often described as “QQ” in Taiwan—a term that refers to something that’s bouncy and pleasantly chewy.
Ingredients Breakdown
Making tapioca pearls requires surprisingly few ingredients, but understanding each one is crucial for success:
| Ingredient | Amount | Purpose | Notes |
|---|---|---|---|
| Tapioca starch | 1 cup (120g) | Main ingredient | Use food-grade tapioca starch, not tapioca flour (they’re different) |
| Black food coloring (optional) | 1/4 tsp | Gives the classic black boba look | Natural alternatives include activated charcoal powder |
| Brown sugar | 3 tbsp (45g) | Adds sweetness and color | Dark brown sugar works best for authentic flavor |
| Water | 6 tbsp (90ml) | Forms the dough | The exact amount may vary based on humidity |
| Additional boiling water | 8 cups | For cooking the pearls | Use plenty of water for best results |
| Brown sugar syrup | 1 cup | For soaking and flavoring | 1:1 ratio of brown sugar to water |
Equipment You’ll Need
- Large mixing bowl
- Measuring cups and spoons
- Small saucepan for boiling water
- Slotted spoon
- Clean work surface for rolling
- Knife or dough scraper
- Sifter or fine-mesh strainer
- Storage container with lid
Step-by-Step Preparation
Preparing the Dough
- Boil water with brown sugar: In a small saucepan, bring 6 tablespoons of water and 3 tablespoons of brown sugar to a boil. Stir until sugar dissolves completely.
- Prepare your workspace: While waiting for the water to boil, place 1 cup of tapioca starch in a large mixing bowl. If using food coloring, add it to the starch and mix thoroughly.
- Create the dough: Pour the boiling sugar water into the tapioca starch. Start by pouring about 3/4 of the liquid, then mix with a spoon. The mixture will initially look like crumbs. Add the remaining liquid gradually until a dough forms.
- Test the consistency: The dough should be pliable but not sticky. If it’s too dry, add a small amount of hot water (1 teaspoon at a time). If it’s too wet, add more tapioca starch (1 tablespoon at a time).
Shaping the Pearls
Rolling the pearls is perhaps the most time-consuming part, but don’t worry—there are techniques to make this process faster:
- Divide and roll: Take the dough and divide it into 4-6 portions. Roll each portion into a long, thin rope about 1/4-inch (0.6 cm) in diameter.
- Cut into pieces: Using a knife or dough scraper, cut the ropes into small, equal-sized pieces.
- Shape into balls: Roll each piece between your palms to form small, round balls. Aim for uniformity in size—about 1/4 inch in diameter is ideal.
- Prevent sticking: As you shape the pearls, dust them lightly with additional tapioca starch to prevent sticking. Place the finished pearls on a plate or tray, making sure they don’t touch each other.
Quick tip: For a faster method, try the “group rolling” technique. Take a portion of the dough and roll it into a thin snake-like rope on your work surface. Cut the rope into small pieces, then place several pieces in your palms and gently roll them together to form multiple balls at once.
Cooking the Tapioca Pearls
Cooking is where many boba attempts fail, but follow these precise steps for perfect results:
- Bring water to a rolling boil: Fill a large pot with about 8 cups of water. The water should be at a full, rolling boil before adding the pearls.
- Add the pearls: Gently add the tapioca pearls to the boiling water. Stir immediately but gently to prevent sticking.
- Cook until floating: Continue to boil the pearls until they float to the surface, which typically takes about 5-7 minutes.
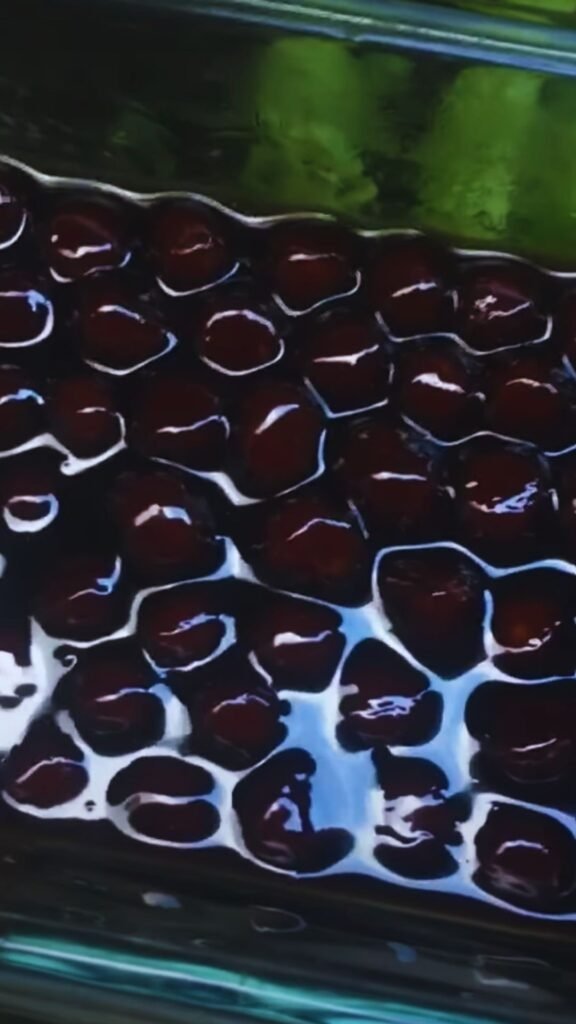
- Cover and simmer: Once floating, reduce heat to medium-low, cover the pot, and simmer for another 15-20 minutes. The pearls should turn completely translucent with only a small white dot in the center.
- Rest with heat off: Turn off the heat but keep the pot covered. Let the pearls sit for an additional 15-20 minutes. This resting period is crucial for achieving that perfect chewy texture.
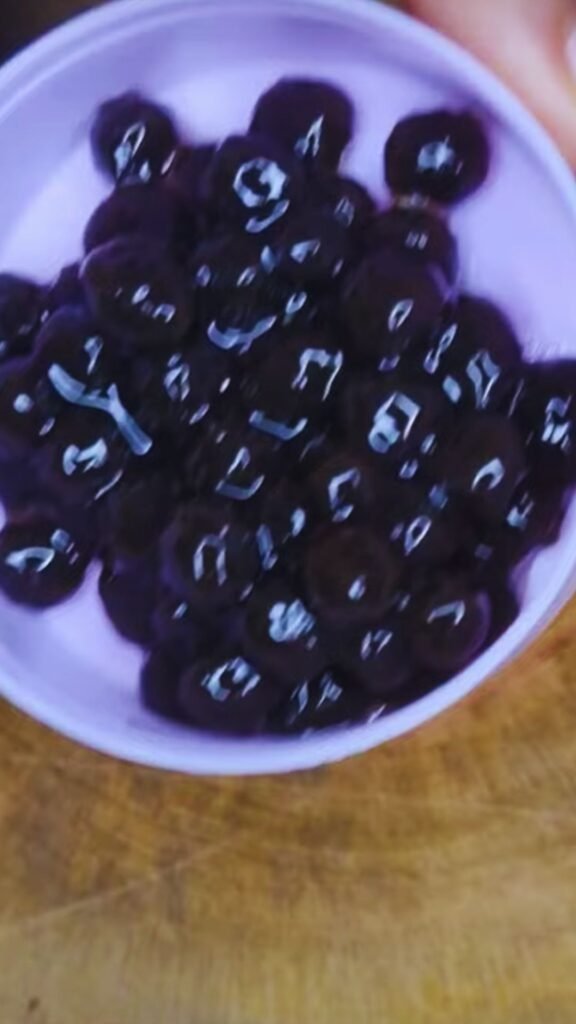
- Drain and rinse: Using a slotted spoon, transfer the cooked pearls to a bowl of cold water. Rinse them briefly to remove excess starch and prevent sticking.
Sugar Syrup Soaking
The final step that separates good boba from great boba is soaking them in a sweet syrup:
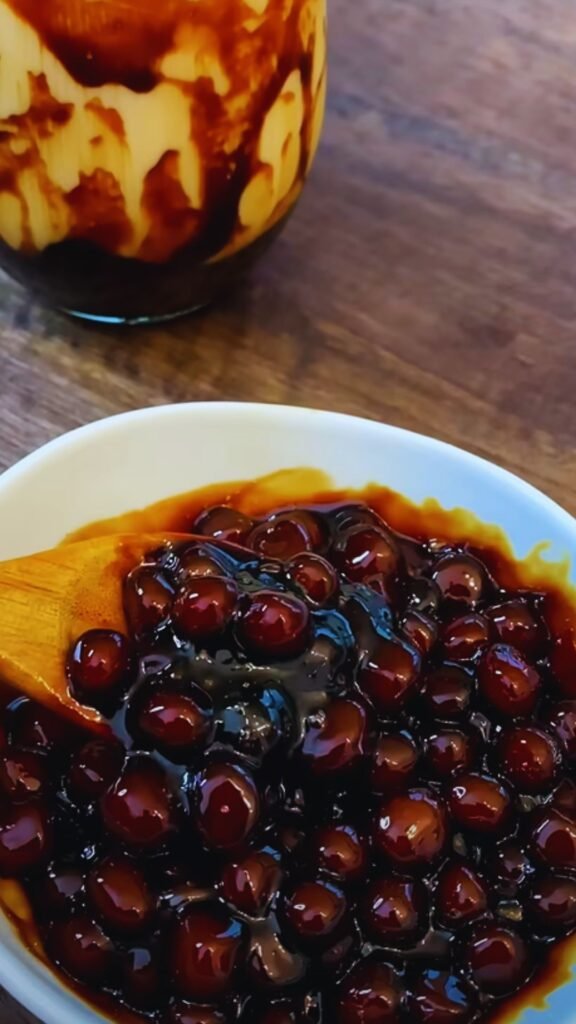
- Make brown sugar syrup: In a saucepan, combine 1 cup of brown sugar with 1 cup of water. Bring to a simmer and stir until sugar dissolves completely. Let cool slightly.
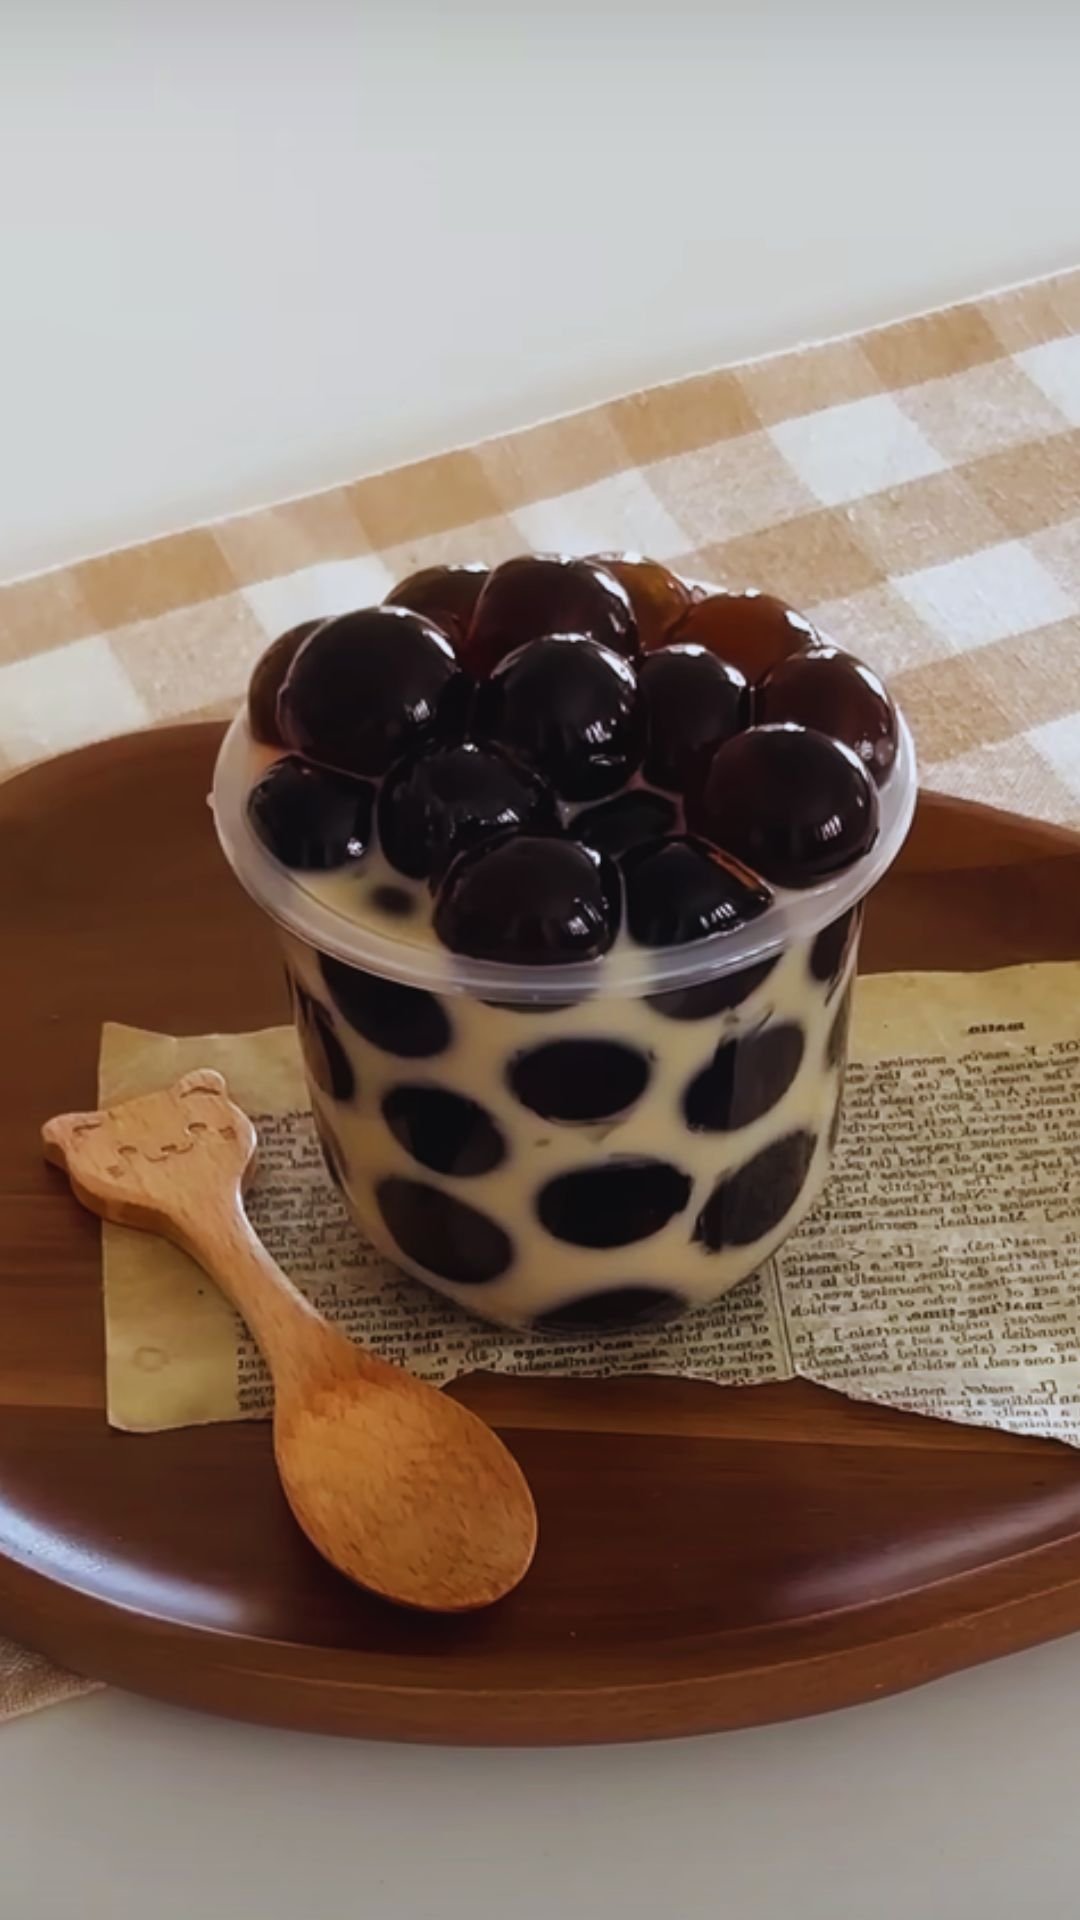
- Soak the pearls: Transfer the drained pearls to the sugar syrup. The syrup should completely cover the pearls. Let them soak for at least 30 minutes before using, though longer is better (up to several hours).
The sugar syrup not only adds sweetness but also helps preserve the soft, chewy texture of the pearls for longer.
Detailed Texture Analysis
Understanding the science behind tapioca pearl texture can help you troubleshoot and perfect your technique:
| Stage | Texture | Appearance | Common Issues |
|---|---|---|---|
| Raw dough | Pliable, slightly elastic | Opaque, solid color | Too crumbly or too sticky |
| Partially cooked | Firm outside, doughy inside | Translucent edges, opaque center | Floating too quickly or not at all |
| Properly cooked | Chewy throughout, “bouncy” | Fully translucent with tiny white center | Hard centers or mushy exterior |
| Overcooked | Mushy, falls apart easily | Fully translucent, may appear bloated | Disintegrates in drink |
| After cooling | Firmer exterior, chewy interior | No change in appearance | Can become too hard if not stored in syrup |
| In sugar syrup | Soft, chewy, sweet | Glossy appearance | May become too soft if soaked too long |
Flavor Variations
While traditional black tapioca pearls have a mild, sweet taste, you can experiment with various flavors:
- Honey pearls: Replace brown sugar with honey in both the dough and soaking syrup
- Brown sugar boba: Use dark muscovado sugar for a deeper molasses flavor
- Matcha pearls: Add 1-2 teaspoons of matcha powder to the tapioca starch
- Fruit-infused: Add fruit puree or extract to the soaking syrup
- Coconut: Use coconut sugar and coconut water in place of brown sugar and regular water
Storage and Shelf Life
Properly stored homemade tapioca pearls can last several days. Here’s how to keep them fresh:
- Always store in syrup: Never store cooked pearls without their sugar syrup, as they’ll harden quickly.
- Refrigerate promptly: Transfer cooled pearls and syrup to an airtight container and refrigerate for up to 4-5 days.
- Reheat before using: Cold pearls will be firmer. To restore their soft texture, either let them come to room temperature or briefly microwave with some syrup (15-20 seconds).
- Freezing option: For longer storage, you can freeze the uncooked, shaped pearls. Spread them on a baking sheet so they don’t touch, freeze until solid, then transfer to a freezer bag. They’ll keep for up to 3 months. Cook directly from frozen, adding a few extra minutes to the cooking time.
Troubleshooting Common Issues
Even experienced boba makers encounter problems sometimes. Here’s how to solve the most common issues:
Dough Problems
- Too crumbly? The water wasn’t hot enough or you need more liquid. Add more hot water 1 teaspoon at a time.
- Too sticky? You’ve added too much water. Incorporate more tapioca starch gradually.
- Dough drying out while working? Keep a damp cloth over the portions you’re not actively working with.
Cooking Problems
- Pearls sticking together? Stir gently but immediately after adding to boiling water.
- Pearls disintegrating? Your water isn’t hot enough or the dough was too wet.
- Hard centers? You didn’t cook them long enough or the resting period was too short.
- Too mushy? You overcooked them. Reduce cooking time next time.
Texture Problems
- Pearls hardened quickly? They must be stored in sugar syrup at all times.
- Not chewy enough? Try using half tapioca starch and half glutinous rice flour for extra chewiness.
- Too dense? Make sure you’re not compressing the dough too much when rolling the balls.
Serving Suggestions
Now that you’ve mastered making tapioca pearls, here are some delicious ways to enjoy them:
- Classic milk tea: Brew strong black tea, add milk and sugar to taste, then add your homemade pearls
- Fresh fruit tea: Combine fresh fruit puree with jasmine or green tea and boba
- Matcha latte boba: Mix matcha powder with milk and sweetener, then add pearls
- Coffee boba: Add pearls to iced coffee with sweetened condensed milk
- Smoothie boba: Blend your favorite fruits with yogurt and top with pearls
- Dessert topping: Use as a topping for ice cream, shaved ice, or puddings
For an extra special presentation, serve your boba drinks in clear glasses with extra-wide straws to showcase your beautiful homemade pearls.
Nutritional Information
Homemade tapioca pearls have several advantages over store-bought versions, including control over ingredients and freshness. Here’s a nutritional breakdown (approximate values per 1/4 cup serving):
| Nutrient | Amount | % Daily Value* |
|---|---|---|
| Calories | 120-150 | – |
| Carbohydrates | 30-35g | 10-12% |
| Sugars | 10-15g | 20-30% |
| Protein | <1g | <2% |
| Fat | 0g | 0% |
| Sodium | 0-5mg | <1% |
| Potassium | 10-15mg | <1% |
| Calcium | 15-20mg | 1-2% |
| Iron | 0.2-0.5mg | 1-3% |
*Based on a 2,000 calorie diet
It’s worth noting that tapioca pearls are primarily a carbohydrate source with minimal nutritional value. They’re best enjoyed as an occasional treat rather than a dietary staple.
Questions & Answers
Can I make tapioca pearls without using brown sugar? Yes, you can substitute white sugar, honey, or even natural sweeteners like maple syrup. However, brown sugar provides both sweetness and the characteristic color that most people associate with boba pearls.
Why did my tapioca pearls turn hard after cooking? Tapioca pearls will naturally harden when they cool unless they’re stored in a sugar syrup. This is due to the starch molecules realigning as they cool. Always keep your finished pearls in sugar syrup until ready to use.
Can I use other types of starch instead of tapioca starch? Tapioca starch has unique properties that give boba its characteristic chewiness. While you can experiment with partial substitutions (like 20% glutinous rice flour for extra chewiness), 100% substitution will significantly alter the texture and may not work at all.
How long should I soak the pearls in sugar syrup? A minimum of 30 minutes is recommended, but soaking for 2-3 hours or even overnight in the refrigerator will result in more flavorful pearls. Just be aware that extended soaking (24+ hours) may eventually cause the pearls to become too soft.
Why are my cooked pearls still white in the center? A tiny white dot in the center is normal and indicates proper cooking. If the white area is larger, your pearls need more cooking time. The translucent outer layer indicates gelatinization of the starch, which gradually moves from the outside to the center during cooking.
Is it normal for the tapioca pearl dough to feel different from regular bread dough? Absolutely! Tapioca dough behaves quite differently from wheat flour dough. It should feel somewhat similar to play-dough—pliable but not elastic or stretchy. It also tends to dry out more quickly, so work efficiently.
Can I color my tapioca pearls with natural ingredients instead of food coloring? Yes! For black or dark pearls, activated charcoal powder works well. For other colors, try butterfly pea flower powder (blue), beetroot powder (pink/red), matcha (green), or turmeric (yellow). Add these to the dry tapioca starch before mixing with the hot liquid.
How do I know when the pearls are done cooking? Properly cooked pearls should be almost completely translucent with possibly a tiny white dot in the center. They should float to the surface and have a chewy texture without any hard or overly dense parts when bitten into.
Final Thoughts
Making your own tapioca pearls at home might seem daunting at first, but with practice, you’ll find it’s an enjoyable process that yields results far superior to store-bought options. The satisfaction of sipping bubble tea with pearls you’ve crafted from scratch is unmatched!
Remember that perfecting your technique may take a few attempts—don’t be discouraged if your first batch isn’t perfect. Each time you make them, you’ll develop a better feel for the dough consistency and cooking times that work best in your kitchen.
Whether you’re a bubble tea enthusiast looking to save money or simply enjoy the process of creating things from scratch, homemade tapioca pearls are a rewarding culinary project that’s sure to impress friends and family.
Happy boba making!