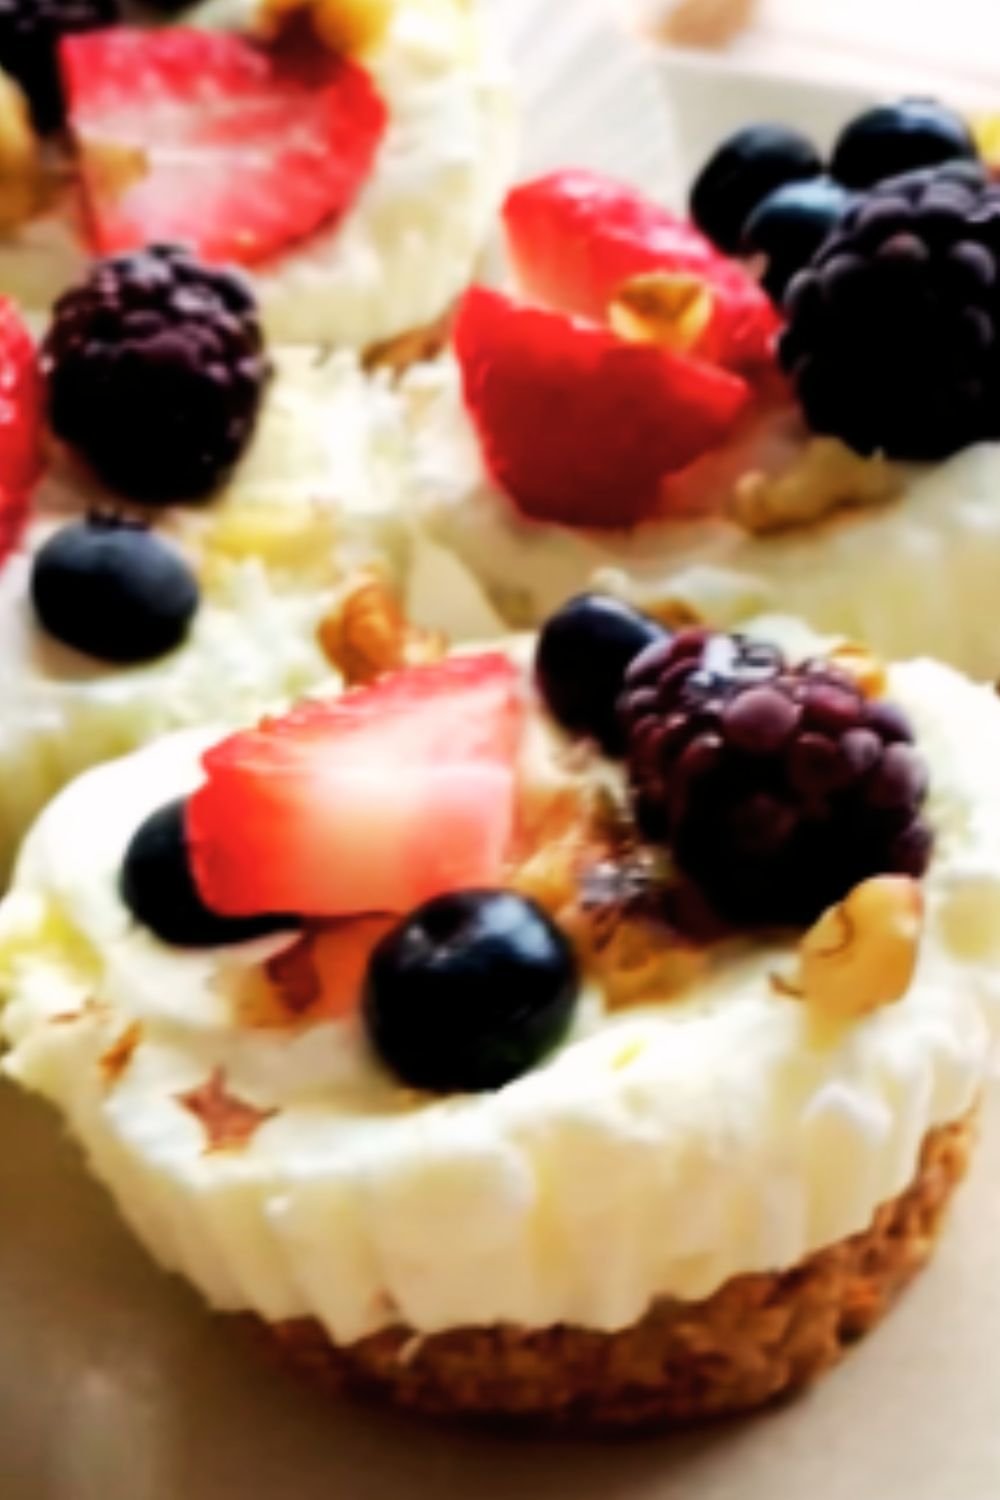
There’s something magical about a recipe that can double as both a wholesome breakfast and a guilt-free dessert. As someone who’s constantly juggling a busy schedule, I’ve fallen head over heels for these Frozen Yogurt Granola Cups. They’ve become my secret weapon for those hectic mornings when I need something nutritious that I can grab and go, or for those evenings when I’m craving something sweet but don’t want to indulge in a calorie-laden dessert.
These delightful little cups combine the satisfying crunch of granola with the creamy goodness of yogurt, all topped with vibrant fresh fruits. The best part? You can make a batch on Sunday, and they’ll keep in your freezer all week long, ready whenever hunger strikes. Let me walk you through how to create these versatile treats that will revolutionize your meal prep routine.
Why You’ll Love These Frozen Yogurt Granola Cups
Before diving into the recipe, let me share why these frozen yogurt cups have become a staple in my kitchen:
- Nutrient-packed: They combine protein-rich yogurt, fiber-filled granola, and vitamin-loaded fruits in one convenient package.
- Customizable: You can easily adapt the recipe based on dietary preferences, seasonal fruits, or what you have on hand.
- Perfect for meal prep: Make them once, enjoy them all week long.
- Kid-friendly: Little ones love the fun presentation and sweet-but-healthy profile.
- Portable: Ideal for on-the-go breakfasts or snacks.
- Portion-controlled: Each cup provides a satisfying serving without the risk of overindulging.
Ingredients You’ll Need
For the granola base:
- 2 cups old-fashioned rolled oats
- ½ cup chopped nuts (I prefer a mix of almonds and walnuts)
- 3 tablespoons coconut oil, melted
- 3 tablespoons honey or maple syrup
- 1 teaspoon vanilla extract
- ½ teaspoon ground cinnamon
- Pinch of salt
For the yogurt filling:
- 3 cups Greek yogurt (plain or vanilla)
- 2-3 tablespoons honey or maple syrup (adjust to taste)
- 1 teaspoon vanilla extract (omit if using vanilla yogurt)
For the toppings:
- 2 cups mixed fresh berries (strawberries, blueberries, raspberries)
- ½ cup granola (reserved from base or store-bought)
- Optional additions: sliced bananas, diced mango, kiwi, or peaches
- Optional garnishes: mint leaves, a drizzle of honey, or a sprinkle of chia seeds
Essential Equipment
- Muffin tin (12-cup standard size)
- Cupcake liners (paper or silicone)
- Measuring cups and spoons
- Mixing bowls
- Baking sheet
- Parchment paper
- Spatula
- Storage container for freezing

Preparation Method
Step 1: Create the Granola Base
- Preheat your oven to 325°F (165°C) and line a baking sheet with parchment paper.
- In a large bowl, combine the oats and chopped nuts.
- In a separate small bowl, whisk together the melted coconut oil, honey or maple syrup, vanilla extract, cinnamon, and salt.
- Pour the wet ingredients over the oat mixture and stir until everything is well coated.
- Spread the mixture evenly on the prepared baking sheet.
- Bake for 20-25 minutes, stirring halfway through, until the granola is golden brown and fragrant.
- Allow the granola to cool completely. It will crisp up as it cools.
- Reserve about ½ cup of the granola for topping, if desired.
Step 2: Prepare the Muffin Tin
- Line a 12-cup muffin tin with paper or silicone liners. If using paper liners, a light spray of cooking oil will help prevent sticking.
- Take about 2 tablespoons of the cooled granola mixture and press it firmly into the bottom of each liner, creating a thin, compact layer.
- Place the muffin tin in the refrigerator for about 15 minutes to allow the granola base to set.
Step 3: Mix the Yogurt Filling
- In a medium bowl, combine the Greek yogurt, honey or maple syrup, and vanilla extract (if using). Stir until smooth and well combined.
- If you’d like to create different flavored cups, divide the yogurt into separate bowls and mix in additional flavorings such as:
- 1-2 tablespoons of cocoa powder for chocolate yogurt
- 1-2 tablespoons of fruit preserves for fruit-flavored yogurt
- ½ teaspoon of ground cinnamon or pumpkin pie spice for spiced yogurt
Step 4: Assemble the Cups
- Remove the muffin tin from the refrigerator.
- Spoon the yogurt mixture over each granola base, filling each cup almost to the top.
- Smooth the tops with the back of a spoon.
- Add your chosen toppings: berries, sliced fruits, reserved granola, or any other additions you’d like.
- Gently press the toppings slightly into the yogurt to ensure they stick.

Step 5: Freeze
- Carefully place the filled muffin tin in the freezer.
- Freeze for at least 4 hours, or preferably overnight, until the yogurt is completely solid.
- Once frozen, remove the cups from the muffin tin and transfer them to an airtight container or ziplock bag.
- Store in the freezer for up to 1 month.
Tips for Perfect Frozen Yogurt Granola Cups
- Greek yogurt works best: Its thicker consistency freezes more nicely than regular yogurt and provides more protein.
- Don’t skimp on the honey/maple syrup: The sweetener not only adds flavor but also helps prevent the yogurt from freezing too hard.
- Be mindful of moisture: Pat berries dry before adding them as toppings to prevent ice crystals from forming.
- Allow some thaw time: For the best texture and flavor, remove the cups from the freezer about 5-10 minutes before enjoying.
- Layer strategically: If mixing fruits into the yogurt rather than just topping, add them in layers to distribute evenly.
- Consider your liners: Silicone muffin liners make for easier removal, but paper liners work well too.
Nutritional Benefits
These frozen yogurt granola cups aren’t just delicious; they’re also packed with nutrition. Here’s a breakdown of what makes them so good for you:
| Component | Key Nutrients | Benefits |
|---|---|---|
| Greek Yogurt | Protein, calcium, probiotics | Supports muscle growth, bone health, and gut health |
| Oats | Fiber, B vitamins, magnesium | Promotes heart health, sustained energy, digestive health |
| Nuts | Healthy fats, protein, vitamin E | Brain health, satiety, antioxidant protection |
| Berries | Vitamins C & K, antioxidants | Immune support, anti-inflammatory properties |
| Honey/Maple Syrup | Natural enzymes, antioxidants | Provides natural sweetness with benefits beyond refined sugar |
| Cinnamon | Antioxidants, anti-inflammatory compounds | May help regulate blood sugar and reduce inflammation |
Variations to Try
One of the reasons I love this recipe so much is how versatile it is. Here are some delicious variations to keep things interesting:
Tropical Paradise
- Base: Add ¼ cup shredded coconut to the granola
- Yogurt: Mix in ¼ teaspoon coconut extract
- Toppings: Diced mango, pineapple, and a sprinkle of toasted coconut
Berry Bliss
- Base: Standard granola base
- Yogurt: Swirl in 2 tablespoons of berry preserves
- Toppings: Mixed berries and a few white chocolate chips
Apple Pie
- Base: Add extra cinnamon to the granola
- Yogurt: Mix in ¼ teaspoon apple pie spice
- Toppings: Sautéed cinnamon apples and a sprinkle of granola
Chocolate Peanut Butter
- Base: Add 2 tablespoons cocoa powder to the granola
- Yogurt: Swirl in 2 tablespoons natural peanut butter
- Toppings: Banana slices and a few dark chocolate chips
Lemon Berry
- Base: Standard granola base
- Yogurt: Mix in 1 teaspoon lemon zest and 1 tablespoon lemon juice
- Toppings: Blueberries and a sprinkle of poppy seeds
Special Dietary Adaptations
These frozen yogurt granola cups can be easily modified to suit various dietary needs:
Gluten-Free: Use certified gluten-free oats and ensure all other ingredients are gluten-free.
Vegan: Replace Greek yogurt with plant-based yogurt (coconut or almond work well), use maple syrup instead of honey, and choose plant-based mix-ins.
Nut-Free: Substitute seeds (like sunflower or pumpkin) for the nuts in the granola base.
Lower Sugar: Reduce the honey/maple syrup and use plain yogurt with stevia or monk fruit sweetener. Choose berries over higher-sugar fruits.
Dairy-Free: Use coconut yogurt or another plant-based alternative in place of the Greek yogurt.

Serving Suggestions
While these frozen yogurt granola cups are perfect on their own, here are some ways to elevate them for different occasions:
For Breakfast:
- Pair with a small smoothie for a more substantial morning meal
- Serve alongside scrambled eggs for a balanced breakfast
- Add a side of fresh fruit for extra nutrients
For Snack Time:
- Enjoy with a handful of nuts for added protein
- Serve with herbal tea for an afternoon pick-me-up
- Pack in a lunch box with an ice pack for a mid-day treat
For Dessert:
- Drizzle with a small amount of melted dark chocolate
- Add a dollop of nut butter on top
- Sprinkle with a few mini chocolate chips or cacao nibs
For Entertaining:
- Set up a “yogurt cup bar” with various toppings for guests to customize
- Arrange on a platter with fresh fruits for a beautiful presentation
- Serve in mini cups for an elegant dessert option
Storage and Make-Ahead Tips
These frozen yogurt granola cups are the ultimate make-ahead treat, but proper storage is key to maintaining their quality:
- Short-term storage: Keep them in the freezer for up to 1 month.
- Preventing freezer burn: Once completely frozen, transfer the cups to an airtight container or wrap individually in plastic wrap.
- Batch preparation: You can double or triple the recipe and freeze in batches.
- Labeling: If making different flavors, consider labeling them or using different colored liners to distinguish varieties.
- Thawing guidelines: For the best texture, let them sit at room temperature for 5-10 minutes before eating. If you prefer a softer consistency, you can transfer to the refrigerator for 30 minutes before serving.
Troubleshooting Common Issues
Even with simple recipes, things can sometimes go awry. Here are solutions to common problems:
| Issue | Possible Cause | Solution |
|---|---|---|
| Granola base is too crumbly | Not enough binding agent or not pressed firmly enough | Add a bit more honey or coconut oil; press more firmly into the liners |
| Yogurt is too icy when frozen | Regular yogurt used instead of Greek; not enough fat content | Use full-fat Greek yogurt; add a tablespoon of cream cheese to the yogurt mixture |
| Toppings fall off when removed from freezer | Not pressed into the yogurt enough | Gently press toppings into the yogurt before freezing; or add a thin layer of yogurt on top |
| Cups are difficult to remove from liners | Paper liners used without cooking spray | Use silicone liners or spray paper liners lightly with cooking spray before filling |
| Yogurt has crystallized | Too much moisture from fresh fruit | Pat fruits dry before adding; consider using freeze-dried fruits instead |
Why Homemade is Better Than Store-Bought
While you can find frozen yogurt treats in stores, making your own offers several advantages:
- Control over ingredients: Avoid artificial preservatives, excessive sugars, and unwanted additives.
- Cost-effective: Making a batch at home costs significantly less than buying pre-made versions.
- Customization: Adjust flavors, sweetness, and ingredients to your exact preferences.
- Freshness: Use in-season fruits and high-quality ingredients for superior flavor.
- Sustainability: Reduce packaging waste by making your own.
- Family activity: Get kids involved in the kitchen with this simple, fun recipe.
Frequently Asked Questions
Q: Can I use regular yogurt instead of Greek yogurt? A: Yes, but the texture will be icier when frozen. To combat this, you can strain regular yogurt through a cheesecloth for a few hours to thicken it or add 1-2 tablespoons of cream cheese to the mixture.
Q: How long do these need to thaw before eating? A: For the best texture, let them sit at room temperature for 5-10 minutes before enjoying. If you prefer a softer consistency, you can place them in the refrigerator for about 30 minutes.
Q: Can I use store-bought granola instead of making my own? A: Absolutely! Choose a granola you enjoy and use about 2 tablespoons per cup for the base. Just be aware that some store-bought granolas may be higher in sugar and oils.
Q: Are these suitable for a weight loss diet? A: These cups can be part of a balanced weight loss plan, especially if you control the added sweeteners and use low-fat yogurt. Each cup provides protein, healthy fats, and fiber that can help keep you satisfied.
Q: My kids don’t like Greek yogurt. What can I substitute? A: Try using vanilla yogurt, which is often milder in flavor, or mix regular yogurt with a bit of honey and vanilla extract. You can also try coconut yogurt for a different flavor profile.
Q: Can I make these in a mini muffin tin for smaller portions? A: Yes! Reduce the ingredients proportionally and check that the granola base is thin enough to fit in the smaller cups. Freeze time may be slightly reduced.
Q: How can I add more protein to these cups? A: Mix unflavored protein powder into the yogurt, add a layer of nut butter between the granola and yogurt, or incorporate hemp seeds into the granola base.
Q: Do frozen berries work as well as fresh for toppings? A: Frozen berries will release more moisture as they thaw, which can create ice crystals. If using frozen berries, thaw them first, drain well, and pat dry before adding to the cups.
Final Thoughts
In our busy lives, finding foods that are nutritious, delicious, and convenient can feel like searching for the holy grail. These Frozen Yogurt Granola Cups manage to hit all three marks with flying colors. I love knowing that I have a stash of these wholesome treats in my freezer, ready to power me through a hectic morning or satisfy a sweet craving without derailing my healthy eating intentions.
The beauty of this recipe lies in its simplicity and adaptability. Once you master the basic formula, you can let your creativity run wild with different flavor combinations, seasonal ingredients, and dietary adaptations. Whether you’re a meal prep enthusiast, a parent looking for healthier snack options for your children, or someone seeking balance between nutrition and indulgence, these frozen yogurt cups deserve a spot in your regular rotation.
So gather your ingredients, set aside a little time on the weekend, and prepare to fall in love with your new favorite make-ahead treat. Your future self—rushing out the door on a busy morning or craving something sweet after dinner—will thank you profusely.