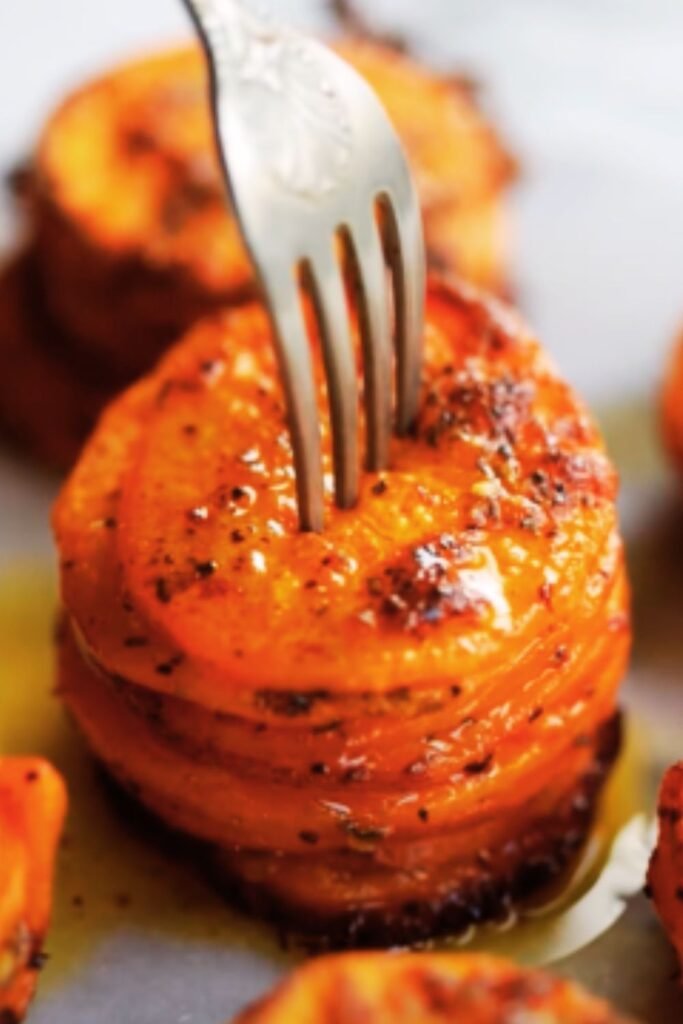
There’s something undeniably satisfying about the humble potato. Whether mashed, fried, or roasted, potatoes have a special place in my heart (and stomach). But when I discovered crispy potato stacks, my potato game changed forever. These impressive little towers of thinly sliced potatoes transform the ordinary spud into something extraordinary—crispy on the outside, tender on the inside, and infused with herbs and butter that make each bite a revelation.
I’ve been perfecting this recipe for years, tweaking the seasonings, adjusting the baking time, and experimenting with different varieties of potatoes. What makes these stacks so special is their versatility and visual appeal. They’re elegant enough for holiday dinners yet simple enough for a weeknight meal. The best part? They require minimal ingredients but deliver maximum flavor.
Why You’ll Love These Potato Stacks
Before diving into the recipe, let me share why these crispy potato stacks deserve a spot in your culinary repertoire:
- Eye-catching presentation: Unlike traditional potato dishes, these stacks create a stunning visual impact on any plate
- Customizable flavors: The basic recipe can be adapted with countless herb and spice combinations
- Perfect texture contrast: Each stack delivers crispy edges with creamy centers
- Make-ahead friendly: You can prep these hours before baking
- Portion control: Individual stacks help control serving sizes
- Impressive yet simple: They look like they took hours to make, but the process is surprisingly straightforward
The Science Behind the Perfect Crisp
What makes these potato stacks achieve that perfect crispy exterior? It’s all about science. When thin potato slices are brushed with oil or butter and arranged in stacks, several things happen during baking:
- The starch on the potato surfaces gelatinizes in the heat
- Moisture evaporates from the exposed edges
- The Maillard reaction occurs as proteins and sugars react to high heat
- The fat conducts heat efficiently to the potato surfaces
This combination of processes creates that golden-brown crispiness we crave, while the interior slices steam inside the stack, becoming tender and flavorful.
Essential Ingredients

The beauty of this recipe lies in its simplicity. Here’s what you’ll need:
- Russet or Yukon Gold potatoes: 2 pounds (about 4-5 medium potatoes)
- Unsalted butter: 4 tablespoons, melted
- Olive oil: 2 tablespoons
- Fresh thyme leaves: 1 tablespoon (plus extra for garnish)
- Fresh rosemary: 1 teaspoon, finely chopped
- Garlic: 2-3 cloves, minced or pressed
- Sea salt: 1 teaspoon
- Freshly ground black pepper: ½ teaspoon
- Parmesan cheese: ¼ cup, finely grated (optional but recommended)
Potato Varieties Explained
DL: Russet Potatoes : High starch content makes them ideal for crispy exteriors. They’re my first choice for this recipe due to their ability to hold shape while achieving maximum crispiness.
DL: Yukon Gold Potatoes : These buttery-flavored potatoes have a medium starch content, offering a nice balance between crispiness and creaminess.
DL: Red Potatoes : With lower starch content, these will create a less crispy but more cohesive stack. Use only if you prefer a more tender result.
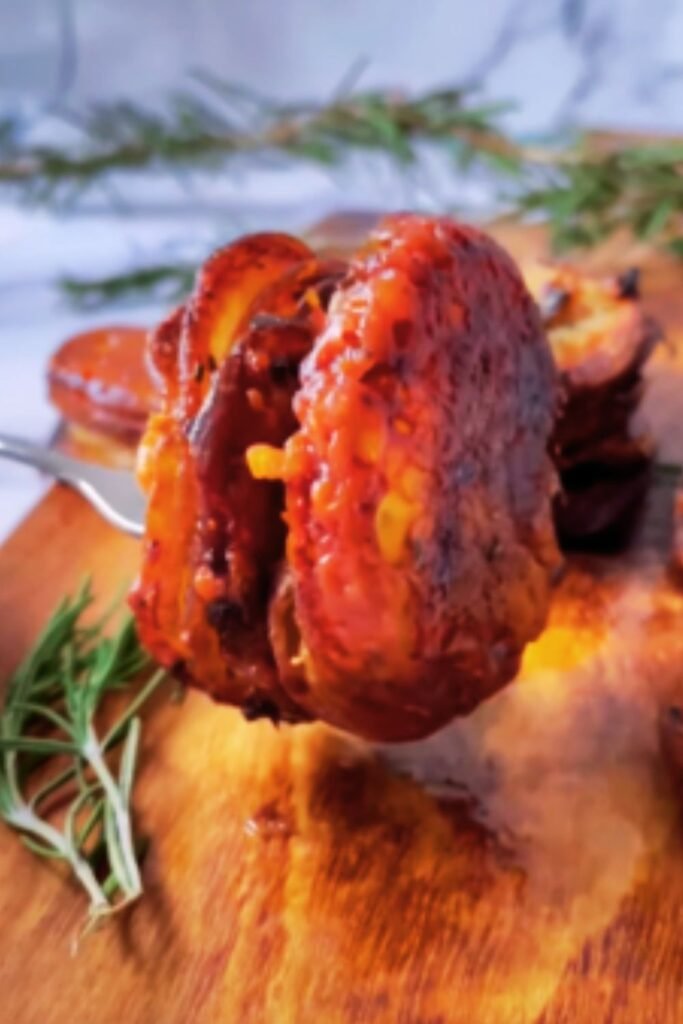
DL: Sweet Potatoes : While not traditional, they make a delicious variation. They require slightly longer cooking time and benefit from complementary spices like cinnamon or chipotle.
Essential Equipment
For the best results, you’ll need:
- Mandoline slicer: Essential for achieving uniformly thin slices (1/16 to 1/8 inch thickness)
- Standard muffin tin: Creates perfectly portioned stacks
- Pastry brush: For applying the butter mixture evenly
- Sharp knife: If you don’t have a mandoline (though results may vary)
Step-by-Step Instructions
Preparation Phase
- Preheat your oven to 375°F (190°C)
- Spray a 12-cup muffin tin with non-stick cooking spray or brush lightly with olive oil
- Wash and dry your potatoes thoroughly (no need to peel if they’re well-scrubbed)
- In a small bowl, combine the melted butter, olive oil, minced garlic, thyme, rosemary, salt, and pepper
- Using a mandoline set to 1/16 inch (1.5 mm), carefully slice the potatoes (use the finger guard!)
Assembly Process
- Place potato slices in a large mixing bowl
- Pour the butter-herb mixture over the potatoes
- Gently toss with your hands, ensuring each slice is coated (be gentle to avoid breaking the slices)
- Stack the potato slices in the muffin cups, adding a few slices at a time and pressing gently
- Fill each cup to slightly above the rim (they’ll shrink during baking)
- If using Parmesan, sprinkle a small amount between layers and on top of each stack
Baking Technique
- Cover the muffin tin with aluminum foil
- Bake covered for 30 minutes (this steams the potatoes, ensuring tender centers)
- Remove the foil and bake for an additional 25-30 minutes until the edges are deep golden brown and crispy
- Let the stacks cool in the tin for 5 minutes before removing
- Gently loosen the edges with a knife if needed, then lift each stack out carefully
Troubleshooting Common Issues
Even the most experienced home cooks can encounter challenges with this recipe. Here are solutions to the most common problems:
| Problem | Cause | Solution |
|---|---|---|
| Stacks fall apart | Slices too thick or uneven | Use mandoline for consistent thickness |
| Not crispy enough | Oven temperature too low | Increase temperature to 400°F for last 10 minutes |
| Burning on top | Oven temperature too high | Lower rack position or cover with foil when browned |
| Sticking to pan | Insufficient greasing | Use non-stick spray and let cool slightly before removing |
| Center still firm | Not baked long enough | Extend covered baking time by 5-10 minutes |
| Too greasy | Too much butter/oil | Reduce fat mixture by 25% |
| Lacking flavor | Insufficient seasoning | Season between layers, not just on top |
Flavor Variations to Try
The basic recipe is delicious, but I love experimenting with different flavor profiles. Here are my favorite variations:
Mediterranean Inspired
- Replace thyme and rosemary with 1 tablespoon of fresh oregano
- Add 1 teaspoon of lemon zest to the butter mixture
- Substitute feta cheese for Parmesan
- Sprinkle with chopped olives before serving
Smoky Southwest
- Add 1 teaspoon smoked paprika and ½ teaspoon cumin to the butter mixture
- Include 1 minced jalapeño (seeds removed for less heat)
- Top with cotija cheese instead of Parmesan
- Garnish with fresh cilantro after baking
French Onion
- Mix ¼ cup caramelized onions into the butter mixture
- Use Gruyère cheese between layers
- Add a pinch of nutmeg to the seasoning
- Sprinkle with chives before serving
Truffle Infused
- Add 1 teaspoon truffle oil to the butter mixture
- Use a mix of wild mushrooms (finely chopped) between layers
- Finish with a sprinkle of truffle salt
- Garnish with microgreens
Make-Ahead and Storage Tips
One of the aspects I appreciate most about this recipe is its flexibility for entertaining. Here’s how to plan ahead:
Prep in Advance
You can slice the potatoes and store them in cold water in the refrigerator for up to 24 hours. Drain and pat completely dry before using.
Partial Baking
Complete the recipe through the covered baking stage, then cool and refrigerate. Finish the uncovered baking just before serving (add 5-10 extra minutes since they’ll be cold).
Freezing
Fully baked potato stacks freeze surprisingly well. Cool completely, then freeze in a single layer on a baking sheet. Once frozen, transfer to a freezer container. Reheat at 375°F for 15-20 minutes directly from frozen.
Leftover Magic
Leftover potato stacks make an incredible base for breakfast. Top with a poached egg and hollandaise for an elegant potato Benedict, or crumble them into a frittata for added texture and flavor.
Nutritional Information
For those watching their nutritional intake, here’s the approximate breakdown per serving (based on 12 stacks):
| Nutrient | Amount per Serving |
|---|---|
| Calories | 145 |
| Total Fat | 8g |
| Saturated Fat | 4g |
| Cholesterol | 15mg |
| Sodium | 220mg |
| Total Carbohydrates | 16g |
| Dietary Fiber | 2g |
| Sugars | 1g |
| Protein | 3g |
Serving Suggestions
These versatile potato stacks pair beautifully with a wide range of main dishes. Here are my favorite combinations:
Protein Pairings
- Roasted chicken with garlic and herbs
- Grilled steak with chimichurri
- Baked salmon with lemon butter
- Slow-roasted pork loin
- Vegetarian option: serve alongside a robust mushroom Wellington
Complementary Vegetables
- Roasted asparagus with lemon zest
- Sautéed green beans with almonds
- Maple-glazed carrots
- Simple mixed greens with vinaigrette
- Roasted Brussels sprouts with balsamic glaze
For Special Occasions
For holiday entertaining, these potato stacks make a stunning addition to your table. I serve them alongside traditional holiday roasts, but they’re special enough to transform an ordinary Sunday dinner into something memorable.
Frequently Asked Questions
After sharing this recipe with friends and family over the years, these are the questions I’m most commonly asked:
Q: Can I make these without a mandoline slicer? A: While a mandoline produces the most consistent results, you can use a sharp chef’s knife or the slicing attachment on a food processor. The key is to get slices as uniform as possible, about 1/16 to 1/8 inch thick.
Q: My potatoes turned brown after slicing. What happened? A: Potatoes oxidize when exposed to air. Work quickly after slicing or keep them in cold water until ready to use, then pat dry thoroughly before assembling.
Q: Can I use dried herbs instead of fresh? A: Yes, but reduce the amount to 1 teaspoon dried thyme and ¼ teaspoon dried rosemary, as dried herbs are more potent.
Q: How do I know when they’re done? A: The edges should be deeply golden and crispy, and a knife should slide easily through the center of the stack.
Q: My stacks didn’t get crispy. What went wrong? A: Ensure your oven is properly calibrated to temperature, the potato slices are dry before assembling, and don’t overcrowd the muffin tin. Also, make sure you’re removing the foil for the second half of baking.
Q: Are these gluten-free? A: Yes, this recipe is naturally gluten-free, making it perfect for guests with gluten sensitivities.
Q: Can I make mini versions in a mini muffin tin? A: Absolutely! Reduce the baking time by about 15 minutes total (20 minutes covered, 15-20 uncovered).
The Perfect Occasion
I’ve found these potato stacks to be the ideal side dish for almost any occasion. They’ve graced my Thanksgiving table, accompanied Sunday roasts, and even starred in brunch settings. Their elegant appearance belies their simple preparation, making them my go-to when I want to impress without spending hours in the kitchen.
What I love most about this recipe is how it transforms the humble potato into something extraordinary. The crispy, golden edges give way to tender, flavor-infused centers, creating a textural experience that elevates any meal.
Whether you’re cooking for a special occasion or simply want to upgrade your weeknight dinner, these crispy potato stacks deserve a place in your culinary arsenal. They require minimal ingredients and effort but deliver maximum impact—proof that sometimes the simplest foods, prepared with attention to detail, can be the most memorable.
So slice those potatoes thin, layer them with herbs and butter, and watch as they transform in the oven. Your dinner guests will be reaching for seconds, and you’ll find yourself making them again and again, each time perhaps with a new flavor twist to keep things interesting. Happy cooking!
Q&A Section
Q: How far in advance can I prepare these potato stacks? A: You can slice the potatoes and keep them in cold water in the refrigerator up to 24 hours ahead. Drain, pat dry thoroughly, and proceed with the recipe. You can also assemble the entire recipe in the muffin tin and refrigerate for up to 4 hours before baking.
Q: What’s the best way to reheat leftover potato stacks? A: For the best texture, reheat them in a 375°F oven for 5-10 minutes. A toaster oven works wonderfully for small batches. Avoid microwaving if possible, as it makes them soggy rather than crispy.
Q: Can I make these dairy-free? A: Absolutely! Substitute the butter with olive oil or a plant-based butter alternative, and either skip the cheese or use a dairy-free alternative. The results will still be delicious, though slightly less rich.
Q: Do I need to peel the potatoes? A: It’s entirely your preference. I often leave the skins on for added nutrition, texture, and visual appeal, especially with thin-skinned varieties like Yukon Gold. Just be sure to wash them thoroughly.
Q: My family loves garlic. Can I add more? A: Certainly! Feel free to double the garlic for a more pronounced flavor. You can also add a sprinkle of garlic powder between layers for an extra punch.
Q: Would this recipe work with sweet potatoes? A: Yes, sweet potatoes make a delicious variation. They require slightly longer cooking time (add about 5-10 minutes to the covered baking period) and pair beautifully with cinnamon, nutmeg, and a touch of brown sugar if you want to lean into their natural sweetness.