There’s something magical about combining two beloved classics into one extraordinary dish. As someone who’s spent countless hours perfecting pasta salads for family gatherings and potlucks, I’m thrilled to share my absolute favorite mashup: Creamy Deviled Egg Pasta Salad. This ingenious creation marries the tangy, creamy goodness of traditional deviled eggs with the hearty satisfaction of pasta salad, resulting in a dish that disappears within minutes at any gathering.
I still remember the first time I served this at a neighborhood cookout. People who claimed they weren’t “pasta salad people” were coming back for seconds and thirds, and I was bombarded with requests for the recipe. What makes this dish so special isn’t just the clever combination of two classics but the perfect balance of flavors and textures that creates something entirely new and utterly irresistible.
What Makes This Pasta Salad Special
Before diving into the recipe, let me share why this particular pasta salad stands out from the crowd:
- Two-in-One Appeal: It satisfies cravings for both deviled eggs and pasta salad simultaneously
- Protein-Packed: The eggs make this substantially more filling than typical pasta salads
- Make-Ahead Friendly: Actually tastes better after the flavors have had time to meld
- Crowd-Pleaser: Appeals to both picky eaters and culinary adventurers
- Customizable Base: Can be adapted to accommodate different dietary needs and preferences
I’ve been refining this recipe for years, and I’m confident you’ll love the current iteration. The secret lies in treating both components—the pasta and the deviled egg mixture—with equal importance and attention to detail.
Ingredients: Quality Matters
For a dish with relatively few ingredients, quality makes all the difference. Here’s what you’ll need to serve 8-10 people:
For the Pasta Base:
- 1 pound (16 oz) medium pasta shells
- 1 tablespoon kosher salt (for pasta water)
- 1 cup celery, finely diced (about 3 stalks)
- 3/4 cup red onion, finely diced (about 1/2 medium onion)
- 1/2 cup red bell pepper, finely diced (about 1/2 large pepper)
- 1/3 cup dill pickles, finely chopped
- 3 tablespoons fresh dill, chopped
- 2 tablespoons fresh chives, minced
For the Deviled Egg Dressing:
- 12 large eggs, hard-boiled and peeled
- 1 cup mayonnaise (preferably full-fat)
- 1/4 cup sour cream
- 3 tablespoons Dijon mustard
- 2 tablespoons yellow mustard
- 1 tablespoon apple cider vinegar
- 2 teaspoons pickle juice (from the jar of dill pickles)
- 1 teaspoon paprika, plus more for garnish
- 1/2 teaspoon garlic powder
- 1/2 teaspoon onion powder
- 1/4 teaspoon cayenne pepper (optional, for heat)
- Salt and freshly ground black pepper, to taste
Kitchen Equipment Needed
I find that having the right tools makes preparing this salad much more efficient:
- Large pot for boiling pasta and eggs
- Colander for draining
- Ice bath setup (large bowl with ice water)
- Sharp knife and cutting board
- Egg slicer (optional but helpful)
- Large mixing bowl
- Medium mixing bowl for dressing
- Rubber spatula
- Measuring cups and spoons
- Serving bowl with lid for storage
Step-by-Step Preparation Method
I’ve broken down the process into manageable stages to ensure perfect results every time:
Stage 1: Egg Preparation
- Place eggs in a large pot and cover with cold water by 1 inch
- Bring to a full rolling boil over high heat
- Once boiling, remove from heat, cover, and let sit for exactly 12 minutes
- Transfer eggs to an ice bath and let cool for 15 minutes
- Peel eggs under cool running water to help remove shells cleanly
Stage 2: Pasta Cooking
- While eggs are cooling, bring a large pot of water to a boil
- Add 1 tablespoon kosher salt to the boiling water
- Add pasta and cook according to package directions until al dente (usually 8-10 minutes)
- Drain pasta in a colander and rinse briefly with cold water to stop cooking
- Spread pasta on a baking sheet to cool completely and prevent sticking
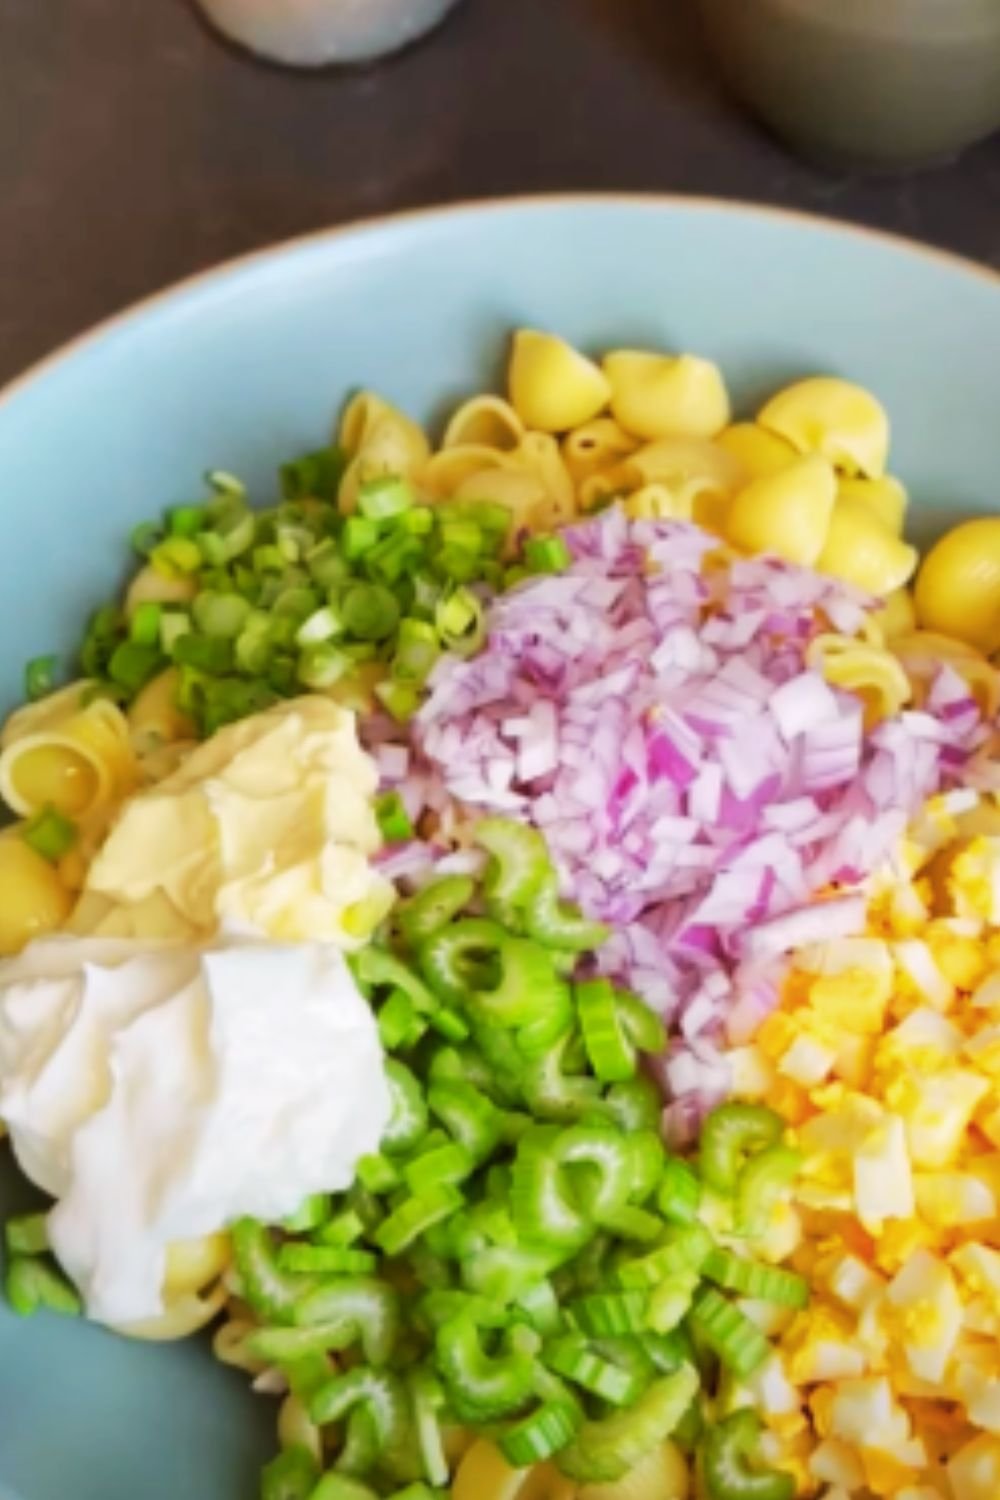
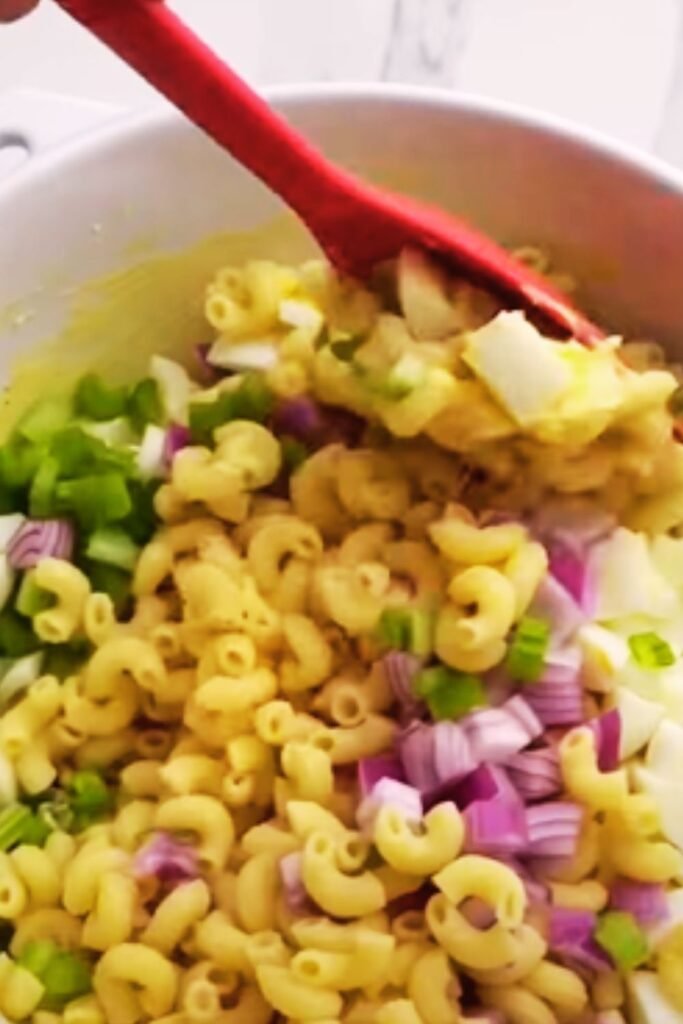
Stage 3: Vegetable Preparation
- While pasta and eggs are cooling, dice celery, red onion, and bell pepper
- Chop pickles and fresh herbs
- Combine all vegetables and herbs in a large mixing bowl
- Add cooled pasta to the vegetable mixture and toss gently to combine
Stage 4: Deviled Egg Dressing
- Separate 8 of the hard-boiled eggs, reserving the remaining 4
- Slice the 8 eggs in half and separate yolks from whites
- Chop the egg whites into small pieces and add to the pasta mixture
- In a medium bowl, mash the yolks with a fork until smooth
- Add mayonnaise, sour cream, both mustards, vinegar, pickle juice, paprika, garlic powder, onion powder, and cayenne (if using)
- Whisk until smooth and creamy
- Season with salt and pepper to taste
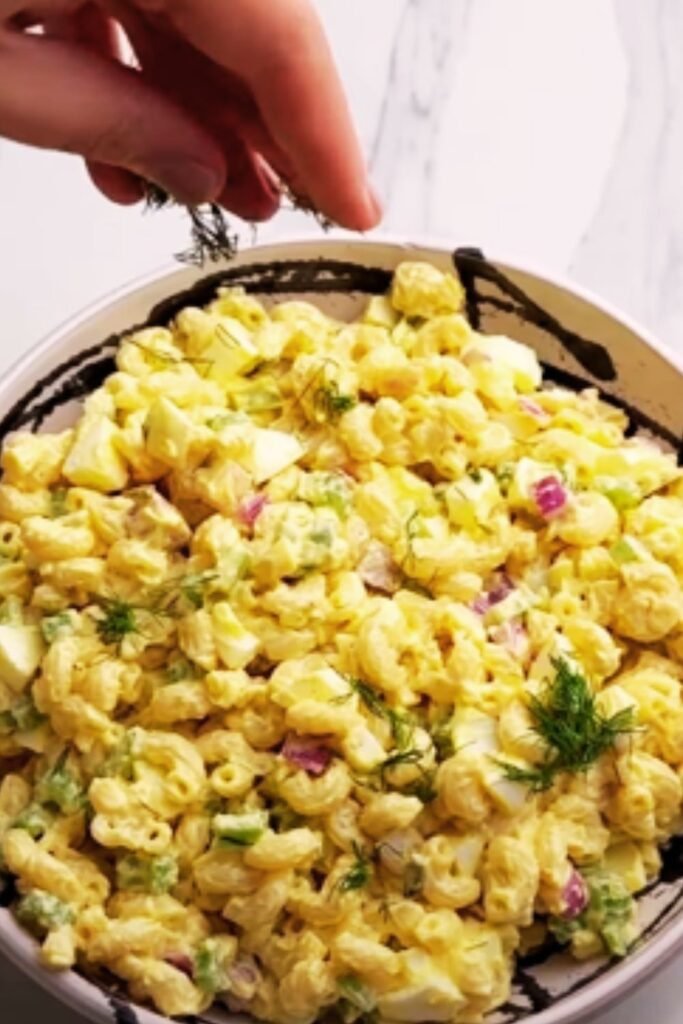
Stage 5: Assembly
- Pour the deviled egg dressing over the pasta mixture
- Gently fold with a rubber spatula until everything is well coated
- Slice the remaining 4 whole eggs and arrange on top as garnish
- Sprinkle with additional paprika and minced chives
- Cover and refrigerate for at least 2 hours before serving, preferably overnight
Nutritional Information
Understanding the nutritional content helps you plan your meal accordingly:
| Nutrient | Amount per Serving | % Daily Value* |
|---|---|---|
| Calories | 425 | – |
| Total Fat | 24g | 31% |
| Saturated Fat | 5g | 25% |
| Cholesterol | 255mg | 85% |
| Sodium | 620mg | 27% |
| Total Carbohydrates | 36g | 13% |
| Dietary Fiber | 2g | 7% |
| Sugars | 3g | – |
| Protein | 15g | 30% |
| Vitamin A | – | 15% |
| Vitamin C | – | 20% |
| Calcium | – | 6% |
| Iron | – | 15% |
*Percent Daily Values are based on a 2,000 calorie diet. Your daily values may be higher or lower depending on your calorie needs.
Storage and Make-Ahead Tips
One of the reasons I love this recipe is how well it holds up in the refrigerator:
Storage Guidelines:
- Refrigerator: Keeps well for up to 4 days in an airtight container
- Freezer: Not recommended as mayonnaise-based dressings separate when thawed
- Best Flavor: Develops after 4-8 hours of refrigeration as flavors meld
Make-Ahead Strategies:
- Day Before: Prepare the entire salad without the garnish eggs
- Morning Of: Add sliced egg garnish and additional paprika
- Last Minute: Refresh with a quick stir and sprinkle of fresh herbs
Common Problems and Solutions
Even experienced cooks occasionally encounter issues with pasta salads. Here’s how to troubleshoot:
Problem: Dry Pasta Salad
Solution: Pasta continues to absorb moisture in the refrigerator. If your salad seems dry after storage, mix 2 tablespoons mayonnaise with 1 tablespoon sour cream and fold into the salad gently.
Problem: Mushy Pasta
Solution: Be sure to cook pasta just to al dente, as it will continue to soften slightly in the dressing. Rinsing immediately after cooking helps halt the cooking process.
Problem: Watery Dressing
Solution: Make sure the pasta is completely cooled and thoroughly drained before adding dressing. Pat vegetables dry after washing to remove excess moisture.
Problem: Bland Flavor
Solution: Pasta salads need more seasoning than you might think. Don’t be afraid to add more salt, pepper, or an extra splash of vinegar to brighten flavors before serving.
Variations to Try
While the classic version is my go-to, I’ve experimented with several delicious variations over the years:
Mediterranean Version
- Add 1/2 cup chopped kalamata olives
- Substitute feta cheese for 2 of the eggs
- Add 1 cup quartered cherry tomatoes
- Use fresh basil instead of dill
- Add 1 teaspoon oregano to the dressing
Lighter Version
- Use Greek yogurt in place of sour cream
- Reduce mayonnaise to 1/2 cup and add 1/4 cup olive oil
- Increase the vegetables by 50%
- Use whole wheat or protein-enriched pasta
Spicy Southern Version
- Add 1/4 cup pimento peppers
- Include 1 tablespoon hot sauce in the dressing
- Add 1/4 teaspoon cayenne pepper
- Garnish with smoked paprika
- Add 2 tablespoons sweet pickle relish

Serving Suggestions
This versatile salad works well in numerous settings:
Perfect Pairings:
- For Cookouts: Serve alongside grilled chicken, burgers, or ribs
- For Potlucks: Pairs beautifully with baked ham or fried chicken
- For Lighter Meals: Serve with a simple green salad and crusty bread
- For Brunch: Offer as part of a spread with fresh fruit and pastries
Presentation Ideas:
- Line a serving bowl with butter lettuce leaves before adding the salad
- Garnish with additional fresh herbs and a sprinkle of paprika
- For individual servings, use a ring mold to create a shaped portion on each plate
- For a dramatic presentation, hollow out a round bread loaf to create an edible bowl
Special Dietary Adaptations
With some thoughtful substitutions, this salad can accommodate various dietary needs:
Gluten-Free Version
- Use gluten-free pasta (rice or corn-based varieties work best)
- Double-check that your mustard and mayonnaise are certified gluten-free
- Allow extra time for gluten-free pasta to cool completely before mixing
Dairy-Free Option
- Omit sour cream and increase mayonnaise to 1 1/4 cups (use vegan mayonnaise if needed)
- Add 1 tablespoon of nutritional yeast for added richness
Lower-Calorie Adaptation
- Use light mayonnaise
- Substitute plain Greek yogurt for the sour cream
- Increase the ratio of vegetables to pasta
- Use 8 eggs instead of 12
Why This Recipe Works: The Science Behind It
Understanding the science helps you appreciate why certain techniques are important:
Egg Chemistry
Hard-boiled egg yolks contain a significant amount of lecithin, a natural emulsifier that helps bind oil and water. This creates a stable, creamy dressing that clings beautifully to the pasta.
Pasta Properties
Medium shell pasta is ideal because:
- The shells trap small bits of vegetables and egg
- The cavity collects extra dressing for flavor in every bite
- The texture holds up well to refrigeration
Flavor Development
The combination of both yellow and Dijon mustards provides a complex flavor profile. Yellow mustard offers brightness, while Dijon adds depth. The small amount of vinegar and pickle juice provides acidity that balances the richness of the eggs and mayonnaise.
Seasonal Adaptations
This versatile recipe can be adjusted throughout the year:
Spring Version
- Add blanched asparagus pieces
- Include fresh peas
- Use more fresh dill and chives
Summer Version
- Add sweet corn kernels
- Include diced cucumber
- Mix in halved cherry tomatoes
Fall Version
- Include diced apple for sweetness and crunch
- Add toasted pecans
- Use fresh parsley instead of dill
Winter Version
- Add roasted red peppers
- Include sun-dried tomatoes
- Mix in a pinch of warming spices like smoked paprika
Questions and Answers
After sharing this recipe hundreds of times, I’ve collected the most common questions people ask:
Q: Can I make this pasta salad without mayonnaise?
A: Yes, you can substitute Greek yogurt mixed with a little olive oil and dijon mustard. The texture will be different, but still delicious. For a completely mayo-free version, try a mixture of mashed avocado and Greek yogurt as your base.
Q: How far in advance can I make this for a party?
A: This salad actually improves with time, as the flavors meld together. You can safely make it up to 24 hours in advance. I recommend adding the garnish eggs just before serving for the most attractive presentation.
Q: My eggs are difficult to peel. Any tricks?
A: Fresh eggs are notoriously difficult to peel. For best results, use eggs that are at least 7-10 days old. The ice bath after cooking is also crucial—the thermal shock helps separate the membrane from the shell. Rolling the egg gently on the counter before peeling can also help crack the shell all over for easier removal.
Q: Can I use different pasta shapes?
A: Absolutely! While medium shells are my preference because they catch bits of egg and vegetables in their crevices, other short pasta shapes like bow ties, rotini, or orecchiette work well too. Avoid long pasta like spaghetti or linguine, which don’t integrate as well with the chunky components.
Q: Is this safe for a picnic or outdoor gathering?
A: Like any mayonnaise-based salad, this should not sit out at temperatures above 40°F (4°C) for more than 2 hours. For outdoor events, serve it in a bowl nestled in a larger bowl filled with ice, or in small portions that will be consumed quickly.
Q: How can I add more protein to make this a complete meal?
A: This is already fairly protein-rich thanks to the eggs, but you can easily add diced ham, crumbled bacon, flaked tuna, or diced chicken breast to make it even more substantial. For a vegetarian protein boost, try adding chickpeas or white beans.
Final Thoughts: Why I Keep Coming Back to This Recipe
After years of making pasta salads for every occasion imaginable, this Creamy Deviled Egg Pasta Salad remains in my regular rotation. It strikes that perfect balance between familiar comfort food and unexpected twist that makes people take notice.
What I appreciate most is its adaptability. Whether I’m cooking for picky children or sophisticated foodies, this dish can be tailored to please virtually any palate. The combination of creamy dressing, tender pasta, crunchy vegetables, and protein-rich eggs creates a completely satisfying experience that works as a side dish or main course.
I encourage you to make this recipe your own. Start with my base version, then adjust the seasonings, add your favorite vegetables, or experiment with the variations I’ve suggested. The most meaningful recipes are those we adapt over time to suit our own tastes and traditions.
The next time you’re asked to bring a dish to share, I hope you’ll consider this Creamy Deviled Egg Pasta Salad. I promise it won’t just disappear quickly—it will have people asking for the recipe before the gathering is over.