Have you ever found yourself craving the savory satisfaction of a juicy cheeseburger but wanted something a bit different? I’ve been there too! After countless kitchen experiments, I’ve perfected what might be my favorite weeknight dinner hack: Air Fryer Cheeseburger Wraps. These delicious bundles deliver all the flavors of a classic cheeseburger in a crispy, portable package without the mess or extra carbs of a traditional bun.
I first stumbled upon this recipe when my kids were begging for burgers but I was looking for something quicker and less messy. Little did I know these would become a regular request in our household! The beauty of these wraps lies in their versatility – you can customize them with all your favorite burger toppings while enjoying the crispy perfection that only an air fryer can deliver.
Why You’ll Love This Recipe
These air fryer cheeseburger wraps have become my go-to for busy weeknights, and here’s why they might become yours too:
- Quick and Easy: Ready in under 30 minutes from start to finish
- Kid-Friendly: Even picky eaters love these handheld meals
- Customizable: Add whatever toppings and condiments your family enjoys
- Healthier Option: Uses less oil than traditional deep-fried alternatives
- Perfect Texture: Crispy exterior with a juicy, flavorful interior
- Great for Meal Prep: Make ahead and reheat for lunches
The first time I served these to my family, the kitchen fell silent – always the sign of a winning recipe! Now they’re on regular rotation in our meal planning, and I’m excited to share all my tips and tricks with you.
Ingredients You’ll Need
For the Beef Filling:
- 1 pound ground beef (80/20 lean-to-fat ratio works best)
- 1 small onion, finely diced
- 2 cloves garlic, minced
- 1 tablespoon Worcestershire sauce
- 1 teaspoon dijon mustard
- 1 teaspoon smoked paprika
- ½ teaspoon salt
- ¼ teaspoon black pepper
- 2 tablespoons ketchup
- 1 tablespoon pickle relish (sweet or dill, based on preference)
For the Wraps:
- 4 large flour tortillas (10-inch size)
- 1 cup shredded cheddar cheese
- 1 cup shredded iceberg lettuce
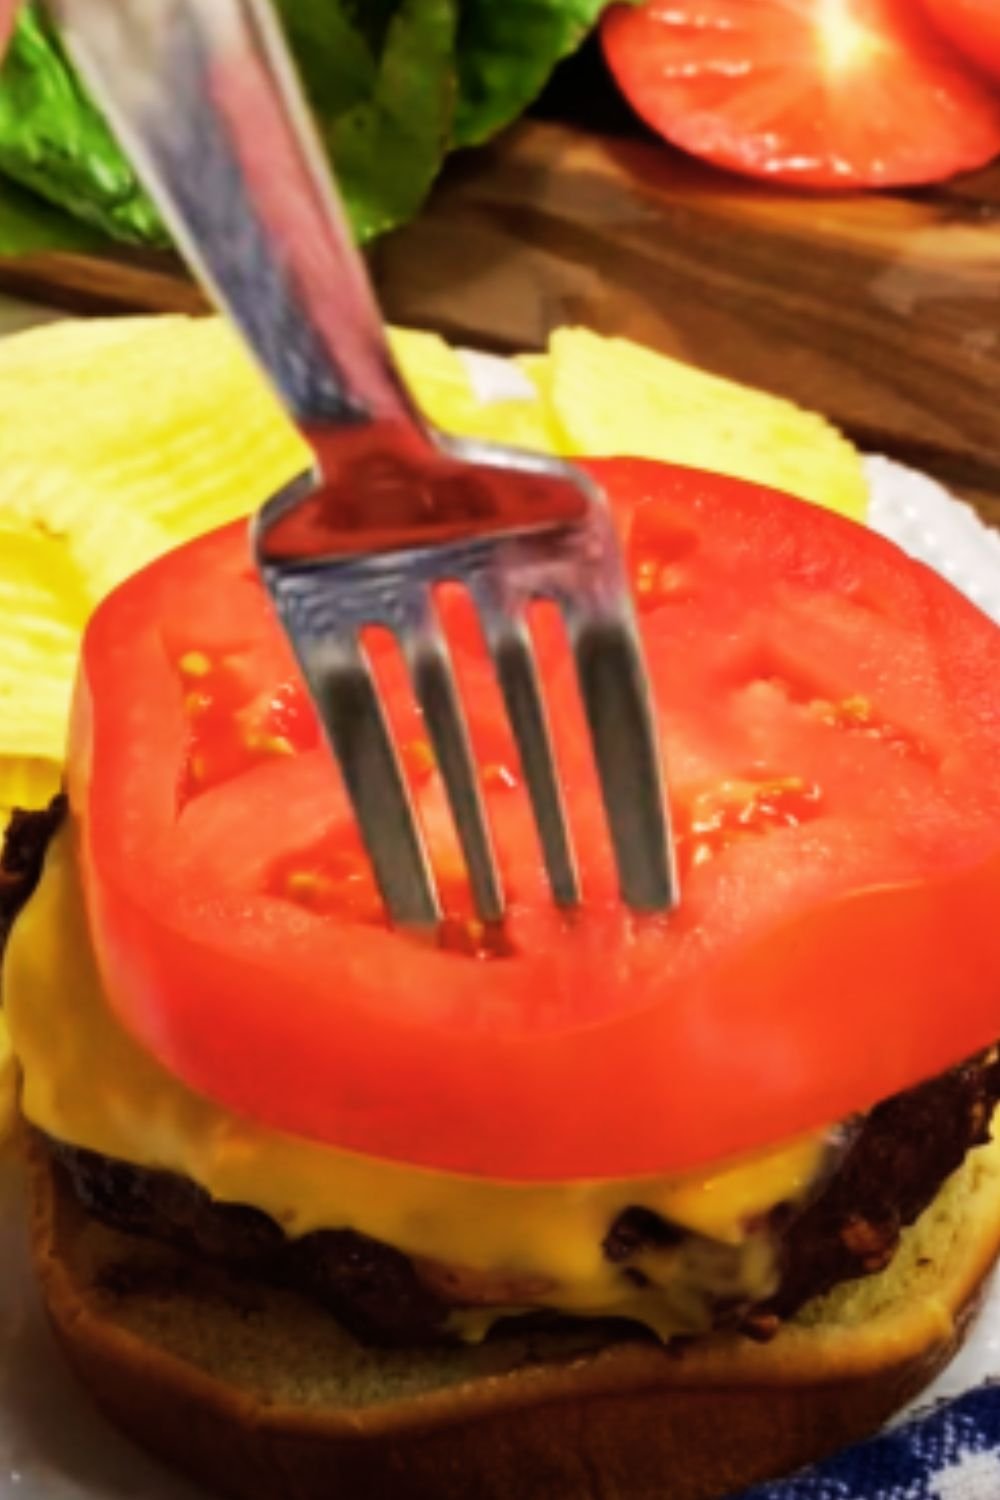
- 2 small tomatoes, diced and seeds removed
- ¼ cup diced dill pickles
- 4 slices American cheese
- 2 tablespoons butter, melted (for brushing)
For the Special Sauce:
- ¼ cup mayonnaise
- 2 tablespoons ketchup
- 1 tablespoon yellow mustard
- 1 tablespoon sweet pickle relish
- ½ teaspoon garlic powder
- ½ teaspoon onion powder
- ¼ teaspoon smoked paprika
- 1 teaspoon hot sauce (optional)
Kitchen Equipment Needed
Before we dive into the cooking process, make sure you have these essential tools on hand:
| Equipment | Purpose | Notes |
|---|---|---|
| Air Fryer | Primary cooking method | 5-6 quart capacity ideal |
| Large Skillet | Cooking beef mixture | Non-stick or cast iron recommended |
| Mixing Bowls | Preparing ingredients | Various sizes needed |
| Measuring Spoons | Accurate seasoning | Essential for balanced flavors |
| Spatula | Flipping and serving | Silicone works best with tortillas |
| Tongs | Handling hot wraps | Heat-resistant recommended |
| Kitchen Thermometer | Food safety | Ensure beef reaches 160°F |
| Cutting Board | Prep work | Separate ones for meat and produce |
| Sharp Knife | Chopping vegetables | Keep it sharp for precision |
| Small Whisk | Mixing special sauce | For smooth, well-combined sauce |
Step-by-Step Instructions
Preparing the Beef Filling
- Preheat your air fryer to 375°F (190°C) for 5 minutes.
- Heat a large skillet over medium-high heat and add the ground beef, breaking it up with a spatula as it cooks.
- When the beef is about halfway cooked (still showing some pink), add the diced onions and continue cooking for another 3-4 minutes until the onions become translucent.
- Add the minced garlic and cook for another 30 seconds until fragrant.
- Stir in the Worcestershire sauce, dijon mustard, smoked paprika, salt, and pepper, mixing well to combine.
- Cook until the beef is completely browned and no pink remains, about 2 more minutes.
- Lower the heat and add the ketchup and pickle relish, stirring to incorporate thoroughly.
- Remove from heat and allow the mixture to cool slightly while you prepare the special sauce.
Making the Special Sauce
- In a small mixing bowl, combine all the special sauce ingredients: mayonnaise, ketchup, yellow mustard, pickle relish, garlic powder, onion powder, smoked paprika, and hot sauce (if using).
- Whisk until smooth and well combined. The sauce should have a slightly pink-orange color.
- Refrigerate until ready to use, or if short on time, set aside at room temperature.
Assembling and Cooking the Wraps
- Lay out each tortilla on a clean work surface.
- Spread approximately 1-2 tablespoons of the special sauce in the center of each tortilla, leaving about a 2-inch border around the edges.
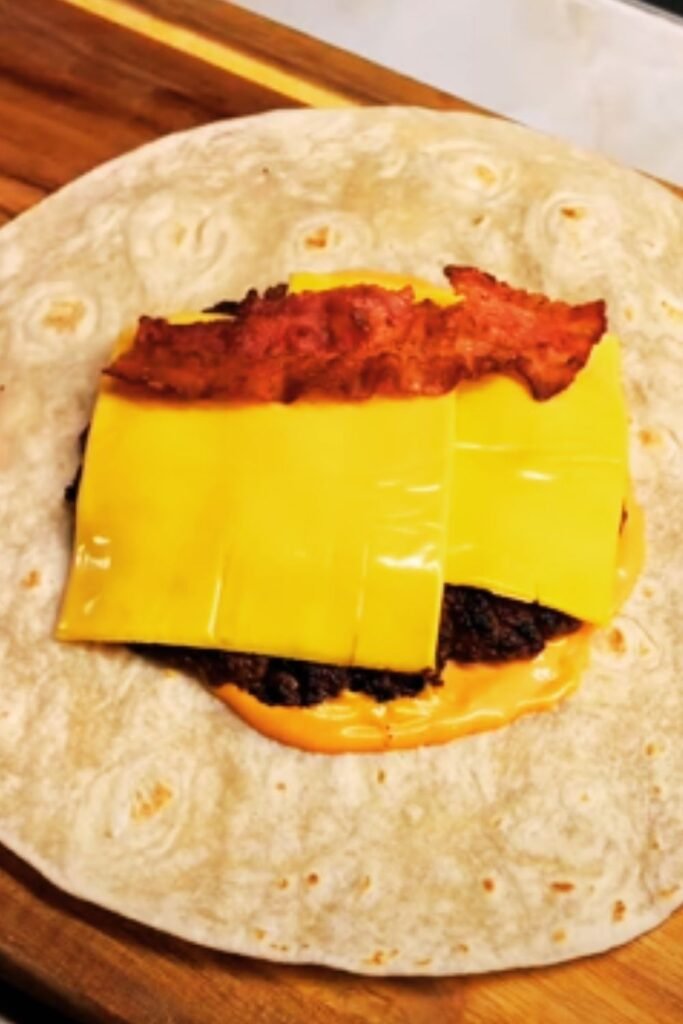
- Place one slice of American cheese in the center of each tortilla.
- Divide the beef mixture equally among the tortillas (about ½ cup per wrap), placing it on top of the cheese.
- Sprinkle each with ¼ cup of shredded cheddar cheese.
- Add a small handful of shredded lettuce, a spoonful of diced tomatoes, and some diced pickles on top of the beef mixture.
- To fold the wraps, first fold in the sides, then the bottom, and roll tightly away from you, creating a sealed burrito-like package. The key is making them tight enough to stay closed but not so tight that the filling spills out.
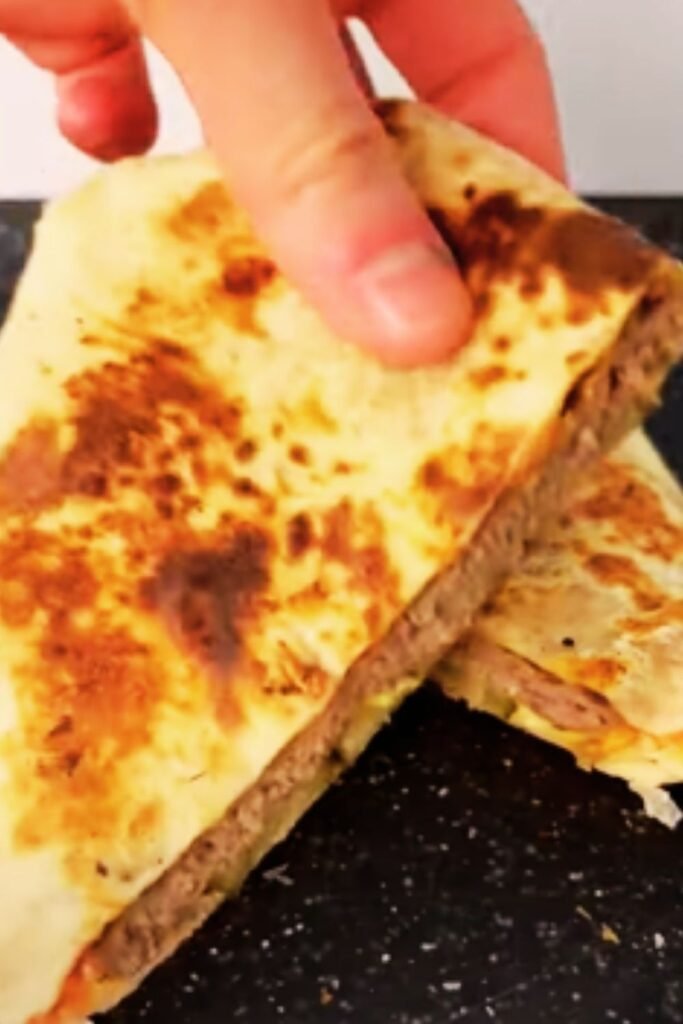
- Brush each wrap lightly with melted butter on all sides. This helps create that golden-brown crispy exterior.
Air Frying the Wraps
- Place the wraps seam-side down in your preheated air fryer basket. Depending on your air fryer size, you may need to cook them in batches of 2.
- Cook at 375°F (190°C) for 5 minutes, then carefully flip each wrap using tongs.
- Continue cooking for another 3-5 minutes until the wraps are golden brown and crispy on all sides.
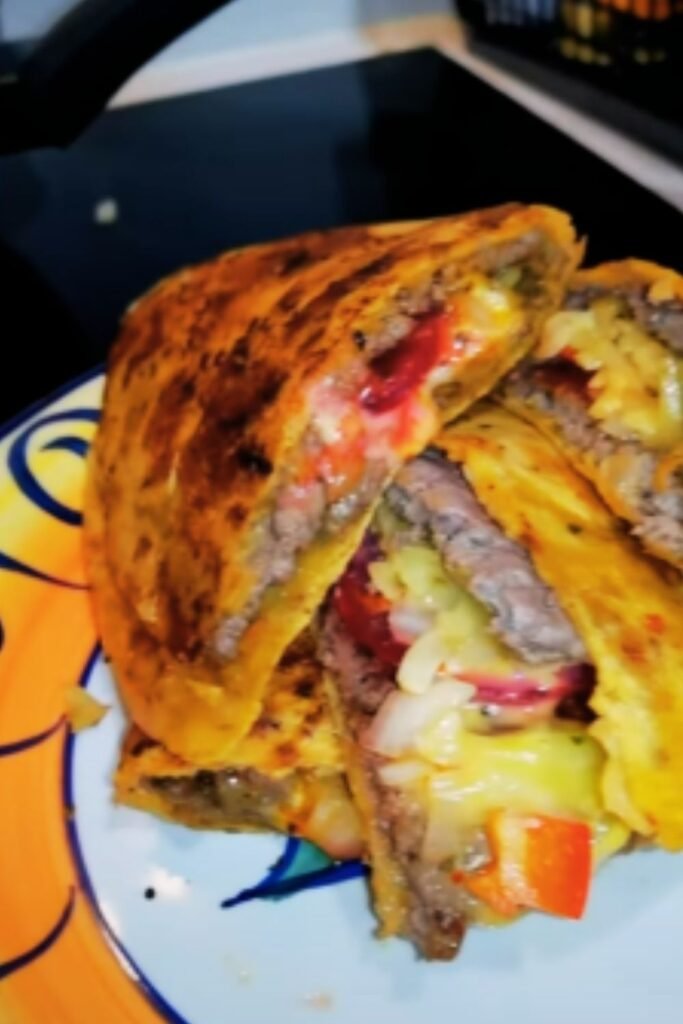
- Transfer to a cutting board and let them rest for 2-3 minutes before slicing diagonally.
- Serve with additional special sauce on the side for dipping.
Expert Tips and Tricks
After making these wraps countless times, I’ve picked up some valuable insights that make a huge difference:
- Don’t Overstuff: It’s tempting to add more filling, but overstuffed wraps can burst open during cooking.
- Pat Dry Your Vegetables: Especially tomatoes and pickles – excess moisture can make your wraps soggy.
- Temperature is Key: If your ground beef mixture is too hot when assembling, it can make the tortilla soggy. Let it cool for about 5 minutes before building your wraps.
- Double-Check Sealing: Make sure your wraps are properly sealed before air frying to prevent filling from leaking out.
- No Crowding: Leave enough space between wraps in the air fryer basket to allow proper air circulation.
- Rotating is Important: Halfway through cooking, rotate the wraps in the air fryer for even crispiness.
- Let Them Rest: Allow the wraps to rest for a few minutes after cooking. This helps set the melted cheese and makes them easier to slice.
- Use Fresh Tortillas: Fresh, pliable tortillas fold much better than older ones that might crack.
Nutritional Information
Understanding the nutritional content helps you make informed decisions about portion sizes and frequency. Here’s a breakdown per wrap:
| Nutrient | Amount per Serving | % Daily Value* |
|---|---|---|
| Calories | 525 kcal | 26% |
| Total Fat | 32g | 41% |
| Saturated Fat | 14g | 70% |
| Cholesterol | 95mg | 32% |
| Sodium | 1150mg | 50% |
| Total Carbohydrates | 31g | 11% |
| Dietary Fiber | 2g | 7% |
| Sugars | 5g | – |
| Protein | 28g | 56% |
| Calcium | 350mg | 27% |
| Iron | 3.5mg | 19% |
| Potassium | 420mg | 9% |
*Percent Daily Values are based on a 2,000 calorie diet. Your daily values may be higher or lower depending on your calorie needs.
Serving Suggestions
These cheeseburger wraps are delicious on their own, but here are some perfect pairings I’ve discovered:
- Sweet Potato Fries: The slight sweetness complements the savory wraps beautifully.
- Crisp Dill Pickle Spears: For that authentic burger joint experience.
- Simple Green Salad: A light, vinaigrette-dressed salad balances the richness.
- Homemade Coleslaw: The creamy, crunchy texture works wonderfully alongside.
- Corn on the Cob: During summer months, this makes for a perfect cookout-style meal.
- Fresh Fruit Platter: For a refreshing contrast, especially with kids.
- Sparkling Water with Lime: A bubbly, refreshing beverage cuts through the richness.
- Iced Tea: Sweet or unsweetened, it’s a classic pairing.
Variations and Substitutions
One of the reasons I love this recipe is how adaptable it is! Here are some popular variations I’ve tried:
Protein Alternatives:
- Turkey or Chicken: Use ground turkey or chicken for a leaner option.
- Plant-Based: Substitute with Beyond Meat or Impossible burger for a vegetarian version.
- Bacon Cheeseburger: Mix in 1/4 cup of cooked, crumbled bacon to the beef filling.
Cheese Options:
- Swiss Cheese: For a nutty flavor profile.
- Pepper Jack: Adds a nice spicy kick.
- Blue Cheese: For a more gourmet burger experience.
- Dairy-Free: Use plant-based cheese alternatives if needed.
Dietary Adjustments:
- Low-Carb: Use large lettuce leaves instead of tortillas for a keto-friendly option.
- Gluten-Free: Substitute with gluten-free tortillas or wraps.
- Spicy Version: Add diced jalapeños and hot sauce to the beef mixture.
Regional Variations:
- Southwest Style: Add corn, black beans, and taco seasoning.
- Mediterranean: Mix in feta cheese, olives, and tzatziki sauce instead of special sauce.
- Hawaiian: Include diced pineapple and teriyaki sauce.
Storage and Reheating Instructions
I often make a double batch of these wraps for meal prep. Here’s how to store and reheat them properly:
Storage:
- Refrigeration: Wrapped tightly in aluminum foil, they’ll keep in the refrigerator for up to 3 days.
- Freezing: For longer storage, wrap individually in plastic wrap, then aluminum foil, and freeze for up to 2 months.
Reheating:
- Air Fryer: For the best results, reheat refrigerated wraps in the air fryer at 350°F for 3-4 minutes until crispy and heated through.
- From Frozen: No need to thaw! Place frozen wraps in the air fryer at 325°F for 10-12 minutes, flipping halfway.
- Microwave: In a pinch, microwave for 1-2 minutes, though you’ll lose the crispy exterior.
- Conventional Oven: Bake at 350°F for 10 minutes if refrigerated, or 15-20 minutes if frozen.
Common Mistakes to Avoid
Through my own trial and error, I’ve identified these common pitfalls:
- Soggy Tortillas: Adding hot filling to cold tortillas creates condensation. Let your beef mixture cool slightly before assembly.
- Undercooking: Not cooking long enough in the air fryer can result in doughy rather than crispy wraps.
- Temperature Too High: Setting your air fryer above 375°F can burn the outside before the inside is properly heated.
- Poor Folding Technique: Not tucking in the sides properly allows the filling to escape during cooking.
- Too Much Sauce: Excessive sauce inside the wrap can make it soggy and difficult to handle.
- Overfilled Wraps: Tempting as it may be, overstuffing leads to bursting during cooking.
- Not Preheating: Skipping the preheating step can affect cooking time and texture.
Frequently Asked Questions
Q: Can I make these wraps in advance and cook them later?
A: Absolutely! You can assemble them, wrap each one individually in plastic wrap, and refrigerate for up to 24 hours before cooking. Just brush with butter right before air frying.
Q: I don’t have an air fryer. Can I make these in the oven?
A: Yes! Preheat your oven to 425°F, place the wraps on a baking sheet lined with parchment paper, and bake for about 10-12 minutes, flipping halfway, until golden brown and crispy.
Q: How do I prevent my wraps from becoming soggy?
A: The key is managing moisture. Let your beef mixture cool slightly before assembly, pat your vegetables dry, and don’t overdo the sauce inside the wrap.
Q: Can I use corn tortillas instead of flour tortillas?
A: While corn tortillas have great flavor, they’re typically smaller and more prone to cracking. If using corn tortillas, I recommend warming them first to increase flexibility and using two overlapping tortillas per wrap.
Q: What’s the best ground beef to use for this recipe?
A: I recommend 80/20 lean-to-fat ratio ground beef for the juiciest results. Leaner beef (90/10) can work but might result in a drier filling.
Q: Can these be made as a freezer meal?
A: Definitely! Follow all steps up to air frying, then wrap individually in plastic wrap followed by aluminum foil. Freeze for up to 2 months and cook directly from frozen (no thawing needed) in the air fryer at 325°F for 10-12 minutes.
Q: How can I make these healthier?
A: Try using lean ground turkey, whole wheat tortillas, reduced-fat cheese, and Greek yogurt instead of mayonnaise in the special sauce. You can also load up on more vegetables.
Q: My air fryer is small. Can I cook these in batches?
A: Yes! Cook them in batches of 1-2 at a time, depending on your air fryer size. Keep the cooked ones warm in a low oven (200°F) while you finish the remaining wraps.
Why This Recipe Works
As someone who’s experimented with countless air fryer recipes, I can confidently say these cheeseburger wraps hit all the right notes:
The air fryer creates the perfect environment for these wraps – circulating hot air that crisps the exterior while gently heating the interior to melty perfection. The tortilla develops a satisfying crunch similar to a grilled sandwich, while the filling remains juicy and flavorful.
The combination of two cheeses is intentional – the American cheese provides that classic melt-in-your-mouth burger experience, while the sharper cheddar adds depth of flavor. The special sauce ties everything together with its tangy, creamy profile that mimics the best burger joint sauce you’ve ever had.
I’ve found that brushing the outside with butter rather than oil gives these wraps that rich, golden color and helps them crisp more evenly. It’s a small detail that makes a big difference in the final result.
Perhaps most importantly, these wraps solve the common problem with traditional burgers – they’re easier to eat! No more toppings sliding out or buns disintegrating. Everything stays neatly contained in a portable, handheld package that’s perfect for busy families.
After countless iterations and family taste tests, I’m confident this recipe delivers the perfect balance of convenience, flavor, and that satisfying cheeseburger experience we all crave – just in a more practical, air-fried package.
Whether you’re looking for a quick weeknight dinner, a fun weekend lunch, or a crowd-pleasing party appetizer (just cut them into smaller sections!), these Air Fryer Cheeseburger Wraps are sure to become a new favorite in your recipe rotation.
Final Thoughts
There’s something magical about transforming a classic favorite into something new while preserving all the flavors we love. These Air Fryer Cheeseburger Wraps do exactly that – they deliver all the satisfaction of a juicy cheeseburger in a crispy, convenient package that’s perfect for today’s busy lifestyles.
I hope you enjoy making and eating these wraps as much as my family does! They’ve become our Friday night tradition – a bit healthier than takeout but every bit as satisfying. The air fryer truly transforms this simple concept into something special, with that perfect contrast between crispy exterior and juicy interior.
Remember that cooking should be fun and adaptable. Feel free to experiment with different fillings and flavors to make this recipe your own. I’d love to hear about your variations and how they turned out!
Happy cooking and enjoy your delicious cheeseburger wraps!