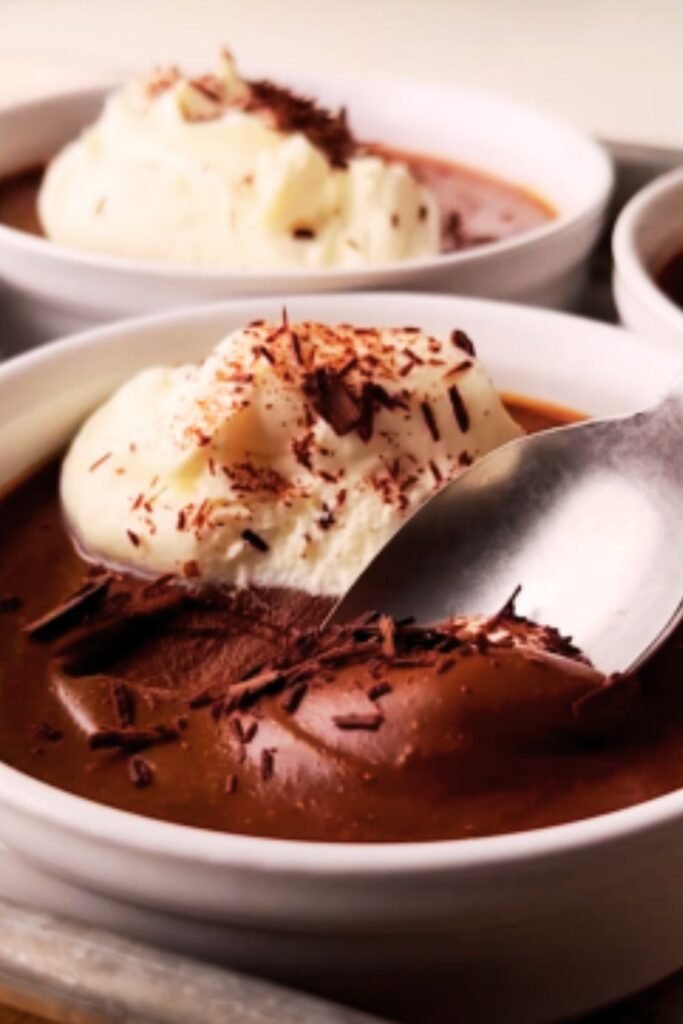
There’s something magical about breaking through the glossy surface of a perfectly set chocolate pot de crème with your spoon, revealing the silky, decadent custard beneath. I’ve been making this classic French dessert for years, and I’m still captivated by how something so elegant can be created with just a handful of ingredients. Today, I’m sharing my foolproof recipe for chocolate pots de crème that will have your guests thinking you spent hours in the kitchen, when in reality, it’s remarkably simple to prepare.
What Are Pots de Crème?
Before diving into the recipe, let’s understand what makes this dessert special. Pots de crème (pronounced “po də krem”) translates to “pots of cream” in French. They are:
Rich custard : Unlike pudding which is typically thickened with cornstarch, pots de crème rely on eggs for their structure Baked : They’re gently cooked in a water bath (bain-marie) to achieve their signature silky texture Served chilled : Always presented cold, usually in small individual ramekins or cups Intensely flavored : Often chocolate, but can be vanilla, coffee, or other flavors
This dessert strikes the perfect balance between a mousse and a flan, with a texture that’s simultaneously rich yet light, firm yet yielding. The chocolate version I’m sharing today is particularly heavenly, with a deep, complex flavor that satisfies even the most discerning chocolate lovers.
The History Behind This Elegant Dessert
I’ve always been fascinated by the cultural significance of the foods we enjoy. Pots de crème have been delighting French diners since the 17th century, originally served in small porcelain pots with lids (hence the name). These delicate custards were a favorite among the aristocracy, symbolizing refinement and luxury.
What I find most interesting is how this dessert evolved from being served exclusively in fine dining establishments to becoming a beloved home recipe. The technique remains largely unchanged after centuries—a testament to its perfection. Today, I’m continuing this tradition, bringing a touch of French elegance to your home kitchen.
The Secret to Perfect Chocolate Pots de Crème
After years of testing different methods, I’ve discovered that success with this recipe comes down to three critical factors:
- Quality ingredients (especially the chocolate)
- Proper temperature control
- Patience during the chilling process
Let me share what I’ve learned about each of these elements.
Choosing Your Chocolate
The chocolate you select will directly impact the flavor of your finished dessert. This is not the time for grocery store baking chips. I recommend:
- High-quality dark chocolate with 60-70% cacao content
- Single-origin chocolates if you want to explore nuanced flavor profiles
- Avoiding chocolates with additives like vegetable oils
I personally prefer using a combination of bittersweet and semisweet chocolate for complexity. If you use exclusively dark chocolate above 70% cacao, you may want to increase the sugar slightly to balance the bitterness.
The Temperature Dance
Temperature control is crucial at two stages:
When tempering the eggs: Add the hot cream too quickly, and you’ll have scrambled eggs; too slowly, and your custard won’t properly set During baking: The water bath must be hot enough to cook the custards but not so hot that they curdle
I’ve found that a kitchen thermometer is invaluable here. Your cream should be around 170°F (77°C) when you begin tempering the eggs, and your water bath should be around 180°F (82°C) when it goes into the oven.
The Virtue of Patience
Finally, don’t rush the chilling process. Allow:
- At least 4 hours in the refrigerator (preferably overnight)
- Remove from the fridge 15-20 minutes before serving for the best texture and flavor development
Now, let’s get to the recipe itself!
Silky Chocolate Pots de Crème Recipe
Ingredients
For the custard:
- 1½ cups heavy cream
- ½ cup whole milk
- 5 oz high-quality bittersweet chocolate (60-70% cacao), finely chopped
- 2 oz semisweet chocolate, finely chopped
- 5 large egg yolks, room temperature
- ¼ cup granulated sugar
- ¼ teaspoon salt
- 1 teaspoon pure vanilla extract
- Optional: 1 tablespoon espresso powder (to enhance the chocolate flavor)
For serving:
- 1 cup cold heavy cream
- 2 tablespoons powdered sugar
- ½ teaspoon vanilla extract
- Chocolate shavings, for garnish
- Fresh raspberries or strawberries (optional)
Equipment Needed
- 6-8 small ramekins or custard cups (4-6 oz size)
- Fine-mesh sieve
- Mixing bowls (heat-resistant glass preferred)
- Saucepan
- Whisk
- Roasting pan or large baking dish (for water bath)
- Kitchen thermometer (recommended)
Instructions
Preparing the Custard Base
- Preheat your oven to 325°F (163°C).
- Place your chopped chocolate in a medium heat-resistant bowl and set aside.
- In a medium saucepan, combine the heavy cream and milk. If using espresso powder, add it now and whisk to dissolve. Heat over medium heat until small bubbles form around the edges (about 170°F/77°C) – do not bring to a full boil.
- Pour the hot cream mixture over the chopped chocolate and let stand for 1 minute. Then whisk until smooth and the chocolate is completely melted.
- In a separate bowl, whisk together the egg yolks, sugar, and salt until the mixture becomes pale yellow and slightly thickened.
- Tempering the eggs: Slowly drizzle about ½ cup of the warm chocolate mixture into the egg mixture while constantly whisking. This gradually raises the temperature of the eggs without cooking them.
- Continue adding the chocolate mixture to the egg mixture in a slow stream, whisking constantly.
- Once fully combined, stir in the vanilla extract.
- Strain the mixture through a fine-mesh sieve into a clean bowl or measuring cup with a pour spout to catch any bits of cooked egg or undissolved chocolate.
Baking the Custards
- Arrange your ramekins in a large roasting pan or baking dish.
- Carefully divide the custard mixture among the ramekins, filling each about ¾ full.
- Prepare the water bath: Bring a kettle or pot of water to a near-boil. Place the roasting pan with filled ramekins in the oven, then carefully pour the hot water into the pan until it reaches halfway up the sides of the ramekins.
- Cover the entire roasting pan loosely with aluminum foil, creating a tent to allow steam to circulate.
- Bake until the custards are set around the edges but still slightly jiggly in the center, about 25-35 minutes depending on the size of your ramekins. The internal temperature should reach 170-175°F (77-79°C).
- Carefully remove the pan from the oven and allow the custards to cool in the water bath for 15 minutes.
- Remove the ramekins from the water bath and let them cool completely at room temperature.
- Cover each ramekin with plastic wrap, making sure the plastic touches the surface of the custard to prevent a skin from forming.
- Refrigerate for at least 4 hours, preferably overnight.
For Serving
- About 15-20 minutes before serving, remove the pots de crème from the refrigerator to take the chill off slightly.
- Whip the cold heavy cream with powdered sugar and vanilla extract until soft peaks form.
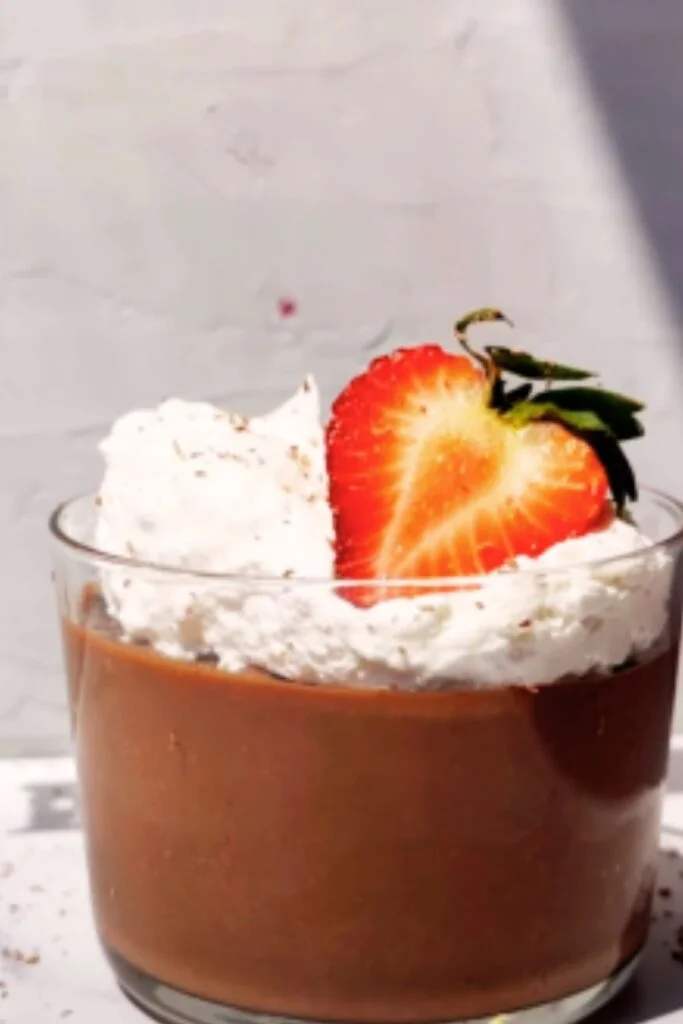
- Top each custard with a dollop of whipped cream.
- Garnish with chocolate shavings and fresh berries if desired.
Troubleshooting Common Issues
Even experienced bakers occasionally encounter challenges with custards. Here are solutions to common problems:
| Issue | Possible Cause | Solution |
|---|---|---|
| Custard is curdled or grainy | Temperature too high during baking | Lower oven temperature and ensure water bath isn’t boiling |
| Custard didn’t set properly | Insufficient baking time or temperature | Extend baking time by 5-minute increments; check for proper jiggle |
| Skin formed on top | Exposure to air during cooling | Ensure plastic wrap touches the surface while cooling |
| Weeping or separation | Overcooking | Reduce baking time; watch for proper jiggle in center |
| Too firm/rubbery | Too many egg yolks or overbaking | Reduce egg yolks by one; check doneness earlier |
| Too bitter | Chocolate percentage too high | Use a lower percentage chocolate or increase sugar |
Variations to Try
While the classic chocolate version remains my favorite, I’ve experimented with several delicious variations over the years:
Flavor Infusions
- Orange-Chocolate: Add 1 tablespoon orange zest to the cream before heating
- Coffee-Chocolate: Increase espresso powder to 2 tablespoons
- Spiced Chocolate: Add ¼ teaspoon cinnamon, a pinch of cayenne, and a pinch of ground cardamom
- Mint Chocolate: Steep 1/4 cup fresh mint leaves in the cream for 30 minutes before straining and proceeding
Texture Additions
- Salted Caramel Layer: Pour a thin layer of cooled salted caramel sauce at the bottom of each ramekin before adding the chocolate mixture
- Praline Crunch: Sprinkle crushed candied hazelnuts between the custard and whipped cream
- Chocolate Cookie Base: Press a thin layer of crushed chocolate cookies at the bottom of each ramekin
Make-Ahead and Storage Tips
One of the aspects I love most about pots de crème is how well they work for entertaining. Here’s my timeline for stress-free dessert prep:
Make-Ahead Schedule
- 2 days ahead: Prepare the chocolate custard mixture and bake in ramekins
- 1 day ahead: Keep chilled in refrigerator with plastic wrap
- 3 hours before serving: Prepare whipped cream and refrigerate separately
- 20 minutes before serving: Remove custards from refrigerator to take the chill off
- Just before serving: Top with whipped cream and garnishes
Storage Guidelines
- Covered pots de crème will keep in the refrigerator for up to 4 days
- The texture is best within the first 2 days
- Do not freeze custards as they will separate when thawed
- Whipped cream can be made up to 4 hours ahead and stored separately
Serving Suggestions
Pots de crème are incredibly versatile when it comes to presentation. Here are some of my favorite serving ideas:
- For an elegant dinner party: Serve in vintage tea cups on saucers with fresh berries and mint leaves
- For a family dessert: Present in small mason jars with cookie spoons
- For a dessert table: Offer in shot glasses as mini desserts alongside other small bites
- For a special touch: Serve with crisp butter cookies or langues de chat for contrasting texture
I particularly enjoy pairing these with a good cup of freshly brewed coffee or espresso. The bitterness of the coffee complements the rich chocolate beautifully. For non-coffee drinkers, chai tea makes an excellent accompaniment.
Nutritional Information
While I believe desserts should be enjoyed without too much guilt, I know many readers appreciate having nutritional information. Here’s the approximate breakdown per serving (assuming 6 servings):
| Nutrient | Amount per Serving |
|---|---|
| Calories | 420 |
| Total Fat | 35g |
| Saturated Fat | 20g |
| Cholesterol | 245mg |
| Sodium | 140mg |
| Total Carbohydrates | 25g |
| Dietary Fiber | 2g |
| Sugars | 20g |
| Protein | 6g |
Note that these values will vary depending on the exact products used and serving size.
The Science Behind the Silkiness
I’ve always been fascinated by the food science that makes these desserts work. Pots de crème achieve their distinctive texture through a process called coagulation. When the proteins in egg yolks are gently heated, they unwind and reconnect, creating a network that traps water molecules and fats.
The key is heating the mixture just enough to cause this protein restructuring without going so far that the proteins tighten excessively (which would result in a rubbery texture or curdling). This is why the water bath is crucial—it ensures an even, gentle heat that allows for perfect coagulation.
Additionally, the fat content in the cream and chocolate creates a rich mouthfeel by coating the palate and slowing the perception of flavor, which is why the taste of chocolate lingers so pleasantly after each bite.
Questions and Answers About Chocolate Pots de Crème
I’ve received many questions about this recipe over the years. Here are the most common ones:
Q: Can I use milk chocolate instead of dark chocolate? Yes, you can substitute milk chocolate, but reduce the sugar to 2-3 tablespoons since milk chocolate is already sweeter. The texture will be slightly softer.
Q: Is there a dairy-free version? You can substitute full-fat coconut milk for the heavy cream and milk. The flavor will have subtle coconut notes, which actually pairs beautifully with chocolate.
Q: My custards cracked on top. What happened? Cracking usually occurs from too high heat. Lower your oven temperature by 25°F next time and ensure your water bath comes up to the proper height around the ramekins.
Q: Can I make this without a water bath? The water bath is essential for the silky texture. Without it, you’ll likely end up with something closer to a baked chocolate pudding—still delicious but not the same luxurious texture.
Q: How do I know when they’re done baking? The edges should be set but the center should still have a slight jiggle—similar to how a cheesecake looks when done. If you have a thermometer, the internal temperature should be 170-175°F (77-79°C).
Q: Can I use this recipe to make one large pot de crème instead of individual servings? Yes, but you’ll need to increase the baking time considerably. A single large dish (about 1-quart capacity) will take approximately 45-55 minutes. Check for the same doneness indicators.
Final Thoughts
What I love most about chocolate pots de crème is how they transform simple ingredients into something truly special. This dessert proves that luxury doesn’t have to be complicated—sometimes it’s found in the perfect execution of basic techniques.
I encourage you to try this recipe the next time you want to impress dinner guests or simply treat yourself to something extraordinary. The process of making these custards can be as enjoyable as eating them, especially when you see how beautifully they turn out.
Remember that practice makes perfect with custards. If your first attempt isn’t exactly as you hoped, don’t be discouraged. Each batch will teach you something about the process, and before long, you’ll be creating pots de crème worthy of the finest Parisian patisserie.
Now, go gather your ingredients and enjoy the process of creating this timeless dessert. Your taste buds will thank you!