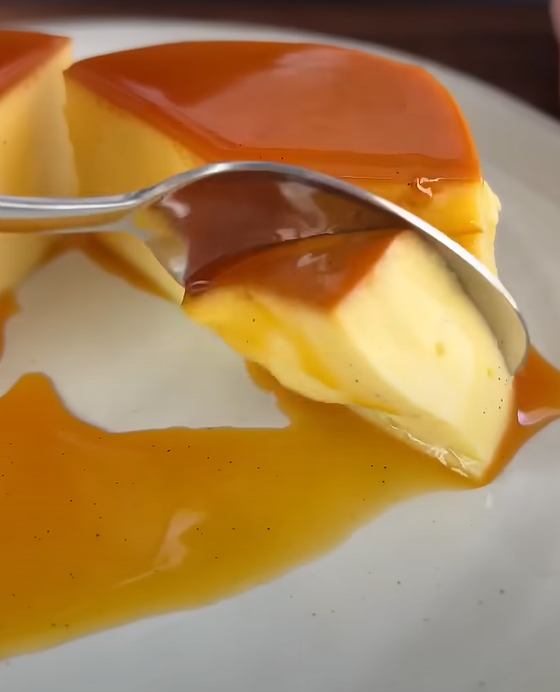
There’s something magical about the moment you flip a perfectly set flan onto a serving plate. The golden caramel cascades down the silky custard like liquid amber, creating an irresistible dessert that has captured hearts across Spain and beyond. I’ve been perfecting my Spanish flan recipe for years, and today I’m sharing everything I’ve learned to help you create this stunning dessert with confidence.
Spanish flan, or “flan de huevo” as it’s traditionally known, represents the pinnacle of simple elegance in dessert making. Unlike its French cousin crème caramel, Spanish flan has its own distinct character – richer, more intensely flavored, and with a texture that melts on your tongue like silk. What makes this recipe truly special is how accessible it is, requiring just a handful of ingredients that you likely already have in your kitchen.
Understanding the Foundation: What Makes Spanish Flan Special
Flan: A baked custard dessert with a layer of soft caramel on top, created by cooking sugar until it caramelizes, then pouring custard mixture over it before baking in a water bath.
Caramel: Sugar that has been heated until it melts and turns golden brown, creating both the base layer and the sauce that flows over the finished flan.
Custard Base: A mixture of eggs, milk, sugar, and vanilla that sets during the gentle baking process to create the smooth, creamy texture.
Bain-Marie: Also known as a water bath, this gentle cooking method prevents the custard from curdling and ensures even cooking throughout.
The beauty of Spanish flan lies in its simplicity. While other desserts might require specialized equipment or exotic ingredients, flan asks for nothing more than patience and attention to detail. I’ve served this to countless dinner guests, and without fail, it becomes the conversation starter of the evening.
Essential Ingredients and Their Roles
Creating the perfect Spanish flan starts with understanding each ingredient’s crucial role in the final product. I’ve learned through countless batches that quality matters immensely here – each component contributes to the overall harmony of flavors and textures.
Ingredient Breakdown Table
| Ingredient | Quantity | Purpose | Quality Tips |
|---|---|---|---|
| Granulated Sugar (Caramel) | 1 cup | Creates golden caramel base | Use pure cane sugar for best flavor |
| Granulated Sugar (Custard) | 3/4 cup | Sweetens and helps set custard | Measure precisely for proper texture |
| Large Eggs | 6 whole eggs | Provides structure and richness | Room temperature eggs blend better |
| Whole Milk | 2 cups | Creates creamy base | Full-fat milk gives richest results |
| Heavy Cream | 1/2 cup | Adds luxurious texture | Essential for authentic Spanish consistency |
| Pure Vanilla Extract | 2 teaspoons | Enhances overall flavor | Real vanilla makes noticeable difference |
| Salt | Pinch | Balances sweetness | Enhances all other flavors |
The eggs serve as the foundation of our custard, providing both the binding properties that allow it to set and the rich flavor that makes flan so satisfying. I always use eggs that have been sitting at room temperature for about 30 minutes – they incorporate much more smoothly than cold eggs straight from the refrigerator.
Milk quality dramatically impacts the final result. I prefer using whole milk because the fat content contributes to that signature creamy mouthfeel. The addition of heavy cream takes this richness to the next level, creating a texture that’s distinctly Spanish in its luxurious feel.
Mastering the Caramel: The Heart of Great Flan
The caramel layer distinguishes exceptional flan from merely good flan. I’ve burned more batches of caramel than I care to admit while learning this technique, but once you understand the process, it becomes almost meditative.
Step-by-Step Caramel Creation
Creating perfect caramel requires attention and patience. I start by placing one cup of granulated sugar in a heavy-bottomed saucepan – the heavy bottom distributes heat evenly and prevents hot spots that can cause burning.
Initial Stage: I place the pan over medium heat without stirring. This might feel counterintuitive, but stirring at this stage can cause crystallization. The sugar will begin melting around the edges first.
Development Stage: As the sugar continues melting, I gently tilt the pan to help even melting. The color will progress from clear to pale yellow, then to golden amber. This process typically takes 8-12 minutes, depending on your stove.
Perfect Timing: The ideal color is deep amber – think of autumn leaves or rich honey. If it looks too light, it won’t have enough flavor. Too dark, and it becomes bitter. I remove it from heat just as it reaches that perfect golden moment.
Working Quickly: Hot caramel waits for no one. I immediately pour it into my flan mold, tilting to coat the bottom evenly. The caramel will harden within minutes, creating our base layer.
Caramel Troubleshooting Guide
| Issue | Cause | Solution | Prevention |
|---|---|---|---|
| Crystallized Sugar | Stirring too early | Start over with clean pan | Don’t stir until sugar begins melting |
| Burned Caramel | Too high heat or too long | Discard and restart | Use medium heat, watch color carefully |
| Uneven Color | Hot spots in pan | Use heavy-bottomed pan | Invest in quality cookware |
| Caramel Too Hard | Overcooked | Normal – will dissolve during baking | Remove from heat at amber stage |
Crafting the Perfect Custard Base
The custard base requires a gentle touch and understanding of how eggs behave under heat. I’ve learned that the secret lies in proper temperature control and gradual incorporation of ingredients.
Temperature Management
I begin by warming the milk and cream in a saucepan until it’s just steaming – not boiling. Boiling will create a skin on top and can affect the final texture. While the milk warms, I whisk the eggs and sugar together until they’re well combined but not frothy. Frothy eggs can create an undesirable foam layer on your finished flan.
The Tempering Process: This step prevents the eggs from scrambling when they meet the warm milk. I slowly pour about half the warm milk into the egg mixture while whisking constantly. This gradually raises the temperature of the eggs without shocking them.
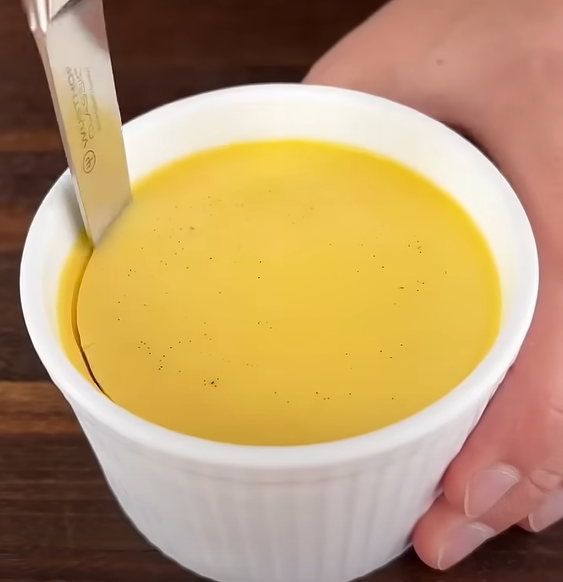
Straining for Perfection: I always strain the custard mixture through a fine-mesh sieve before pouring it over the caramel. This removes any bits of cooked egg or milk skin that might have formed, ensuring a perfectly smooth texture.
The Baking Process: Low and Slow Perfection
Baking flan properly requires understanding the principle of gentle, even heat. I use the bain-marie method, which surrounds our flan mold with hot water, creating a cushion of gentle steam heat that cooks the custard evenly from all sides.
Setting Up Your Water Bath
I preheat my oven to 325°F (163°C) – lower than many recipes suggest, but this gentler temperature prevents the custard from curdling or developing an unpleasant rubbery texture. While the oven heats, I prepare my water bath setup.
Choosing the Right Pan: I use a roasting pan or large baking dish that’s deep enough to hold water halfway up the sides of my flan mold. The water acts as insulation, preventing the direct oven heat from cooking the custard too quickly.
Water Temperature Matters: I fill the roasting pan with hot tap water after placing the flan mold inside. Hot water gives us a head start on the cooking process and helps maintain consistent temperature throughout baking.
Baking Timeline and Testing
The baking process typically takes 50-60 minutes, but I’ve learned not to rely solely on time. Instead, I use the knife test – inserting a thin knife about an inch from the center. When it comes out clean, the flan is done.
Visual Cues: A properly baked flan will be set around the edges but still have a slight jiggle in the center when you gently shake the mold. The top should be golden but not browned.
Cooling Process: I remove the flan from the water bath and let it cool to room temperature before refrigerating. This gradual cooling prevents cracking and allows the custard to fully set.
Unmolding: The Moment of Truth
Unmolding flan successfully requires technique and timing. I always chill my flan for at least 4 hours, though overnight is even better. The custard needs to be completely set and chilled through.
Professional Unmolding Technique
Preparation: I run a thin knife around the edges of the mold to loosen any spots where the custard might be sticking. This prevents tearing when I invert the flan.
The Inversion: I place my serving plate upside down over the flan mold, then quickly flip both together. I let gravity do the work rather than shaking or banging the mold.
Patience Pays: After inverting, I leave the mold in place for several minutes. The caramel needs time to warm slightly and begin flowing. When I lift the mold, the caramel should cascade beautifully down the sides.
Variations and Flavor Combinations
While traditional Spanish flan is perfection in its simplicity, I enjoy experimenting with subtle variations that complement rather than overwhelm the classic flavors.
Popular Flavor Variations
Coffee Flan: I dissolve 2 tablespoons of instant espresso powder in the warm milk for a sophisticated coffee flavor that pairs beautifully with the vanilla base.
Orange Flan: Adding the zest of two oranges to the custard base creates a bright, citrusy note that feels refreshing after a heavy meal.
Coconut Flan: Substituting half the milk with coconut milk creates a tropical variation that’s become incredibly popular at my dinner parties.
Rum Flan: A tablespoon of dark rum added to the custard base provides a subtle warmth that’s particularly welcome during cooler months.
Texture Modifications
| Variation | Modification | Result | Best For |
|---|---|---|---|
| Extra Silky | Add 2 extra egg yolks | Richer, creamier texture | Special occasions |
| Lighter Version | Reduce cream to 1/4 cup | Less dense, more delicate | Daily dessert |
| Firmer Set | Add 1 extra whole egg | Holds shape better | Transport or events |
| Individual Portions | Use ramekins | Personal-sized servings | Elegant presentation |
Nutritional Information and Dietary Considerations
Understanding the nutritional profile of Spanish flan helps with meal planning and accommodating various dietary needs.
Comprehensive Nutritional Breakdown
| Nutrient | Per Serving (1/8 of recipe) | Daily Value % | Notes |
|---|---|---|---|
| Calories | 285 | 14% | Moderate for dessert |
| Total Fat | 12g | 15% | Mostly from eggs and cream |
| Saturated Fat | 7g | 35% | Consider portion size |
| Cholesterol | 185mg | 62% | High due to eggs |
| Sodium | 95mg | 4% | Relatively low |
| Total Carbs | 38g | 14% | Primarily from sugar |
| Protein | 8g | 16% | Good protein content |
| Calcium | 180mg | 18% | Benefits from dairy |
| Vitamin A | 380 IU | 8% | From eggs and dairy |
The protein content in flan makes it more satisfying than many other desserts, while the calcium contributes to daily nutritional needs. However, the high cholesterol and saturated fat content means it’s best enjoyed in moderation as part of a balanced diet.
Storage and Make-Ahead Tips
One of the greatest advantages of Spanish flan is how well it keeps and even improves with time. I often make mine 2-3 days ahead of serving, allowing the flavors to meld and develop.
Optimal Storage Methods
Refrigeration: Properly stored flan keeps beautifully for up to 5 days in the refrigerator. I cover mine with plastic wrap, being careful not to let the wrap touch the surface of the caramel.
Unmolded Storage: Once unmolded, flan should be consumed within 24 hours for best appearance, though it remains safe longer. The caramel will continue to flow and may pool around the base.
Freezing Considerations: While technically possible, I don’t recommend freezing flan. The texture changes significantly, becoming grainy and losing that signature silky smoothness.
Make-Ahead Strategy
For entertaining, I follow this timeline:
- 3 days ahead: Make and bake the flan, refrigerate in mold
- Day of serving: Unmold 2-4 hours before serving
- Just before serving: Add any garnishes or accompaniments
Serving Suggestions and Accompaniments
Spanish flan is stunning on its own, but thoughtful accompaniments can elevate the experience without overwhelming the delicate flavors.
Traditional Accompaniments
Fresh Berries: I love serving flan with fresh strawberries or raspberries. Their natural acidity provides a lovely contrast to the rich sweetness of the custard.
Whipped Cream: A small dollop of lightly sweetened whipped cream adds textural interest and helps balance the intensity of the caramel.
Mint Garnish: A single sprig of fresh mint not only looks elegant but provides a subtle aromatic note that enhances the vanilla flavors.
Creative Presentation Ideas
Individual Ramekins: Making individual flans allows for more elegant plating and portion control. I use 4-ounce ramekins and adjust the baking time to 35-40 minutes.
Layered Parfait Style: For casual settings, I sometimes break tradition and layer crumbled flan with fresh fruit and cream in glasses for a deconstructed presentation.
Holiday Variations: During holidays, I might dust the plate with cinnamon or add a few toasted almonds for seasonal flair.
Troubleshooting Common Issues
Even experienced cooks encounter challenges with flan. I’ve compiled solutions to the most common problems I’ve encountered over the years.
Texture Problems and Solutions
| Problem | Symptoms | Likely Cause | Solution |
|---|---|---|---|
| Grainy Texture | Rough, not smooth | Eggs cooked too fast | Lower oven temp, use water bath |
| Rubbery Flan | Tough, bouncy texture | Overbaked | Reduce baking time, test earlier |
| Watery Flan | Liquid separating out | Underbaked or poor eggs | Bake longer, use fresh eggs |
| Cracked Top | Surface splits | Temperature shock | Cool gradually, gentler baking |
| Won’t Set | Still liquid after cooling | Insufficient eggs or underbaked | Check egg ratio, bake longer |
Caramel Challenges
Caramel Too Light: If your caramel lacks flavor, it wasn’t cooked long enough. The sugar needs to reach that deep amber stage for proper flavor development.
Stuck to Pan: Sometimes caramel hardens too much and won’t release. I’ve learned to work quickly and sometimes warm the bottom of the mold slightly with a kitchen torch to help release.
Uneven Distribution: If caramel doesn’t coat evenly, work faster next time and tilt the mold immediately after pouring while the caramel is still fluid.
Questions and Answers
Q: Can I make Spanish flan without a traditional flan mold? I absolutely make flan in various containers all the time. Any oven-safe dish works beautifully – I’ve used cake pans, pie dishes, and even large ramekins. The key is ensuring whatever you choose can withstand the water bath method and has enough depth for the custard layer.
Q: Why does my flan sometimes have bubbles on the surface? Bubbles typically form when the custard mixture gets too frothy during mixing or when the oven temperature is too high. I prevent this by whisking gently and straining the mixture before pouring. If bubbles do appear, I skim them off with a spoon before baking.
Q: How do I know when the caramel is the perfect color? The perfect caramel color resembles deep amber or honey. I look for a rich golden brown that’s darker than light caramel but not so dark it looks burnt. It should smell nutty and sweet, not bitter. This usually takes 10-12 minutes over medium heat.
Q: Can I substitute any ingredients to make it healthier? I’ve experimented with various substitutions over the years. You can use low-fat milk instead of whole milk, though the texture will be less rich. Sugar substitutes designed for baking can work, but they may affect the caramel formation. I don’t recommend egg substitutes as they won’t provide the proper setting properties.
Q: What’s the difference between Spanish flan and crème caramel? While similar, Spanish flan typically uses more eggs and often includes cream, making it richer and denser than French crème caramel. Spanish flan also traditionally uses a slightly different ratio of milk to eggs, resulting in a more intensely flavored custard with a firmer texture.
Q: My flan cracked during baking. What went wrong? Cracking usually occurs from temperature shock or overbaking. I ensure my oven isn’t too hot (325°F is perfect), use the water bath method for gentle heat, and avoid opening the oven door during baking. Rapid cooling can also cause cracking, so I let mine cool gradually.
Q: How long should I wait before unmolding? Patience is crucial here. I always wait at least 4 hours, but overnight is even better. The flan needs to be completely chilled and set. When properly chilled, it should feel firm when gently pressed in the center.
Q: Can I make this dairy-free? I’ve successfully made dairy-free versions using full-fat coconut milk and coconut cream. The flavor changes significantly, becoming more tropical, but the technique remains the same. Almond milk doesn’t work as well due to its thinner consistency.
Q: Why didn’t my caramel sauce form properly? If your caramel doesn’t create a flowing sauce when unmolding, it may have been overcooked and hardened too much. The baking process should soften it again, but severely overcooked caramel won’t fully dissolve. Also, make sure your flan is completely chilled before unmolding.
Q: Is it normal for the caramel to be hard before baking? Yes, completely normal! The caramel hardens as it cools, creating what seems like a solid layer at the bottom of your mold. During the gentle baking process, it softens and becomes the flowing sauce that cascades over your finished flan. This transformation is part of the magic of flan-making.
Creating perfect Spanish flan is a journey of patience, technique, and understanding. Each element – from the amber caramel to the silky custard – plays its part in creating this timeless dessert. I encourage you to embrace the process, learn from each batch, and soon you’ll be creating flan that rivals the best Spanish kitchens. The reward of that first perfect slice, with caramel flowing like liquid gold, makes every moment of care worthwhile.