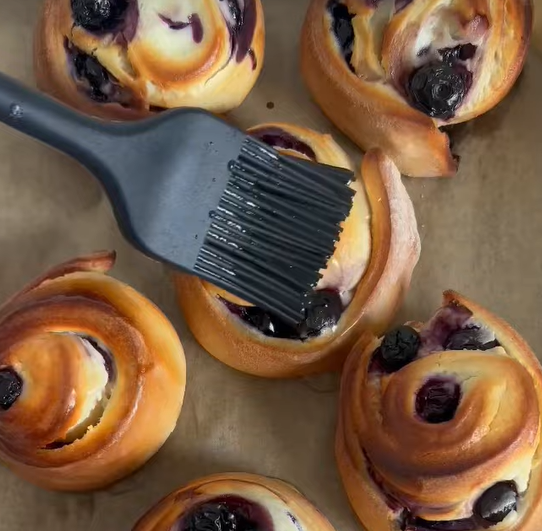
When I first discovered the magic of stuffed cookies, my baking world completely transformed. There’s something absolutely enchanting about biting into what appears to be an ordinary cookie, only to discover a delightful surprise hidden within. Today, I’m thriving to share with you my absolute favorite creation: Big Blue Monster Stuffed Cookies that’ll have everyone begging for the recipe.
These aren’t your grandmother’s simple chocolate chip cookies. We’re talking about massive, chewy, blue-tinted cookies stuffed with creamy goodness that practically melts in your mouth. The “monster” in their name comes from their impressive size and the way they devour your taste buds with flavor. Trust me, once you master this recipe, you’ll become the hero of every baking occasion.
Understanding the Blue Monster Cookie Phenomenon
Stuffed Cookies : Oversized cookies with a filling baked directly inside the dough, creating a surprise center that adds texture and flavor complexity.
Blue Food Coloring : Food-grade coloring agent that creates the signature monster appearance while remaining completely safe for consumption.
Cookie Dough Consistency : The perfect balance between wet and dry ingredients that allows the dough to hold its shape while accommodating the filling without breaking apart during baking.
Filling Integration : The technique of completely encasing the filling within cookie dough to prevent leakage during the baking process.
The science behind these cookies fascinates me every single time I make them. The outer dough acts as a protective shell, steaming the inner filling just enough to create that perfect gooey center. Meanwhile, the blue coloring isn’t just for show—it creates visual excitement that makes these cookies absolutely irresistible to both kids and adults.
Essential Ingredients Breakdown
Creating perfect Blue Monster Stuffed Cookies requires understanding each ingredient’s role in the final product. I’ve experimented with countless variations, and this combination delivers consistently outstanding results.
| Ingredient | Quantity | Purpose | Substitution Options |
|---|---|---|---|
| All-Purpose Flour | 2¼ cups | Structure and stability | Cake flour (reduces density) |
| Unsalted Butter | 1 cup (softened) | Richness and texture | Coconut oil (different flavor profile) |
| Brown Sugar | ¾ cup (packed) | Moisture and chewiness | Coconut sugar (slight flavor change) |
| Granulated Sugar | ½ cup | Sweetness and spread | Stevia blend (reduce quantity) |
| Large Eggs | 2 whole | Binding and richness | Flax eggs for vegan option |
| Vanilla Extract | 2 teaspoons | Flavor enhancement | Almond extract (use half amount) |
| Baking Soda | 1 teaspoon | Leavening agent | Baking powder (use 1.5 times more) |
| Salt | 1 teaspoon | Flavor balance | Sea salt or kosher salt |
| Blue Food Coloring | 6-8 drops | Visual appeal | Natural butterfly pea flower powder |
| Mini Chocolate Chips | 1 cup | Texture contrast | White chips or butterscotch |
Filling Varieties That’ll Blow Your Mind
The beauty of stuffed cookies lies in their versatility. I’ve discovered that certain fillings work magnificently, while others can turn into disappointing disasters. Here’s my tested collection of winning combinations:
Cream Cheese Filling : Mix 8 oz softened cream cheese with ¼ cup powdered sugar and 1 teaspoon vanilla. This creates the most luxurious, tangy center.
Nutella Surprise : Simply use 1 tablespoon of Nutella per cookie. The heat transforms it into molten chocolate heaven.
Peanut Butter Dream : Combine ½ cup creamy peanut butter with 2 tablespoons powdered sugar for stability.
Cookie Dough Center : Use store-bought edible cookie dough or make your own eggless version for the ultimate meta-cookie experience.
The key principle I’ve learned is that your filling must be thick enough to hold its shape but not so dense that it creates hard pockets. Room temperature consistency works perfectly for most fillings.
Step-by-Step Cookie Creation Process
My method has evolved through hundreds of batches, and I’ve refined it to eliminate common pitfalls that plague stuffed cookie attempts.
Preparation Phase Start by preheating your oven to 350°F (175°C). Line your baking sheets with parchment paper, ensuring you have enough space for these generously sized cookies. In my experience, each cookie needs about 3 inches of space on all sides.
Dough Development Cream the softened butter with both sugars using an electric mixer for approximately 3 minutes until the mixture becomes light and fluffy. This step absolutely cannot be rushed—proper creaming creates the foundation for texture. Add eggs one at a time, beating well after each addition, then incorporate vanilla extract and blue food coloring.
In a separate bowl, whisk together flour, baking soda, and salt. Gradually add this dry mixture to your wet ingredients, mixing just until combined. Overmixing develops gluten, resulting in tough cookies instead of the tender texture we’re aiming for. Fold in mini chocolate chips during the final moments of mixing.
Assembly Technique This part requires patience and practice. Scoop approximately 2 tablespoons of dough and flatten it in your palm. Place 1 tablespoon of your chosen filling in the center, then top with another 2 tablespoons of dough. Gently seal the edges, ensuring no filling shows through. Roll the assembled cookie into a ball, then slightly flatten it on your baking sheet.
Baking Precision Bake for 11-13 minutes, watching carefully during the final minutes. The edges should be set but the centers still appear slightly underbaked. This technique ensures gooey centers once they cool. Remove from oven and let them rest on the baking sheet for 5 minutes before transferring to cooling racks.

Troubleshooting Common Disasters
Through my baking journey, I’ve encountered every possible stuffed cookie catastrophe. Here’s how to avoid them:
| Problem | Cause | Solution |
|---|---|---|
| Filling leaks out | Inadequate sealing | Press edges firmly, use less filling |
| Cookies spread too much | Warm dough | Chill dough 30 minutes before baking |
| Centers are too hard | Overbaking | Reduce time by 1-2 minutes |
| Uneven blue color | Insufficient mixing | Add coloring earlier in process |
| Cookies crack on top | Oven too hot | Reduce temperature by 25°F |
| Flat cookies | Old baking soda | Replace leavening agents every 6 months |
Creative Variations and Flavor Combinations
Once you’ve mastered the basic technique, the possibilities become endless. I’ve experimented with numerous variations that have become family favorites.
Rainbow Monster Series Create different colored versions using various food colorings. Red monster cookies with strawberry filling, green ones with mint cream, or purple versions with grape-flavored centers.
Seasonal Adaptations During autumn, I incorporate pumpkin spice into the dough and use cinnamon cream filling. Winter calls for peppermint extract and white chocolate centers, while summer demands lemon zest with berry fillings.
Texture Modifications Add chopped nuts, coconut flakes, or even crushed pretzels to the base dough for surprising texture contrasts. Each addition changes the cookie’s personality completely.
Storage and Serving Strategies
Proper storage makes the difference between cookies that remain delicious for weeks versus those that become stale overnight. I store my Big Blue Monster Stuffed Cookies in airtight containers with parchment paper between layers. They maintain their texture for up to one week at room temperature.
For longer storage, these cookies freeze beautifully. Wrap individually in plastic wrap, then place in freezer bags. They’ll keep for up to three months frozen. Thaw at room temperature for the best texture restoration.
Serving Suggestions These cookies shine brightest when served slightly warm. A quick 10-second microwave warming transforms them back to their fresh-baked glory. Pair them with cold milk, hot coffee, or vanilla ice cream for an elevated dessert experience.
Consider presenting them on colorful plates that complement their blue appearance. The visual impact enhances the eating experience significantly.
Nutritional Considerations and Modifications
| Nutritional Aspect | Per Cookie (Standard Recipe) | Healthier Modification |
|---|---|---|
| Calories | ~280 | Use sugar substitutes (-50 calories) |
| Sugar Content | 18g | Reduce by using stevia blend |
| Fat Content | 12g | Substitute applesauce for half the butter |
| Fiber | 1g | Add ground flaxseed (+2g fiber) |
| Protein | 4g | Include protein powder in filling (+8g) |
For those managing dietary restrictions, these cookies adapt well to various modifications. Gluten-free flour blends work effectively, though the texture changes slightly. Vegan versions using plant-based butter and egg replacers produce surprisingly good results, though the texture becomes somewhat denser.
Advanced Techniques for Professional Results
After perfecting hundreds of batches, I’ve developed professional techniques that elevate these cookies from good to absolutely extraordinary.
Temperature Control Mastery Room temperature ingredients blend more effectively than cold ones. I remove eggs and butter from refrigeration 2 hours before baking. This simple step improves texture consistency dramatically.
Dough Resting Benefits Allowing the assembled dough to rest for 15 minutes before baking allows flavors to meld and prevents excessive spreading. This technique originated from professional bakeries and works wonderfully for home bakers.
Altitude Adjustments High-altitude baking requires modifications. Reduce sugar by 2 tablespoons, increase flour by 1-2 tablespoons, and bake at 375°F instead of 350°F for optimal results.
Frequently Asked Questions
Q: Can I make the dough ahead of time and bake later? Absolutely! I actually prefer this method because it develops flavors. Prepare the dough, assemble the cookies, then refrigerate for up to 24 hours before baking. Add 1-2 extra minutes to the baking time if baking from cold.
Q: Why do my cookies turn out flat instead of thick? This usually happens when the butter is too warm or the dough hasn’t been chilled enough. Make sure your butter is softened but not melted, and chill the assembled cookies for 30 minutes before baking.
Q: Can I freeze the unbaked assembled cookies? Yes! This works wonderfully for meal prep. Freeze the assembled cookies on baking sheets, then transfer to freezer bags once solid. Bake directly from frozen, adding 2-3 extra minutes to the baking time.
Q: What’s the best way to achieve even blue coloring? Add the food coloring to the butter and sugar mixture during the creaming process. This ensures even distribution throughout the dough. Gel food coloring works better than liquid for vibrant colors.
Q: How do I prevent the filling from becoming too hard when baked? Choose fillings with higher fat content, like cream cheese or Nutella, which remain soft when heated. Avoid fillings with high sugar content that can crystallize during baking.
Q: Can I make mini versions of these cookies? Certainly! Use 1 tablespoon of dough per cookie half and reduce the filling to 1 teaspoon. Bake for 8-10 minutes instead of the full time.
Q: What’s causing my cookies to crack on top? Cracking usually indicates the oven temperature is too high or the cookies are overbaked. Reduce temperature by 25°F and watch them carefully during the last few minutes of baking.
Q: How can I make the blue color more vibrant? Use gel food coloring instead of liquid, and add it gradually until you achieve the desired shade. Natural alternatives like butterfly pea flower powder create beautiful blue hues with added health benefits.
Creating perfect Big Blue Monster Stuffed Cookies requires patience, practice, and attention to detail, but the results are absolutely worth every effort. These cookies have become my signature treat, bringing joy to countless gatherings and creating memories that last far beyond the last crumb. The combination of visual appeal, surprising texture, and customizable flavors makes them suitable for any occasion, from casual family dinners to elegant celebrations.
Remember that baking is both an art and a science. While following recipes provides the foundation, don’t be afraid to experiment with flavors, fillings, and presentation styles that reflect your personal taste. Each batch teaches you something new about the process, helping you develop your own unique variations that’ll become treasured family traditions.
The magic of these cookies lies not just in their delicious taste, but in the joy they bring to others. There’s something special about watching someone’s face light up when they discover the hidden filling, creating those precious moments that make all the mixing, measuring, and waiting absolutely worthwhile.


