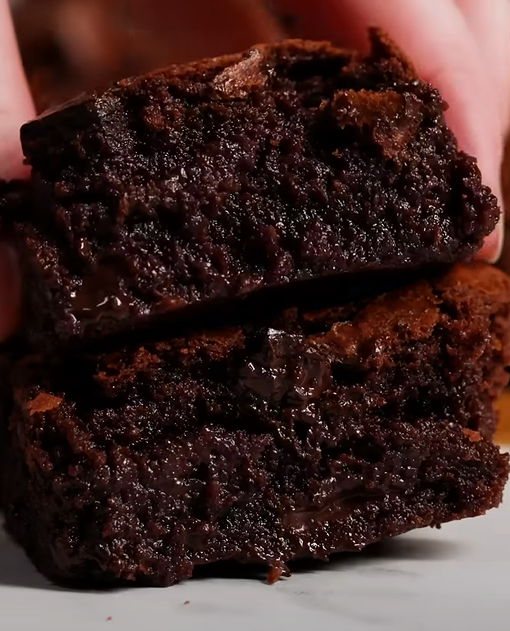
I’ve spent countless hours perfecting what I believe to be the ultimate fudgy brownie recipe, and I’m thrilled to share my secrets with you. These aren’t just any brownies – they’re the kind that make people close their eyes when they take that first bite, the kind that disappear from the pan before they’ve completely cooled. If you’ve been searching for that perfect balance between rich chocolate flavor and melt-in-your-mouth texture, you’ve found your recipe.
The journey to creating the world’s fudgiest brownies taught me that success lies in understanding the science behind baking. It’s not just about throwing ingredients together; it’s about creating the perfect environment for chocolate to shine while achieving that coveted fudgy texture that sets exceptional brownies apart from ordinary ones.
Understanding Fudgy vs. Cakey Brownies
Before diving into my recipe, let me explain what makes brownies truly fudgy. The texture difference comes down to ingredient ratios and mixing techniques.
Fudgy Brownies: : Higher fat-to-flour ratio creates dense, moist texture : Less air incorporation during mixing : Higher chocolate and butter content : Lower baking temperature for longer time
Cakey Brownies: : Higher flour content creates lighter structure : More eggs and leavening agents : Extended mixing incorporates air : Higher baking temperature for shorter time
Chewy Brownies: : Moderate fat-to-flour ratio : Addition of corn syrup or extra egg yolks : Balanced mixing technique : Medium baking temperature and time
My recipe specifically targets the fudgy category because that’s where chocolate flavor truly intensifies and creates that luxurious mouthfeel we all crave.
Essential Ingredients for Ultimate Fudginess
The foundation of exceptional brownies starts with premium ingredients. I’ve tested countless variations, and these specific components consistently deliver outstanding results.
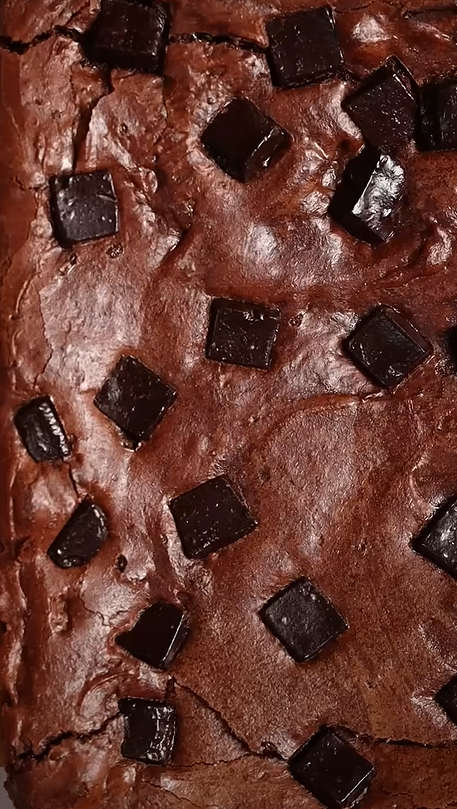
High-Quality Chocolate: : Use 70% dark chocolate for depth : Avoid chocolate chips – they contain stabilizers : Combine with cocoa powder for double chocolate impact : European chocolate brands often yield superior results
Fat Components: : Unsalted butter provides richness and flavor : Room temperature butter incorporates better : Don’t substitute with oil – butter creates superior texture : European-style butter has higher fat content
Sugar Selection: : Granulated sugar creates structure : Brown sugar adds moisture and complexity : The ratio affects final texture significantly : Never substitute with artificial sweeteners
Egg Considerations: : Large eggs at room temperature : Whole eggs provide structure and richness : Don’t over-beat – gentle incorporation is key : Fresh eggs produce better results
My Ultimate Fudgy Brownie Recipe
After years of experimentation, this recipe consistently produces the fudgiest, most decadent brownies I’ve ever tasted. The secret lies in the technique as much as the ingredients.
Ingredients
| Ingredient | Amount | Purpose | Notes |
|---|---|---|---|
| Dark chocolate (70%) | 8 oz (225g) | Primary chocolate flavor | Chopped, not chips |
| Unsalted butter | 1 cup (226g) | Fat for fudginess | Room temperature |
| Granulated sugar | 1 cup (200g) | Structure and sweetness | Fine granulated works best |
| Light brown sugar | ½ cup (100g) | Moisture and complexity | Packed measurement |
| Large eggs | 3 whole | Binding and richness | Room temperature essential |
| Vanilla extract | 2 teaspoons | Flavor enhancement | Pure vanilla only |
| All-purpose flour | ¾ cup (94g) | Structure | Measured by weight preferred |
| Cocoa powder | ¼ cup (25g) | Double chocolate intensity | Dutch-processed preferred |
| Salt | ½ teaspoon | Flavor enhancement | Fine sea salt |
| Espresso powder | 1 teaspoon | Chocolate flavor booster | Optional but recommended |
Step-by-Step Instructions
- Preparation Phase
- Preheat oven to 325°F (163°C) – lower temperature is crucial
- Line 9×9 inch pan with parchment paper, leaving overhang
- Lightly grease parchment with butter
- Position oven rack in center
- Chocolate Melting Process
- Chop chocolate into uniform pieces
- Create double boiler with simmering water
- Melt chocolate and butter together slowly
- Stir constantly until completely smooth
- Remove from heat and let cool slightly
- Sugar Integration
- Whisk both sugars into warm chocolate mixture
- Mix until completely dissolved
- Don’t worry if mixture looks grainy initially
- Continue whisking until smooth and glossy
- Egg Addition Technique
- Add eggs one at a time
- Whisk vigorously after each addition
- Mixture should become glossy and thick
- Add vanilla extract and mix thoroughly
- Dry Ingredient Incorporation
- Sift flour, cocoa powder, salt, and espresso powder together
- Add dry ingredients to chocolate mixture
- Fold gently with rubber spatula
- Stop mixing as soon as flour disappears
- Baking Process
- Pour batter into prepared pan
- Spread evenly but don’t overwork
- Bake for 35-40 minutes
- Center should still jiggle slightly when done
- Toothpick should have moist crumbs, not clean
- Cooling and Cutting
- Cool completely in pan (at least 2 hours)
- Use parchment overhang to lift out
- Cut with sharp knife, cleaning between cuts
- Store covered at room temperature
Pro Tips for Perfect Fudginess
Through my extensive testing, I’ve discovered several techniques that separate good brownies from extraordinary ones. These details make all the difference.
Temperature Control: My oven runs hot, so I always use an oven thermometer to verify actual temperature. Fudgy brownies require precise heat control. Too hot, and you’ll get cakey edges; too cool, and they won’t set properly.
Mixing Method: I learned this from professional bakers: once you add flour, treat the batter like precious cargo. Overmixing develops gluten, which creates tough, chewy brownies instead of tender, fudgy ones.
Doneness Testing: Forget the clean toothpick rule for fudgy brownies. I look for moist crumbs clinging to the tester and a center that jiggles just slightly when gently shaken. The brownies continue cooking from residual heat after removal.
Pan Selection: I prefer metal pans over glass because they conduct heat more evenly. Dark pans absorb heat faster, so I reduce temperature by 25°F when using them. The 9×9 inch size creates the perfect thickness.
Troubleshooting Common Issues
Even experienced bakers encounter challenges. Here’s my guide to solving the most frequent brownie problems.
| Problem | Cause | Solution |
|---|---|---|
| Dry, crumbly texture | Overbaking or too much flour | Reduce baking time, measure flour by weight |
| Cakey instead of fudgy | Too much mixing or leavening | Fold ingredients gently, avoid baking powder |
| Greasy or oily surface | Too much fat or improper mixing | Check ingredient ratios, don’t overmix |
| Sunken center | Underbaking or temperature too high | Extend baking time, verify oven temperature |
| Hard, crusty top | Oven too hot or rack position wrong | Lower temperature, center rack position |
| Uneven baking | Hot spots in oven | Rotate pan halfway through baking |
Flavor Variations and Add-Ins
While my base recipe is perfection on its own, sometimes I enjoy experimenting with complementary flavors. The key is not overwhelming the chocolate base.
Nuts and Seeds: I toast walnuts or pecans before folding them in during the last mixing step. About ¾ cup works perfectly without disrupting the fudgy texture. Hazelnuts pair beautifully with dark chocolate, while almonds add subtle sophistication.
Fruit Additions: Dried cherries or cranberries provide tart contrast to rich chocolate. I soak them in warm water for 10 minutes, then pat dry before adding. Fresh raspberries work wonderfully too – I fold them in very gently to avoid breaking.
Flavor Extracts: Peppermint extract transforms these into restaurant-quality mint brownies. I use just ½ teaspoon – more overwhelms the chocolate. Orange zest brightens the flavor profile beautifully.
Spice Enhancements: A pinch of cinnamon adds warmth without being detectable. Cayenne pepper creates sophisticated heat that complements dark chocolate. Start with just ⅛ teaspoon and adjust to taste.
Storage and Serving Suggestions
Proper storage maintains that perfect fudgy texture I worked so hard to achieve. Room temperature storage in an airtight container keeps them fresh for up to one week. I place parchment paper between layers to prevent sticking.
For longer storage, I wrap individual portions in plastic wrap and freeze for up to three months. They thaw beautifully at room temperature in about 30 minutes.
Serving Ideas:
- Warm slightly and serve with vanilla ice cream
- Dust with powdered sugar for elegant presentation
- Drizzle with caramel or raspberry sauce
- Serve alongside fresh berries and whipped cream
- Cut into small squares for dessert platters
- Crumble over yogurt or oatmeal for breakfast treats
Nutritional Information
Understanding the nutritional content helps with portion planning and dietary considerations.
| Nutrient | Per Serving (1/16 of recipe) | Daily Value % |
|---|---|---|
| Calories | 285 | 14% |
| Total Fat | 16g | 25% |
| Saturated Fat | 10g | 50% |
| Cholesterol | 55mg | 18% |
| Sodium | 95mg | 4% |
| Total Carbohydrates | 35g | 12% |
| Dietary Fiber | 3g | 12% |
| Sugars | 28g | – |
| Protein | 4g | 8% |
| Iron | 2mg | 11% |
The Science Behind Fudginess
Understanding why my recipe works helps you replicate success every time. The science fascinates me, and it’s transformed my baking.
Fat content creates the dense, moist texture we associate with fudgy brownies. My recipe uses more fat relative to flour compared to cakey versions. The chocolate and butter combination provides both flavor and the necessary fat structure.
Lower baking temperature allows even cooking without overdrying edges. Many recipes call for 350°F, but I’ve found 325°F produces more consistent results across different ovens and altitudes.
The sugar ratio affects texture significantly. Granulated sugar provides structure while brown sugar adds moisture. Too much of either throws off the balance.
Minimal mixing prevents gluten development. Once flour goes in, I treat the batter gently. Gluten creates chewiness and structure – the opposite of what we want in fudgy brownies.
Frequently Asked Questions
Q: Can I make these brownies ahead of time? Absolutely! I often make them a day ahead because the flavors actually improve overnight. The chocolate taste deepens and the texture becomes even more luxurious. Store covered at room temperature.
Q: Why do my brownies always turn out cakey? This usually happens from overmixing once the flour is added, or using too much flour. I measure flour by weight when possible, and I fold ingredients just until combined. Also check your oven temperature – too hot creates cakey texture.
Q: Can I use milk chocolate instead of dark chocolate? While you can substitute milk chocolate, the result will be much sweeter and less intensely chocolatey. I recommend using at least 60% dark chocolate for proper flavor balance. The cocoa powder helps maintain chocolate intensity.
Q: My brownies are too sweet. How can I reduce the sweetness? Try increasing the cocoa powder to ⅓ cup and using 85% dark chocolate instead of 70%. You can also reduce the granulated sugar by 2 tablespoons, though this may slightly affect texture.
Q: Can I double this recipe? Yes, but use a 9×13 inch pan instead of two smaller pans. The baking time will increase to about 45-50 minutes. Watch for the same doneness cues – slight jiggle in center and moist crumbs on toothpick.
Q: Why did my brownies sink in the middle? This usually indicates underbaking or oven temperature too high. The edges set first, creating a crust, while the center remains liquid. Use an oven thermometer to verify temperature and extend baking time if needed.
Q. How do I know when brownies are perfectly done? I look for several signs: the surface should look set but still slightly glossy, the center should jiggle just barely when gently shaken, and a toothpick should come out with moist crumbs clinging to it. The internal temperature should reach about 200°F.
Q: Can I make these gluten-free? I’ve successfully substituted the all-purpose flour with almond flour, using about ½ cup instead of ¾ cup. The texture changes slightly – they become more dense and rich – but they’re still deliciously fudgy.
Q: What’s the best way to cut clean squares? I cool the brownies completely, then refrigerate for 30 minutes to firm up. Using a sharp knife, I clean the blade between each cut with a damp towel. Gentle sawing motion works better than pressing straight down.
These brownies represent my passion for creating desserts that bring joy to people’s lives. I’ve served them at family gatherings, brought them to office parties, and gifted them to neighbors. The reaction is always the same – pure delight followed by requests for the recipe.
The beauty of this recipe lies not just in its incredible taste, but in its reliability. Once you master the technique, you’ll have a go-to dessert that never fails to impress. Whether you’re baking for a special occasion or simply treating yourself, these fudgy brownies deliver consistent, exceptional results every single time.