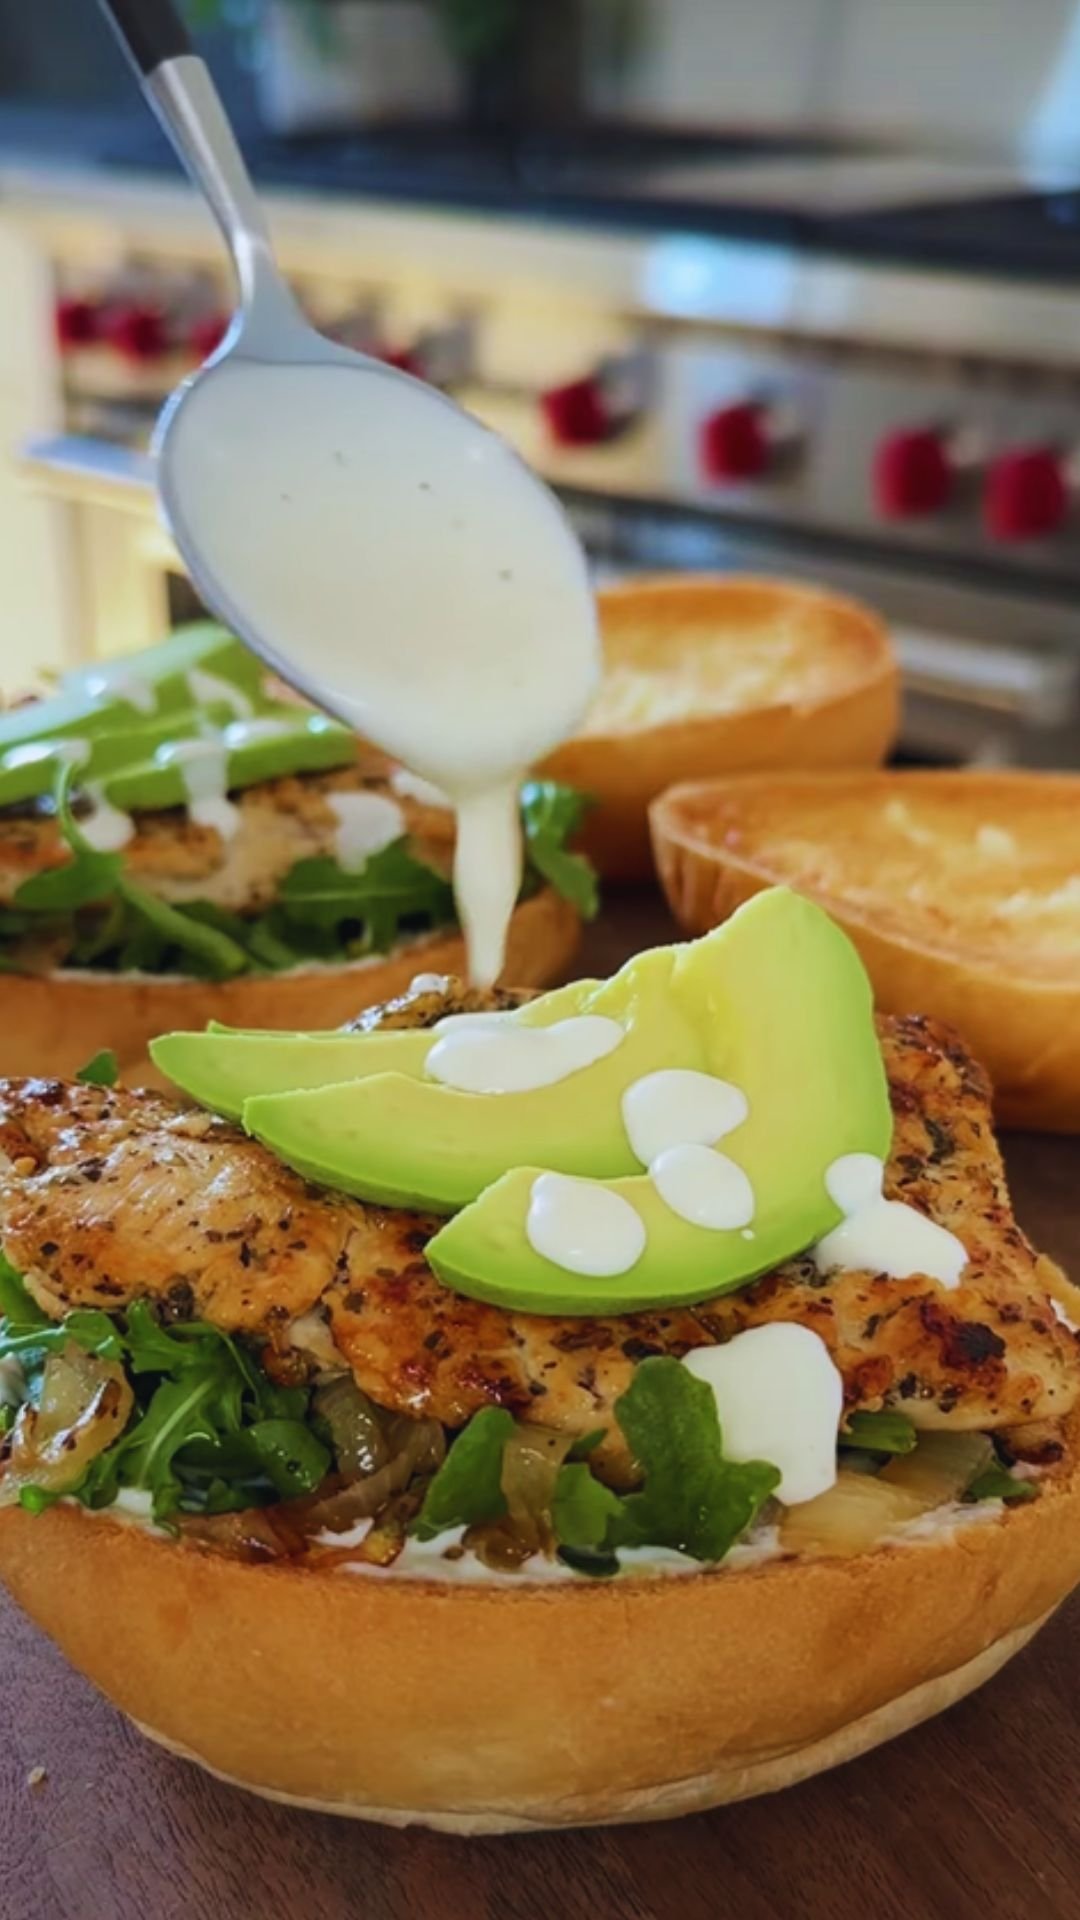
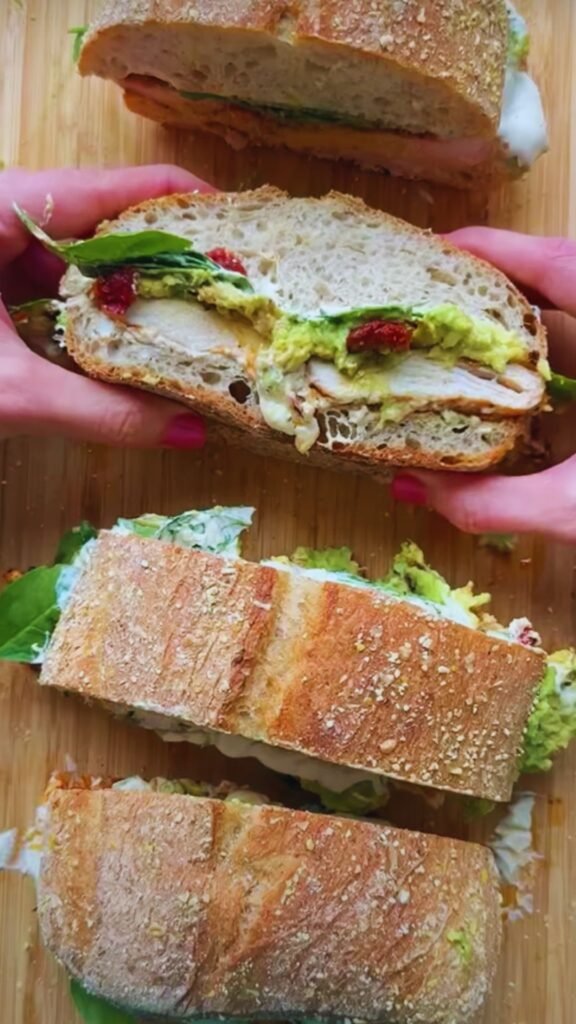
There’s something magical about the combination of tender chicken, creamy avocado, and melted cheese nestled between two perfectly toasted slices of bread. As someone who has spent countless hours perfecting sandwich recipes, I can confidently say that the Chicken Avocado Melt stands in a league of its own. It’s the sandwich I find myself craving on lazy Sundays, the one I’m proud to serve to guests, and the recipe I’m most frequently asked to share.
Today, I’m going to walk you through every step of creating this mouthwatering masterpiece. From selecting the perfect ingredients to assembly techniques that ensure every bite delivers the ideal balance of flavors and textures, this comprehensive guide will transform you into a Chicken Avocado Melt virtuoso. Whether you’re a sandwich enthusiast looking to expand your repertoire or simply someone who appreciates good food, this recipe deserves a special place in your culinary collection.
What Makes This Sandwich Special
Before diving into the recipe itself, let’s take a moment to appreciate what makes the Chicken Avocado Melt so extraordinary. Unlike basic sandwiches that simply stack ingredients between bread, this creation is thoughtfully crafted to create a harmonious flavor experience:
- Flavor Depth: The savory chicken, buttery avocado, tangy sauce, and rich cheese create a multi-dimensional taste profile.
- Textural Contrast: Crispy bread exterior, melty cheese, creamy avocado, and tender chicken provide a satisfying mouthfeel.
- Nutritional Balance: Protein from the chicken, healthy fats from the avocado, and complex carbohydrates from quality bread make this a well-rounded meal.
- Customizability: The basic formula allows for endless variations to suit different dietary preferences and available ingredients.
I’ve tinkered with this recipe for years, adjusting proportions and techniques until reaching what I believe is sandwich perfection. The version I’m sharing today represents countless iterations and refinements—a true labor of love that I’m excited to pass along to you.
Essential Ingredients
The beauty of the Chicken Avocado Melt lies in its relatively simple ingredient list. However, the quality of those ingredients makes all the difference between a good sandwich and an unforgettable one.
For The Basic Sandwich (Makes 2 Sandwiches):
| Ingredient | Quantity | Notes |
|---|---|---|
| Sourdough or artisan bread | 4 slices | A sturdy bread with character holds up best |
| Chicken breast | 8 oz (225g) | Boneless, skinless |
| Ripe avocados | 1 large or 2 small | Hass variety preferred for creaminess |
| Cheese | 4 oz (115g) | Monterey Jack, Cheddar, Gruyère, or Pepper Jack |
| Fresh tomato | 1 medium | Sliced approximately ¼ inch thick |
| Baby spinach or arugula | 1 cup loosely packed | For a peppery contrast and nutritional boost |
| Butter | 2 tablespoons | For toasting the bread |
| Olive oil | 1 tablespoon | For cooking the chicken |
| Special sandwich spread | ¼ cup | Recipe below |
| Salt and freshly ground black pepper | To taste | Be generous with the pepper! |
For The Special Sandwich Spread:
| Ingredient | Quantity | Notes |
|---|---|---|
| Mayonnaise | 3 tablespoons | Use real mayonnaise, not salad dressing |
| Dijon mustard | 1 tablespoon | Adds tang without overwhelming |
| Fresh lemon juice | 1 teaspoon | Brightens all flavors |
| Garlic | 1 small clove | Finely minced or pressed |
| Fresh herbs | 1 tablespoon | Chopped chives, basil, or cilantro |
| Hot sauce (optional) | A few drops | For a gentle heat |
| Salt and freshly ground pepper | Pinch of each | To taste |
Equipment You’ll Need
While this sandwich doesn’t require fancy kitchen gadgets, having the right tools will make the process smoother:
- Heavy skillet or griddle: Cast iron works beautifully for achieving that perfect golden crust on the bread
- Spatula: For flipping the sandwich without losing any precious filling
- Sharp knife: For slicing chicken, avocado, and tomato evenly
- Cutting board: Preferably separate ones for raw chicken and produce
- Meat thermometer: Optional but helpful for ensuring chicken is properly cooked
- Small bowl: For mixing the special sandwich spread
Chicken Preparation Methods
The foundation of our sandwich is perfectly cooked, flavorful chicken. Let’s explore three excellent preparation methods, each offering different advantages:
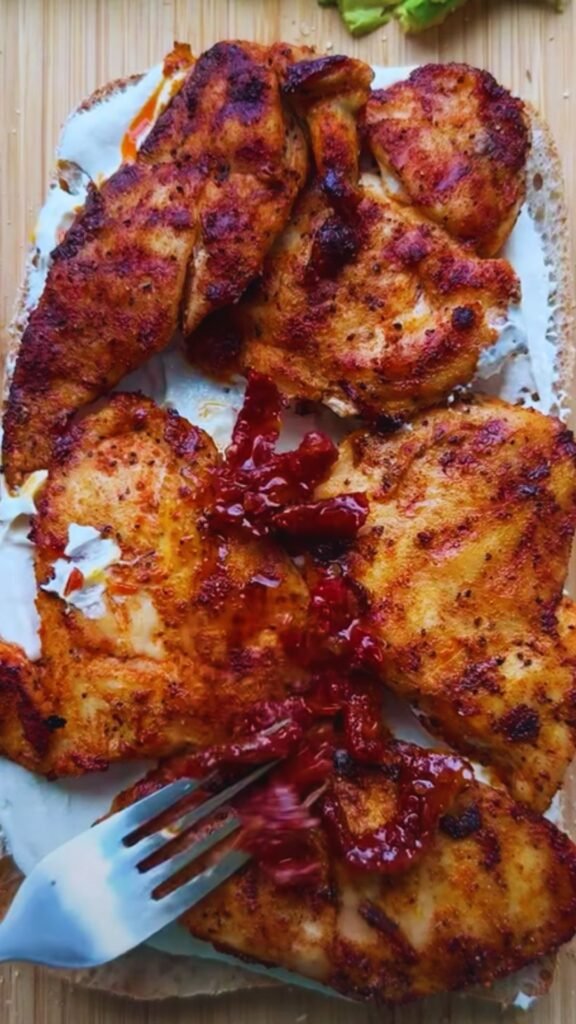
1. Pan-Seared Chicken Breast
This is my go-to method when I’m making these sandwiches to order:
- Pound chicken breasts to an even ½-inch thickness for quick, even cooking
- Season generously with salt, pepper, and a pinch of garlic powder
- Heat olive oil in a skillet over medium-high heat until shimmering
- Cook chicken for 4-5 minutes per side until golden and internal temperature reaches 165°F (74°C)
- Let rest for 5 minutes before slicing against the grain
2. Herb-Roasted Chicken Breast
Perfect for meal prep or when you want to infuse more flavor:
- Preheat oven to 425°F (220°C)
- Rub chicken breasts with olive oil, salt, pepper, and herbs (thyme, rosemary, and oregano work wonderfully)
- Roast on a lined baking sheet for 18-22 minutes until internal temperature reaches 165°F (74°C)
- Allow to cool slightly before slicing
3. Rotisserie Chicken Shortcut
When time is of the essence:
- Purchase a high-quality rotisserie chicken from your local market
- Remove the skin and shred or slice the breast meat
- If desired, warm slightly in a pan with a splash of chicken broth to refresh
The Special Sandwich Spread
The spread is what elevates this sandwich from good to exceptional, tying all the flavors together while adding moisture and tanginess.
- In a small bowl, combine all spread ingredients
- Whisk thoroughly until completely incorporated
- Taste and adjust seasonings as needed
- For the best flavor development, prepare at least 30 minutes before assembling your sandwich and refrigerate
This spread keeps well in the refrigerator for up to three days, so feel free to make a larger batch for future sandwiches or as a dipping sauce for vegetables.
The Perfect Avocado
The avocado contributes essential creaminess and nutritional benefits to our sandwich. Finding and properly preparing a perfectly ripe avocado is crucial:
Selecting Avocados:
- Look for avocados that yield slightly to gentle pressure
- The stem end should come away easily and reveal green underneath
- Avoid avocados with sunken, dark spots or excessive softness
Preparing Avocados:
- Cut the avocado in half lengthwise around the pit
- Twist the halves to separate them
- Remove the pit (carefully!) by striking it with a knife and twisting
- Score the flesh in a grid pattern, then scoop out with a spoon
- Immediately sprinkle with a little lemon juice to prevent browning
For sandwiches, I prefer slicing the avocado rather than mashing it, as it provides a more distinct textural element and visual appeal.
Cheese Selection Guide
The cheese you choose dramatically impacts the final sandwich experience. Consider these excellent options:
| Cheese Type | Flavor Profile | Melting Quality | Best Paired With |
|---|---|---|---|
| Monterey Jack | Mild, buttery | Excellent, smooth melt | Mild chicken seasonings |
| Cheddar (sharp) | Bold, tangy | Good, can separate if overheated | Herbs and spices in chicken |
| Gruyère | Nutty, complex | Superb, stays creamy | Dijon-based spreads |
| Pepper Jack | Spicy, creamy | Excellent, even melt | Cilantro and lime additions |
| Gouda | Smoky, rich | Very good, silky texture | Apple or pear additions |
| Provolone | Mild to sharp | Excellent stretch | Italian herb seasonings |
For beginners, I recommend Monterey Jack as it melts beautifully without overpowering the other flavors. As you become more comfortable with the recipe, experiment with different cheese varieties or even combinations.
Assembly and Cooking Technique
Now comes the crucial part—putting it all together and achieving that perfect melt:
Step-by-Step Assembly:
- Lay out your bread slices on a clean work surface
- Spread a generous layer of the special sauce on each slice
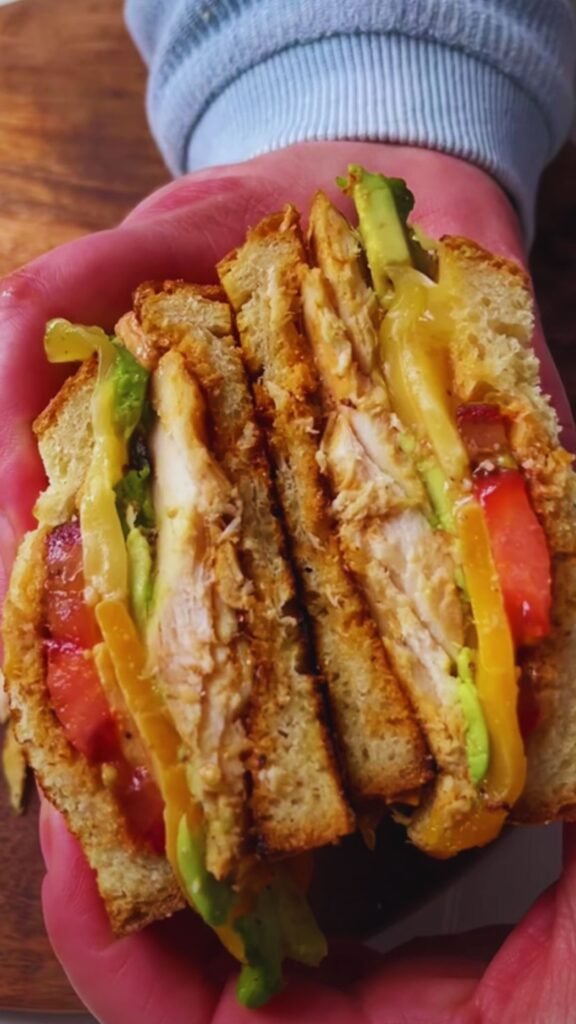
- On two of the slices, arrange:
- A layer of baby spinach or arugula
- Sliced tomato (seasoned with a pinch of salt)
- Sliced or shredded chicken
- Avocado slices
- Cheese (place this on top so it melts down over the other ingredients)
- Close sandwiches with the remaining bread slices, sauce-side down
The Perfect Melt Technique:
- Heat a skillet or griddle over medium heat
- Butter the outside of both pieces of bread lightly but completely
- Place the sandwich on the skillet and cook until golden brown on the bottom, about 3-4 minutes
- Flip carefully with a spatula, pressing gently
- Cover the pan with a lid for 2-3 minutes to help the cheese melt thoroughly
- Remove the lid and continue cooking until the second side is golden brown and crisp
Pro Tips for Success:
- Temp Management: If your bread is browning too quickly but the cheese isn’t melting, lower the heat and cover the pan
- Structural Integrity: Allow the sandwich to rest for 1-2 minutes before cutting to help ingredients set
- Even Melting: Grating firmer cheeses rather than slicing them promotes more even melting
- Golden Crust: Mayonnaise can be used instead of butter on the bread exterior for an exceptionally crisp, golden crust
Nutritional Breakdown
For those monitoring their nutritional intake, here’s an approximate breakdown of a standard Chicken Avocado Melt made with sourdough bread:
| Nutrient | Amount Per Serving | % Daily Value* |
|---|---|---|
| Calories | 650-700 | – |
| Total Fat | 38g | 49% |
| Saturated Fat | 12g | 60% |
| Trans Fat | 0g | – |
| Cholesterol | 95mg | 32% |
| Sodium | 850mg | 37% |
| Total Carbohydrates | 45g | 16% |
| Dietary Fiber | 8g | 29% |
| Sugars | 3g | – |
| Protein | 38g | 76% |
| Vitamin A | – | 15% |
| Vitamin C | – | 25% |
| Calcium | – | 40% |
| Iron | – | 20% |
*Percent Daily Values are based on a 2,000 calorie diet.
Serving Suggestions
A Chicken Avocado Melt is substantial enough to be a meal on its own, but these accompanying sides can create a more complete dining experience:
- Crisp Dill Pickle: The acidic crunch provides a perfect counterpoint to the rich sandwich
- Fresh Green Salad: A simple mix of greens with a light vinaigrette balances the meal
- Sweet Potato Fries: Oven-baked with a touch of rosemary and sea salt
- Roasted Tomato Soup: The classic companion to grilled cheese, elevated for our gourmet sandwich
- Fresh Fruit: Grapes or apple slices offer a refreshing palate cleanser
For a refreshing beverage pairing, consider:
- Sparkling water with citrus
- Unsweetened iced tea with lemon
- Craft root beer or ginger ale
- Fresh-squeezed lemonade
Variations and Dietary Adaptations
One of the best aspects of this sandwich is its versatility. Here are some delicious variations to consider:
Flavor Variations:
- Mediterranean: Add roasted red peppers, feta cheese, and substitute the spread with tzatziki
- Southwest: Include pickled jalapeños, cilantro, and add a squeeze of lime to the avocado
- Italian: Use basil instead of spinach, add a slice of prosciutto, and substitute with provolone cheese
- California: Add sprouts and cucumber for extra crunch and freshness
- BBQ: Toss the chicken with a little barbecue sauce before assembling and use smoked gouda
Dietary Adaptations:
| Dietary Need | Adaptations |
|---|---|
| Gluten-Free | Substitute with high-quality gluten-free bread; ensure all other ingredients are certified gluten-free |
| Dairy-Free | Use plant-based cheese alternatives; ensure they have good melting properties |
| Lower Calorie | Use open-face style with one slice of bread; reduce cheese by half |
| Keto-Friendly | Substitute bread with large portobello mushroom caps or low-carb tortillas |
| Vegetarian | Replace chicken with grilled portobello mushrooms or plant-based chicken alternative |
| Vegan | Combine plant-based chicken, vegan cheese, and plant-based mayonnaise |
Make-Ahead and Storage Tips
While this sandwich is best enjoyed fresh off the griddle, there are ways to prep components ahead of time:
Make-Ahead Components:
- Chicken: Cook and slice up to 2 days ahead; store in an airtight container
- Special Spread: Prepare up to 3 days in advance; store refrigerated
- Prep Vegetables: Wash and dry greens, but only slice tomatoes and avocados just before assembly
Storage Solutions:
If you need to store a fully assembled but uncooked sandwich:
- Assemble without the avocado (add this just before cooking)
- Wrap tightly in parchment paper, then plastic wrap
- Refrigerate for up to 8 hours
- Allow to come to room temperature for 15 minutes before cooking
For leftovers (though rare!):
- Wrap in parchment paper
- Reheat in a 300°F (150°C) oven for 10-15 minutes
- The bread will re-crisp, though the avocado may darken slightly
Troubleshooting Common Issues
Even experienced cooks encounter challenges. Here are solutions to common sandwich problems:
| Issue | Cause | Solution |
|---|---|---|
| Soggy bread | Too much moisture in fillings | Pat tomato slices dry with paper towels; drain chicken well |
| Undermelted cheese | Too high heat or insufficient time | Lower heat, cover pan, and allow more time for melting |
| Dry chicken | Overcooking or reheating | Cook to just 165°F; use a bit of broth when reheating |
| Avocado browning | Oxidation | Sprinkle with lemon juice; add avocado last before cooking |
| Sandwich falls apart | Overfilling or improper stacking | Use slightly less filling; place cheese next to bread to help “glue” |
| Uneven browning | Uneven butter application | Ensure butter covers bread completely; use a heavy pan for even heat |
Frequently Asked Questions
Can I make this sandwich without a panini press? Absolutely! A regular skillet works perfectly—just follow the technique described above. If you have one, a cast-iron press or even a clean brick wrapped in foil can be placed on top of the sandwich for more even pressure.
How do I know when my avocado is perfectly ripe? A ripe avocado will yield slightly to gentle pressure but shouldn’t feel mushy. Remove the small stem at the top—if it comes away easily and shows green underneath, it’s ready to use. If it’s brown underneath, the avocado is overripe.
Can I use pre-cooked chicken from the deli section? Yes! Deli chicken can work in a pinch, but I’d recommend asking for thicker slices and ensuring it’s not overly processed. Rotisserie chicken is generally a better quick option.
How do I prevent my avocado from turning brown? The acid in the lemon juice from our spread helps, but for best results, only cut the avocado right before assembling the sandwich. If preparing ahead, sprinkle extra lemon juice directly on the cut surfaces.
What’s the best bread to use? Sourdough is my favorite for its tangy flavor and sturdy structure, but any good-quality bread with some substance works well. Avoid very soft sandwich breads that may become soggy.
Can I make this sandwich for a crowd? Yes! For parties, I recommend preparing all components separately and setting up a “build your own” sandwich bar. You can then grill sandwiches to order or use an oven method: assemble on a baking sheet, brush with butter, and bake at 425°F until golden and melty.
Is this sandwich healthy? It provides an excellent balance of protein, healthy fats, and complex carbohydrates. The avocado offers heart-healthy monounsaturated fats, while chicken provides lean protein. For a lighter version, use one slice of bread for an open-faced sandwich.
How can I add more vegetables? Consider adding thinly sliced cucumber, radishes, or bell peppers for extra crunch and nutrition. Microgreens also make a beautiful and nutritious addition.
Final Thoughts
The Chicken Avocado Melt represents comfort food at its finest—simple ingredients transformed through thoughtful preparation into something truly greater than the sum of its parts. I love how this sandwich can be both an everyday lunch and an impressive offering for guests, depending on how you present it.
What I appreciate most about this recipe is its forgiving nature. Even if you’re new to cooking, you can achieve delicious results by focusing on quality ingredients and taking your time with each step. And as your confidence grows, the variations are endless.
I hope this guide inspires you to create your own perfect Chicken Avocado Melt. Remember that cooking is as much about the journey as the destination—so enjoy the process, adjust to your preferences, and most importantly, savor every bite of your creation.
If you try this recipe, I’d love to hear how it turned out for you and what personal touches you added to make it your own. Happy cooking!
Q&A Section
What makes the “special sandwich spread” better than just using plain mayonnaise? The special spread combines several flavor elements that enhance the entire sandwich. The acidity from lemon juice and Dijon mustard cuts through the richness of the avocado and cheese, while the garlic and herbs add aromatic complexity. These elements work together to brighten all the other flavors in the sandwich and create a more balanced bite. Plain mayonnaise, while good, simply doesn’t provide the same depth of flavor.
Can I prepare components of this sandwich ahead of time for quicker assembly later? Yes, absolutely! The chicken can be cooked up to two days ahead and stored properly in the refrigerator. The special spread actually benefits from being made a day ahead as the flavors meld together. Just make sure to slice the avocado right before assembly to prevent browning, and only toast the bread when you’re ready to serve.
I’m trying to reduce carbs. What are some good bread alternatives? For a lower-carb version, you have several options. Large lettuce leaves (like butter lettuce or iceberg) make excellent wraps. Portobello mushroom caps, briefly grilled, provide a meaty alternative to bread. Low-carb tortillas or flatbreads work well too. For a middle-ground approach, try thin slices of artisan bread or hollowing out some of the interior of a regular bread slice to reduce the carb content while maintaining the sandwich experience.
How important is the cheese really? Can I skip it and still have a good sandwich? While you can certainly make a delicious chicken and avocado sandwich without cheese, you’ll lose the “melt” aspect that makes this sandwich special. The cheese provides a creamy, gooey texture that binds the other ingredients together and adds richness. If dairy is a concern, there are now excellent plant-based cheese alternatives that melt reasonably well. If you do skip the cheese entirely, I’d recommend adding something else creamy, like a slightly thicker layer of the special spread or even hummus.
What’s the secret to getting that perfect golden-brown crust on the bread? The perfect crust comes down to three factors: the right fat, proper heat, and timing. Make sure your butter (or mayonnaise, if using that method) covers the entire surface of the bread evenly. Start with a medium heat that allows the bread to toast gradually without burning, giving the cheese time to melt. A heavy-bottomed pan provides more even heat distribution. Lastly, patience is key—resist the urge to increase the heat or flip too early. The perfect golden crust develops in about 3-4 minutes per side.